Make.com Webhooks Tutorial for Beginners: Build Your First Triggered Workflow
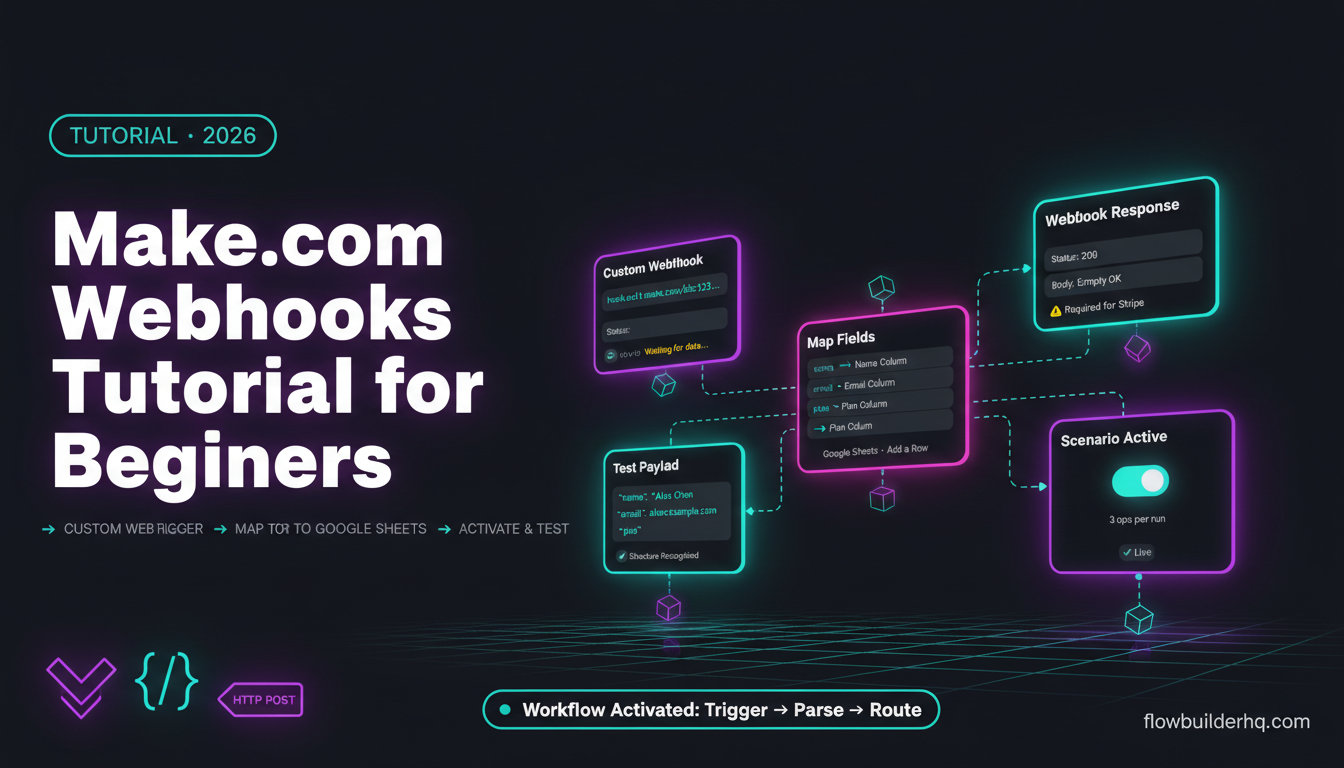
This Make.com webhooks tutorial for beginners skips the theory and gets you to a working triggered workflow fast. Webhooks are how external apps push data into Make.com the moment something happens — a form submission, a payment, a new contact — without polling or scheduled checks. Once you understand how Make.com handles them, you’ll use webhooks for almost everything.
Here’s the full setup, including the exact spots where beginners get stuck and how to get past them.
What You’re Building
By the end of this tutorial, you’ll have a Make.com scenario that:
- Listens for an incoming HTTP POST request (your webhook trigger)
- Parses the payload automatically
- Routes the data into a second app (in this example, a Google Sheets row)
This pattern applies to almost every real-world webhook use case — Stripe payments, Typeform submissions, Shopify orders, custom apps. Learn it once, reuse the structure everywhere.
Step 1: Create a New Scenario and Add the Custom Webhook Trigger
Log into Make.com and click Create a new scenario.
When the module picker opens, search for Webhooks. Select the Custom Webhook module — this is Make’s built-in listener that generates a unique URL for your scenario.
Click Add to create a new webhook. Give it a descriptive name (e.g., typeform-lead-intake or payment-alert). Names matter when you have 30 scenarios — be specific now.
Make.com will generate a webhook URL that looks like this:
https://hook.eu1.make.com/abc123xyz789...Copy that URL. You’ll paste it into whatever external service you want to trigger this scenario.
Step 2: Determine Your Webhook’s Data Structure
Here’s where many beginners stall. Make.com needs to know the structure of your incoming payload before it can map fields downstream. It doesn’t guess — it learns from a real sample.
Click OK to close the webhook setup panel. You’ll see the trigger module sitting in your scenario with a message: “Waiting for data…”
Now send a test payload to your webhook URL. The easiest way to do this without setting up the real external app first is with a tool like GitHub‘s web interface, curl in your terminal, or a simple HTTP test tool. Here’s a curl command you can run immediately:
curl -X POST https://hook.eu1.make.com/YOUR_WEBHOOK_URL \
  -H "Content-Type: application/json" \
  -d '{"name": "Alex Chen", "email": "alex@example.com", "plan": "pro"}'
Replace YOUR_WEBHOOK_URL with your actual generated URL. As soon as Make.com receives this request, it parses the payload and the “Waiting for data” message disappears. Your trigger now shows the data structure with the three fields: name, email, plan.
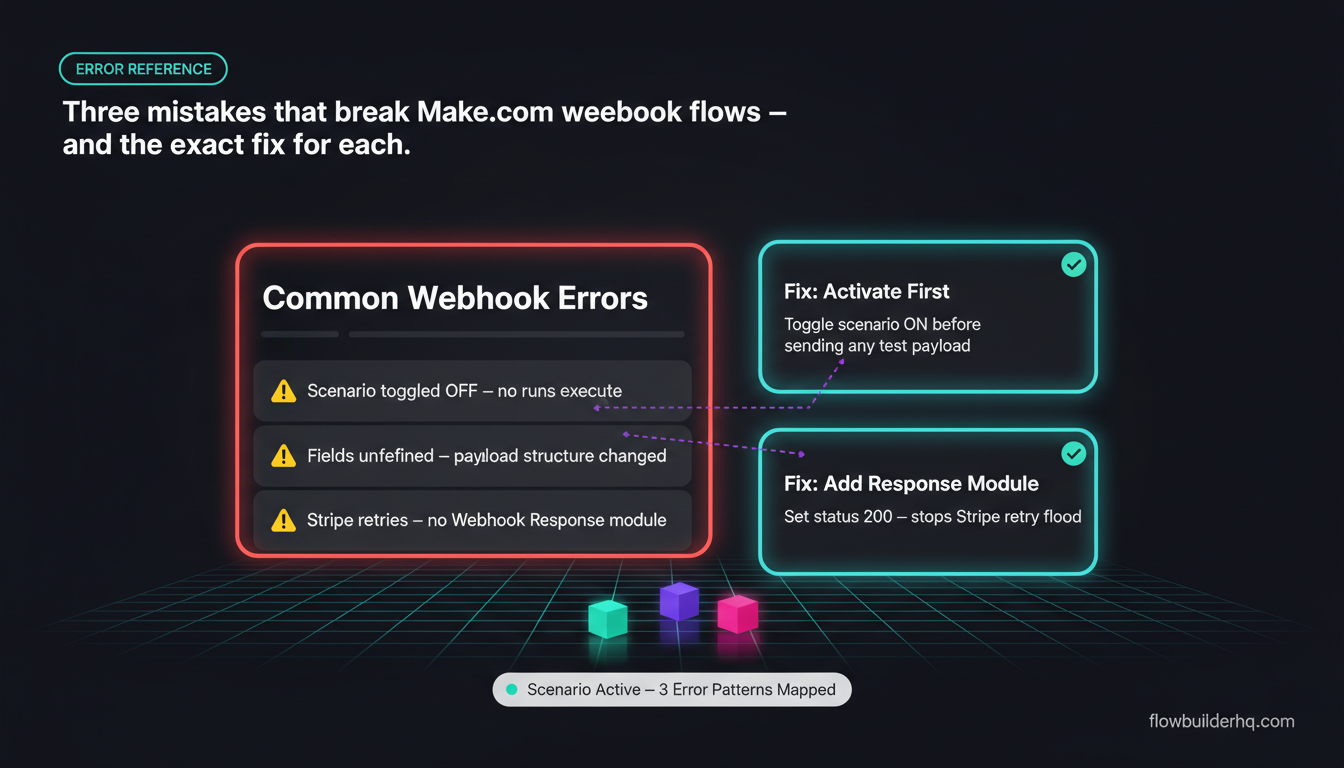
Common mistake #1: Sending the test payload before clicking OK on the webhook module. If the scenario isn’t actively listening, Make.com won’t catch the sample. Click OK first, then send the test — in that order.
Step 3: Add a Second Module to Handle the Data
With the data structure recognized, click the + icon to add your next module. For this tutorial, use Google Sheets → Add a Row.
Connect your Google account if you haven’t already. Select your spreadsheet and the specific sheet tab. You’ll see column headers appear as destination fields.
Now map your webhook fields to the sheet columns. Click into the “Name” column field and select name from the webhook data bundle. Do the same for email and plan. Make.com’s mapping panel shows all available fields from your webhook payload — you just click to insert them.
If your column headers don’t appear, check that your Google Sheet has headers in row 1. Make.com reads those headers to build the field list. An empty first row means empty field names in the mapping panel.
Step 4: Handle the Webhook Response
By default, Make.com sends a generic Accepted response back to whatever sent the webhook. For most use cases, that’s fine. But if the sending app checks for a specific success response — Stripe does this, for example — you need to add a Webhook Response module.
Add it as the final step in your scenario. Set the status to 200 and the body to whatever the calling service expects. Stripe typically wants an empty 200. Typeform doesn’t care. Check your sending app’s documentation.
Common mistake #2: Leaving Stripe webhooks without a 200 response. Stripe will retry the webhook up to 24 hours, flooding your scenario with duplicate runs. Always close the loop with an explicit response module when the sending service is Stripe, WooCommerce, or any payment processor.
Step 5: Activate the Scenario
Toggle the scenario from OFF to ON using the switch at the bottom of the screen. This is the step beginners most often forget.
An inactive scenario will still generate a webhook URL that appears to accept data — Make.com stores incoming payloads in a queue — but the scenario won’t execute. You’ll see queued payloads piling up under the webhook module’s history with no corresponding scenario runs. If you’re staring at an empty execution history wondering why nothing happened, check the activation toggle first.
Common mistake #3: Testing with the scenario off, then wondering why no data landed in the destination. Activate first, test second.
Step 6: Test the Full Flow End-to-End
With the scenario active, send another test payload using the same curl command from Step 2 (or trigger it from your real external service).
Watch the scenario run in Make.com’s execution log. Each module will show a green checkmark if it processed successfully. Click any module to inspect the exact data bundle it received and passed along.
If Google Sheets returns an error, it’s almost always one of these:
- Wrong spreadsheet ID selected (happens when you have multiple Google accounts connected)
- Sheet tab name doesn’t match (Make.com is case-sensitive on tab names)
- Your mapped field returns
undefinedbecause the webhook payload field name doesn’t exactly match what Make.com stored during Step 2
For the third issue: re-run your sample payload send from Step 2 with the exact field names your real integration will use. The data structure Make.com stores is based on the first real sample — if you sent a test with different field names than production data will use, you’ll get mapping errors in live runs.
Step 7: Lock Down Your Webhook (Optional but Recommended)
Anyone with your webhook URL can POST to it. On most plans, that just means wasted operations. On a high-volume production setup, it can mean runaway operation counts.
Make.com’s webhook module has an IP restriction option. You can whitelist specific IP addresses that are allowed to trigger the scenario. Most SaaS tools that send webhooks publish their static IP ranges — Stripe, for example, publishes its IP list in the Stripe documentation.
You can also validate a secret header token. In the webhook module settings, enable header validation and define a shared secret. Your sending app includes that secret in a header (e.g., X-Webhook-Secret: yourtoken), and Make.com rejects any request that doesn’t match. This is lightweight but effective for stopping random hits on your URL.
Webhook Trigger vs. Scheduled Trigger: When to Use Which
Make.com scenarios can also run on a schedule — every 15 minutes, hourly, daily. That’s fine for pulling data from apps that don’t support webhooks. But if an app supports webhooks, always use them instead of a schedule. Here’s why:
- Scheduled runs consume operations even when there’s nothing to process
- Webhook triggers fire only when something actually happens
- Response time is near-instant with webhooks vs. up to 15 minutes lag with polling
For a deeper look at how Make.com fits into a broader automation stack, the Make.com 2026 review covers operation costs, plan limits, and where the tool falls short.
Make.com Webhook Pricing Reality
Every webhook trigger that executes your scenario consumes operations — one per module that runs. A 3-module scenario (Webhook → Filter → Google Sheets) costs 3 operations per execution.
On the free plan (1,000 ops/month), that gives you ~333 webhook-triggered runs per month before you hit the ceiling. On the Core plan at $9/month, you get 10,000 ops — roughly 3,333 runs of the same scenario. Pro at $16/month bumps you to 10,000 ops with higher data limits and faster scheduling. Teams is $29/month.
If you’re processing high-volume webhooks — e-commerce order confirmations, marketing form submissions at scale — calculate your expected monthly run count and multiply by your module count before choosing a plan. Don’t pick the free tier for anything with real throughput.
If Make.com Doesn’t Fit Your Volume or Budget
For solopreneurs who hit Make.com’s operation ceiling frequently, n8n is worth knowing. It handles webhooks similarly — you generate a URL, listen for a payload, parse and route the data — but on the self-hosted free tier, there are no operation limits. The trade-off is that you manage the infrastructure. n8n Cloud Starter runs $8/month with managed hosting if you don’t want to self-host.
The n8n vs. Make.com comparison breaks down exactly when to choose one over the other based on workflow complexity and volume.
Make.com Webhooks: Common Errors Reference
| Error | Likely Cause | Fix |
|---|---|---|
| Scenario doesn’t run | Scenario is toggled off | Activate the scenario before testing |
| Fields show as undefined | Payload structure changed after initial sample | Resend updated sample payload in webhook settings |
| Duplicate runs (Stripe) | No webhook response module — Stripe retries | Add Webhook Response module with status 200 |
| Google Sheets error 403 | Wrong connected account selected | Recheck connection in module settings |
| Waiting for data never resolves | Test payload sent before clicking OK on module | Click OK first, then send payload |
| Incoming data not parsed | Payload sent as form-data instead of JSON | Set Content-Type header to application/json |
Build the Webhook, Then Build From It
The custom webhook module in Make.com is one of the most useful triggers in the platform. Every integration that supports outgoing webhooks can feed data into your scenarios the moment an event fires — no scheduled polling, no lag, no wasted operations sitting idle.
Get this structure right once and you’ll replicate it across every use case: lead routing, payment notifications, support ticket creation, inventory alerts. The trigger mechanism is identical. Only the payload and the destination modules change.
If you’re ready to build, start with Make.com’s free plan — 1,000 operations per month is enough to run real webhook workflows while you’re learning the platform. Once you have the pattern down, check the Make.com for freelancers guide for practical scenarios that generate direct client value.
Building this yourself? Get the workflow pack.
5 ready-to-import n8n workflows — lead capture, invoicing, content repurposing, onboarding, social posting. Free.