HubSpot CRM Tutorial for Solopreneurs: Set It Up Without the Enterprise Bloat
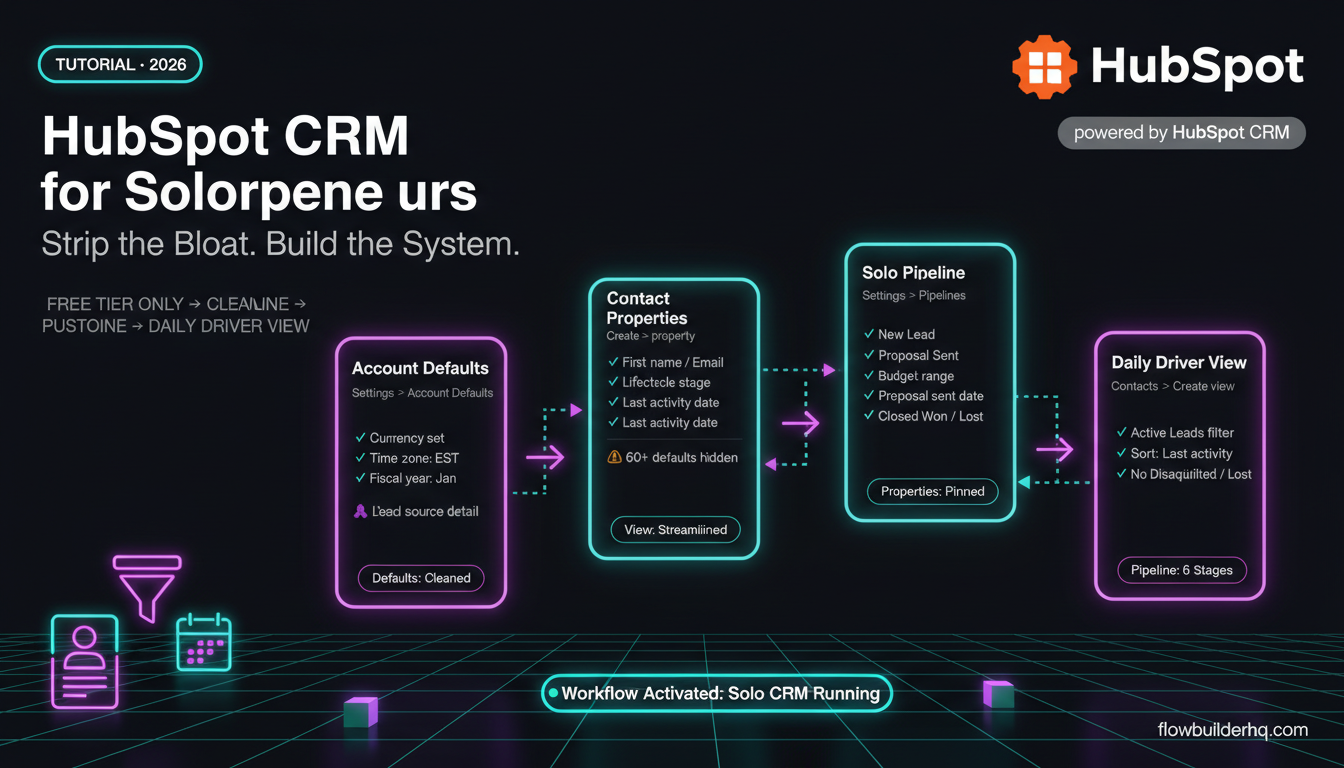
HubSpot’s free CRM is genuinely useful for solopreneurs — but the default setup is built for sales teams, not one-person operations. Out of the box, you get pipelines designed for reps, contact views cluttered with fields you’ll never touch, and a dashboard that assumes you have a manager who needs reports. This HubSpot CRM tutorial for solopreneurs strips all of that out and shows you exactly how to configure it for a solo operator running clients, leads, or projects without a team.
This isn’t a feature tour. It’s a working setup you can replicate in an afternoon.
Why HubSpot CRM Actually Makes Sense at the Free Tier
Most CRM comparisons lead with paid tiers. For solopreneurs, the free plan is the real product. HubSpot’s free CRM gives you unlimited contacts, a deal pipeline, email logging, basic sequences, and a meeting scheduler — all without paying a cent. The paid tiers (Starter at $15/mo, Professional at $890/mo+) layer on automation and reporting depth, but for a solo operator managing under 500 active contacts, free covers 80% of what you need.
If you’re currently tracking leads in a spreadsheet or your email inbox, HubSpot free is a direct upgrade. If you’re weighing it against lighter tools, our full CRM comparison for solopreneurs breaks down seven options side by side.
Step 1: Account Setup — Kill the Defaults First
When you create a HubSpot account, it runs you through an onboarding wizard that assumes you’re setting up for a team. Skip the wizard. Go straight to Settings → Account Defaults and make these changes before anything else:
- Company name and currency: Set these now. Currency affects deal values across all views.
- Date format and time zone: This affects task due dates, meeting timestamps, and email send logs — mismatched time zones cause confusion later.
- Fiscal year: If you track revenue by quarter, set your fiscal year start here. The default is January; change it if your business runs differently.
Then go to Settings → Users & Teams. You’ll see a default “Owner” role already applied to your account. Leave it. Don’t create extra user roles — on the free plan, adding users shares your contact limits and complicates ownership fields on contacts and deals.
Step 2: Clean Up Your Contact Properties
HubSpot’s default contact record has over 60 properties. Most are irrelevant for solo operators — fields like “Number of Employees at Lead’s Company,” “Annual Revenue,” and industry dropdown values built for B2B enterprise sales. Leaving them in place makes every contact view noisy.
Go to Settings → Properties → Contact Properties. You can’t delete default HubSpot properties, but you can remove them from the contact record view. Here’s what to keep visible for a typical solopreneur use case:
- First name, last name, email
- Phone (if you do calls)
- Lead status
- Lifecycle stage
- Last activity date
- Owner (just you, but useful if you filter contacts)
- Any 1-3 custom properties specific to your business (see Step 3)
To clean the view: open any contact record, click the pencil icon next to the properties panel, and choose Edit this view. Remove everything you don’t need. This is per-user, not global, so it won’t affect anyone else if you ever add a collaborator.
Step 3: Add Custom Properties That Actually Fit Your Business
The default properties cover generic CRM use cases. Your business probably has 2-4 data points that none of them capture. Custom properties are free and unlimited.
Go to Settings → Properties → Create property. Common examples for solopreneurs:
- Service interest (dropdown): Options for each service you offer. Lets you filter your pipeline by what someone needs.
- Lead source detail (single-line text): The default “Lead source” is a coarse dropdown. Add a freeform field to note specifics like “Referral from [name]” or “Twitter DM.”
- Proposal sent date (date): The built-in deal stages track general pipeline position, not specific milestones. This property tells you how long since you sent a proposal.
- Budget range (dropdown): If you do discovery calls, a budget range property (e.g., Under $1K / $1K–$5K / $5K+) keeps deals segmented without requiring exact numbers.
Once created, add these to your contact and deal views immediately — custom properties disappear into the settings if you don’t pin them to records.
Step 4: Build a Pipeline That Reflects How You Actually Sell
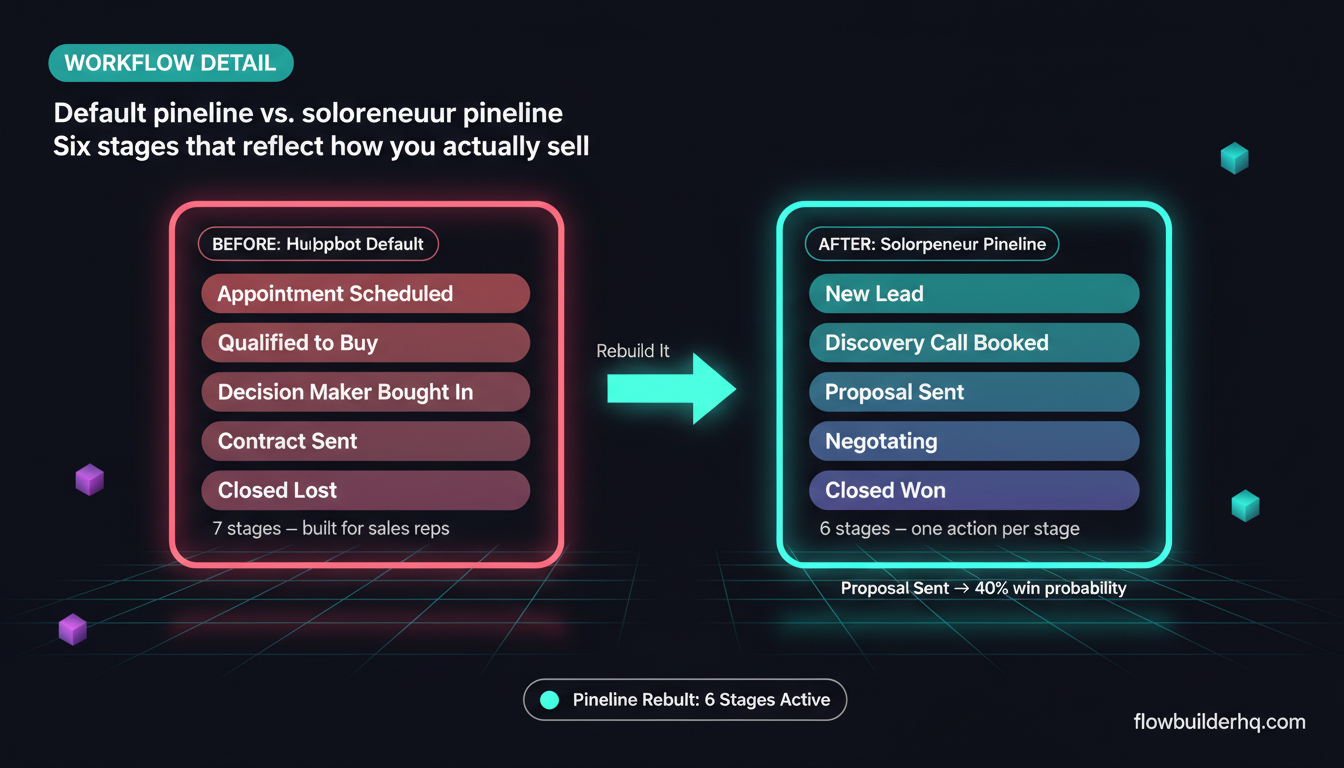
HubSpot’s default deal pipeline has seven stages: Appointment Scheduled, Qualified to Buy, Presentation Scheduled, Decision Maker Bought In, Contract Sent, Closed Won, Closed Lost. That’s a B2B sales rep pipeline. As a solopreneur, you probably move faster and directly.
Go to Settings → Deals → Pipelines → Edit pipeline. Delete what doesn’t apply. A working pipeline for most solopreneurs looks like this:
- New Lead — Someone expressed interest. Not yet qualified.
- Discovery Call Booked — Meeting is scheduled.
- Proposal Sent — You’ve sent scope and pricing.
- Negotiating — Active back and forth on terms.
- Closed Won
- Closed Lost
Four to six stages is enough. Each stage should map to an action you take or a milestone the prospect hits — not a vague sales concept. Set realistic win probabilities per stage (HubSpot uses these in forecasting). If you close roughly 60% of proposals, set “Proposal Sent” to 40% probability.
If you manage client work after the sale (retainers, ongoing projects), consider a second pipeline for post-sale stages: Onboarding, Active, At Risk, Churned. Keeping pre-sale and post-sale separate keeps your close rate metrics clean.
Step 5: Connect Your Email and Set Up Email Logging
Email logging is one of HubSpot’s most useful free features — every email you send or receive from a contact automatically appears in their timeline. Setup takes about three minutes.
Go to Settings → General → Email. Connect your Gmail or Outlook account. Once connected, install the HubSpot Sales Chrome extension if you use Gmail in a browser. This gives you a sidebar showing contact history while you’re composing emails, plus one-click logging for individual threads you don’t want auto-logged.
Two settings to configure immediately after connecting:
- Log emails by default: Turn this ON. You can opt out on individual sends; it’s harder to reconstruct history if you forget to opt in.
- Create contact for unrecognized email addresses: Turn this OFF if you send a lot of vendor or tool-related emails. Otherwise HubSpot will create contacts for every SaaS support thread you touch.
For solopreneurs managing multiple clients, email logging alone justifies using HubSpot over a spreadsheet. You stop hunting for “wait, when did I last follow up with this person?”
Step 6: Set Up the Meeting Scheduler
HubSpot’s free meeting link works like Calendly — you share a URL, prospects pick a time slot, and HubSpot automatically creates a contact and logs the meeting against their record.
Go to Sales → Meetings → Create meeting link. Key settings:
- Meeting type: One-on-one is fine for solo use.
- Duration options: Add 30 and 60 minute options so the prospect can self-select. This reduces back-and-forth about call length.
- Buffer time: Set 15 minutes before and after. You’re running everything yourself — you need the buffer.
- Confirmation email: HubSpot sends this automatically. Customize the copy to sound like you wrote it, not like a corporate calendar system.
- Form questions: Add 1-2 qualifying questions (e.g., “What’s your current biggest challenge?” or “What’s your timeline?”). These answers appear on the contact record before the call.
Replace whatever scheduling link you’re currently using with this one. It feeds directly into your CRM pipeline — meetings booked auto-create deals if you configure the pipeline trigger.
Step 7: Build Your First Contact View (The Daily Driver)
The default “All Contacts” view is useless for daily work — it’s everything, unsorted, with no filters. Build one view you’ll actually open every morning.
Go to Contacts → Create view. Name it something obvious like “Active Leads.” Apply these filters:
- Lifecycle stage = Lead OR Opportunity
- Last activity date = before 7 days ago (or whatever follow-up window fits your business)
- Lead status ≠ Disqualified
Sort by Last activity date, ascending. This surfaces the contacts who haven’t heard from you in the longest time — the ones most likely to go cold. Set this as your default view. Every morning you open HubSpot, this is your follow-up list.
For solopreneurs who also use automation to route leads into HubSpot, pairing this view with an automated lead generation workflow keeps your pipeline populated without manual entry. See this n8n lead capture-to-CRM workflow as one example of how that connects.
Step 8: Use Tasks Instead of Mental Notes
HubSpot tasks are how you replace “I’ll remember to follow up” with an actual system. Create a task directly from a contact or deal record. Set a due date. Add a note with context.
The key habit: every time you finish an action on a contact — a call, a proposal send, a reply — create the next task before you close the record. Never leave a contact or deal without a next action attached to it. If there’s no next action, it means you’ve either closed it or lost it.
On the free plan, tasks appear in the Tasks tab under Sales. You can filter by due date, assignee, and associated object. For a solo operator, sorting by “Due today” and working through it is a complete daily CRM workflow.
Step 9: Automate HubSpot Data Out of Your Inbox
Manual data entry is what kills CRM adoption. If you have to remember to log something, you’ll stop doing it within two weeks.
HubSpot’s free tier gives you basic email logging (covered in Step 5) and form integrations. For anything beyond that — syncing inquiry forms from your website, routing leads from ad platforms, updating deals from external tools — you need a connector.
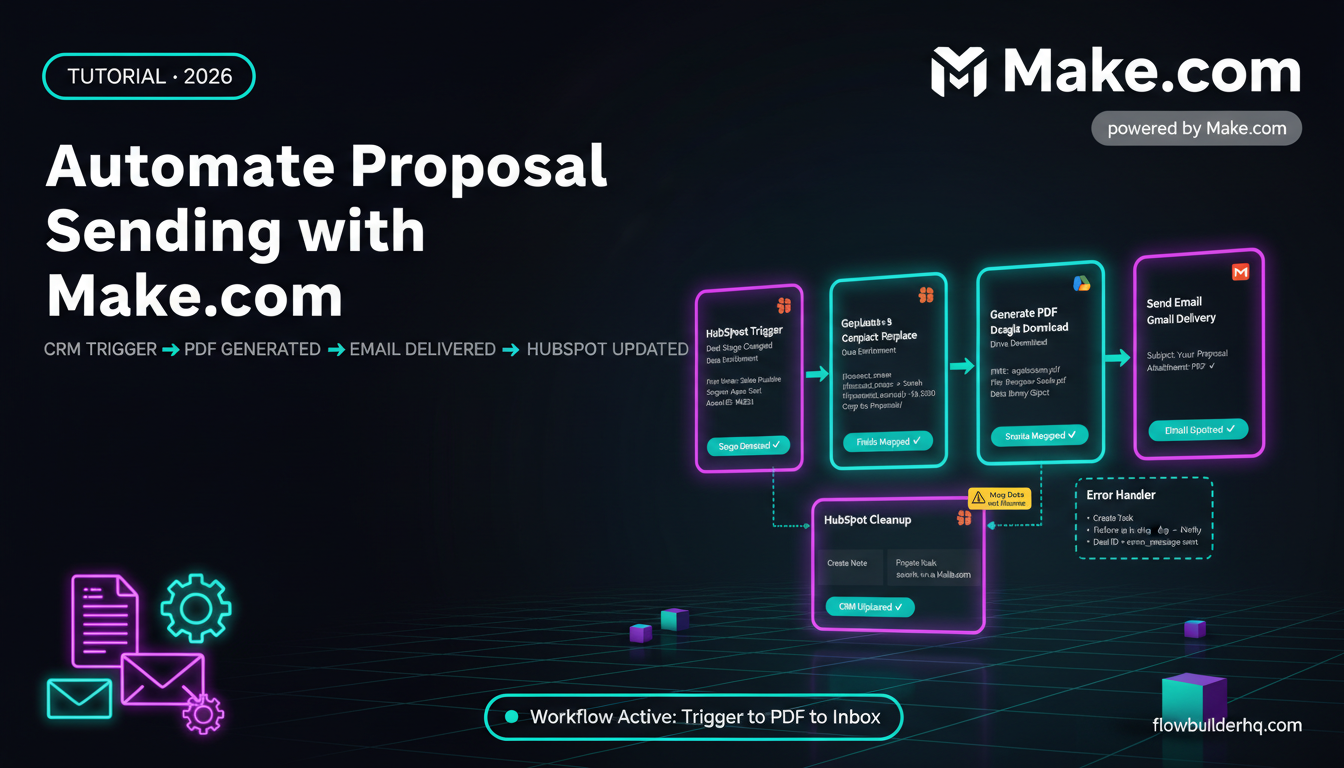
Make.com integrates directly with HubSpot and lets you build multi-step workflows without writing code. A common setup: a form submission on your site triggers a Make scenario that creates a contact in HubSpot, adds them to a pipeline stage, and sends a confirmation email — all without touching HubSpot manually. Make.com’s free plan covers 1,000 operations per month, which is enough for most solopreneurs getting started.
If you want a deeper look at what Make.com can do with client data flows, this client reporting automation walkthrough shows a similar pattern applied to outbound reporting rather than inbound leads.
For more advanced routing — conditional logic, multi-step enrichment, or self-hosted control — n8n is worth considering. This client onboarding workflow built in n8n shows how far you can push automation without touching paid CRM tiers.
What HubSpot Free Doesn’t Do (Be Honest About the Limits)
Before you build your whole workflow around it, know where the free tier stops:
- No workflow automation: Automated sequences (send email 3 days after deal stage change, etc.) require Starter at $15/mo minimum. Free gives you manual sequences only.
- HubSpot branding on emails and forms: Free forms and meeting pages carry HubSpot branding. Removing it requires Starter.
- Limited reporting: Free dashboards exist but custom report builders are paywalled. You can see pipeline volume, but slicing by custom property or date range comparison requires paid.
- No predictive lead scoring: This is an Enterprise feature. Ignore it for now.
- Email send limits: Free plan includes 2,000 marketing emails per month per account. Plenty for a solopreneur’s transactional sends.
If you need automated follow-up sequences and you’re not ready to pay HubSpot $15/mo, pairing HubSpot free CRM with a standalone email tool is a real option. ActiveCampaign vs MailerLite covers two of the strongest options at the lower end of the pricing spectrum.
If you’re seriously evaluating whether the $15/mo Starter upgrade makes sense, this HubSpot free vs paid breakdown is the honest answer without any upsell pressure.
Common Setup Mistakes to Avoid
Adding too many pipeline stages. Every stage you add is a stage you have to maintain. More than six stages on a solo pipeline means deals sit in limbo stages because you don’t have bandwidth to move them. Keep it lean.
Importing all your contacts at once. If you have a large contact list, don’t dump 5,000 emails into HubSpot on day one. Import your 50-100 active leads first. Clean up your view, test your properties, verify the pipeline works — then import the rest. A messy import is hard to untangle.
Ignoring lifecycle stages. HubSpot has a lifecycle stage property (Subscriber → Lead → MQL → SQL → Opportunity → Customer → Evangelist) that controls how contacts behave across lists and views. Most solopreneurs ignore this, then wonder why their filters don’t work. Set lifecycle stage when you import contacts. Use at minimum: Lead (no call yet), Opportunity (post-call), Customer (closed won).
Using HubSpot as a to-do list. Tasks are tied to contact records for a reason. If you find yourself creating tasks not connected to a contact or deal, you’re using a project management tool, not a CRM. For project and task management, a dedicated tool like Notion or Airtable makes more sense — this comparison of Make.com and Airtable touches on where each tool fits in a solo operator stack.
HubSpot CRM for Solopreneurs: The Honest Summary
The free CRM is solid. The setup defaults are not. Everything in this tutorial can be done on the free plan in a few hours, and the result is a contact and deal system that actually reflects how you work — not how a 10-person sales team works.
The biggest ongoing maintenance task is keeping your pipeline clean: move deals, close lost leads, add next tasks. HubSpot won’t do that for you on the free plan. But if you build the daily driver view from Step 7 and work your task list every morning, the system stays usable with 15 minutes a day.
If you’re running broader automation alongside your CRM — lead capture, client onboarding, content workflows — this roundup of no-code automation tools covers what stacks well with HubSpot for solo operators in 2026. And if you want to compare HubSpot against lighter CRM options before committing, the full CRM comparison gives you the direct comparison.
Start with the pipeline. Add your custom properties. Build the daily view. The rest follows from actually using it.
Building this yourself? Get the workflow pack.
5 ready-to-import n8n workflows — lead capture, invoicing, content repurposing, onboarding, social posting. Free.