How to Build an AI Agent with n8n (Real Workflow, Not a Toy Demo)

Most tutorials on how to build an AI agent with n8n show you a three-node flowchart that does nothing useful in production. This one doesn’t. I’ve run multi-step n8n workflows in production — including an auto-publishing pipeline that calls the Claude API, processes the output, and pushes finished content to WordPress without me touching it. What follows is built from that real experience.
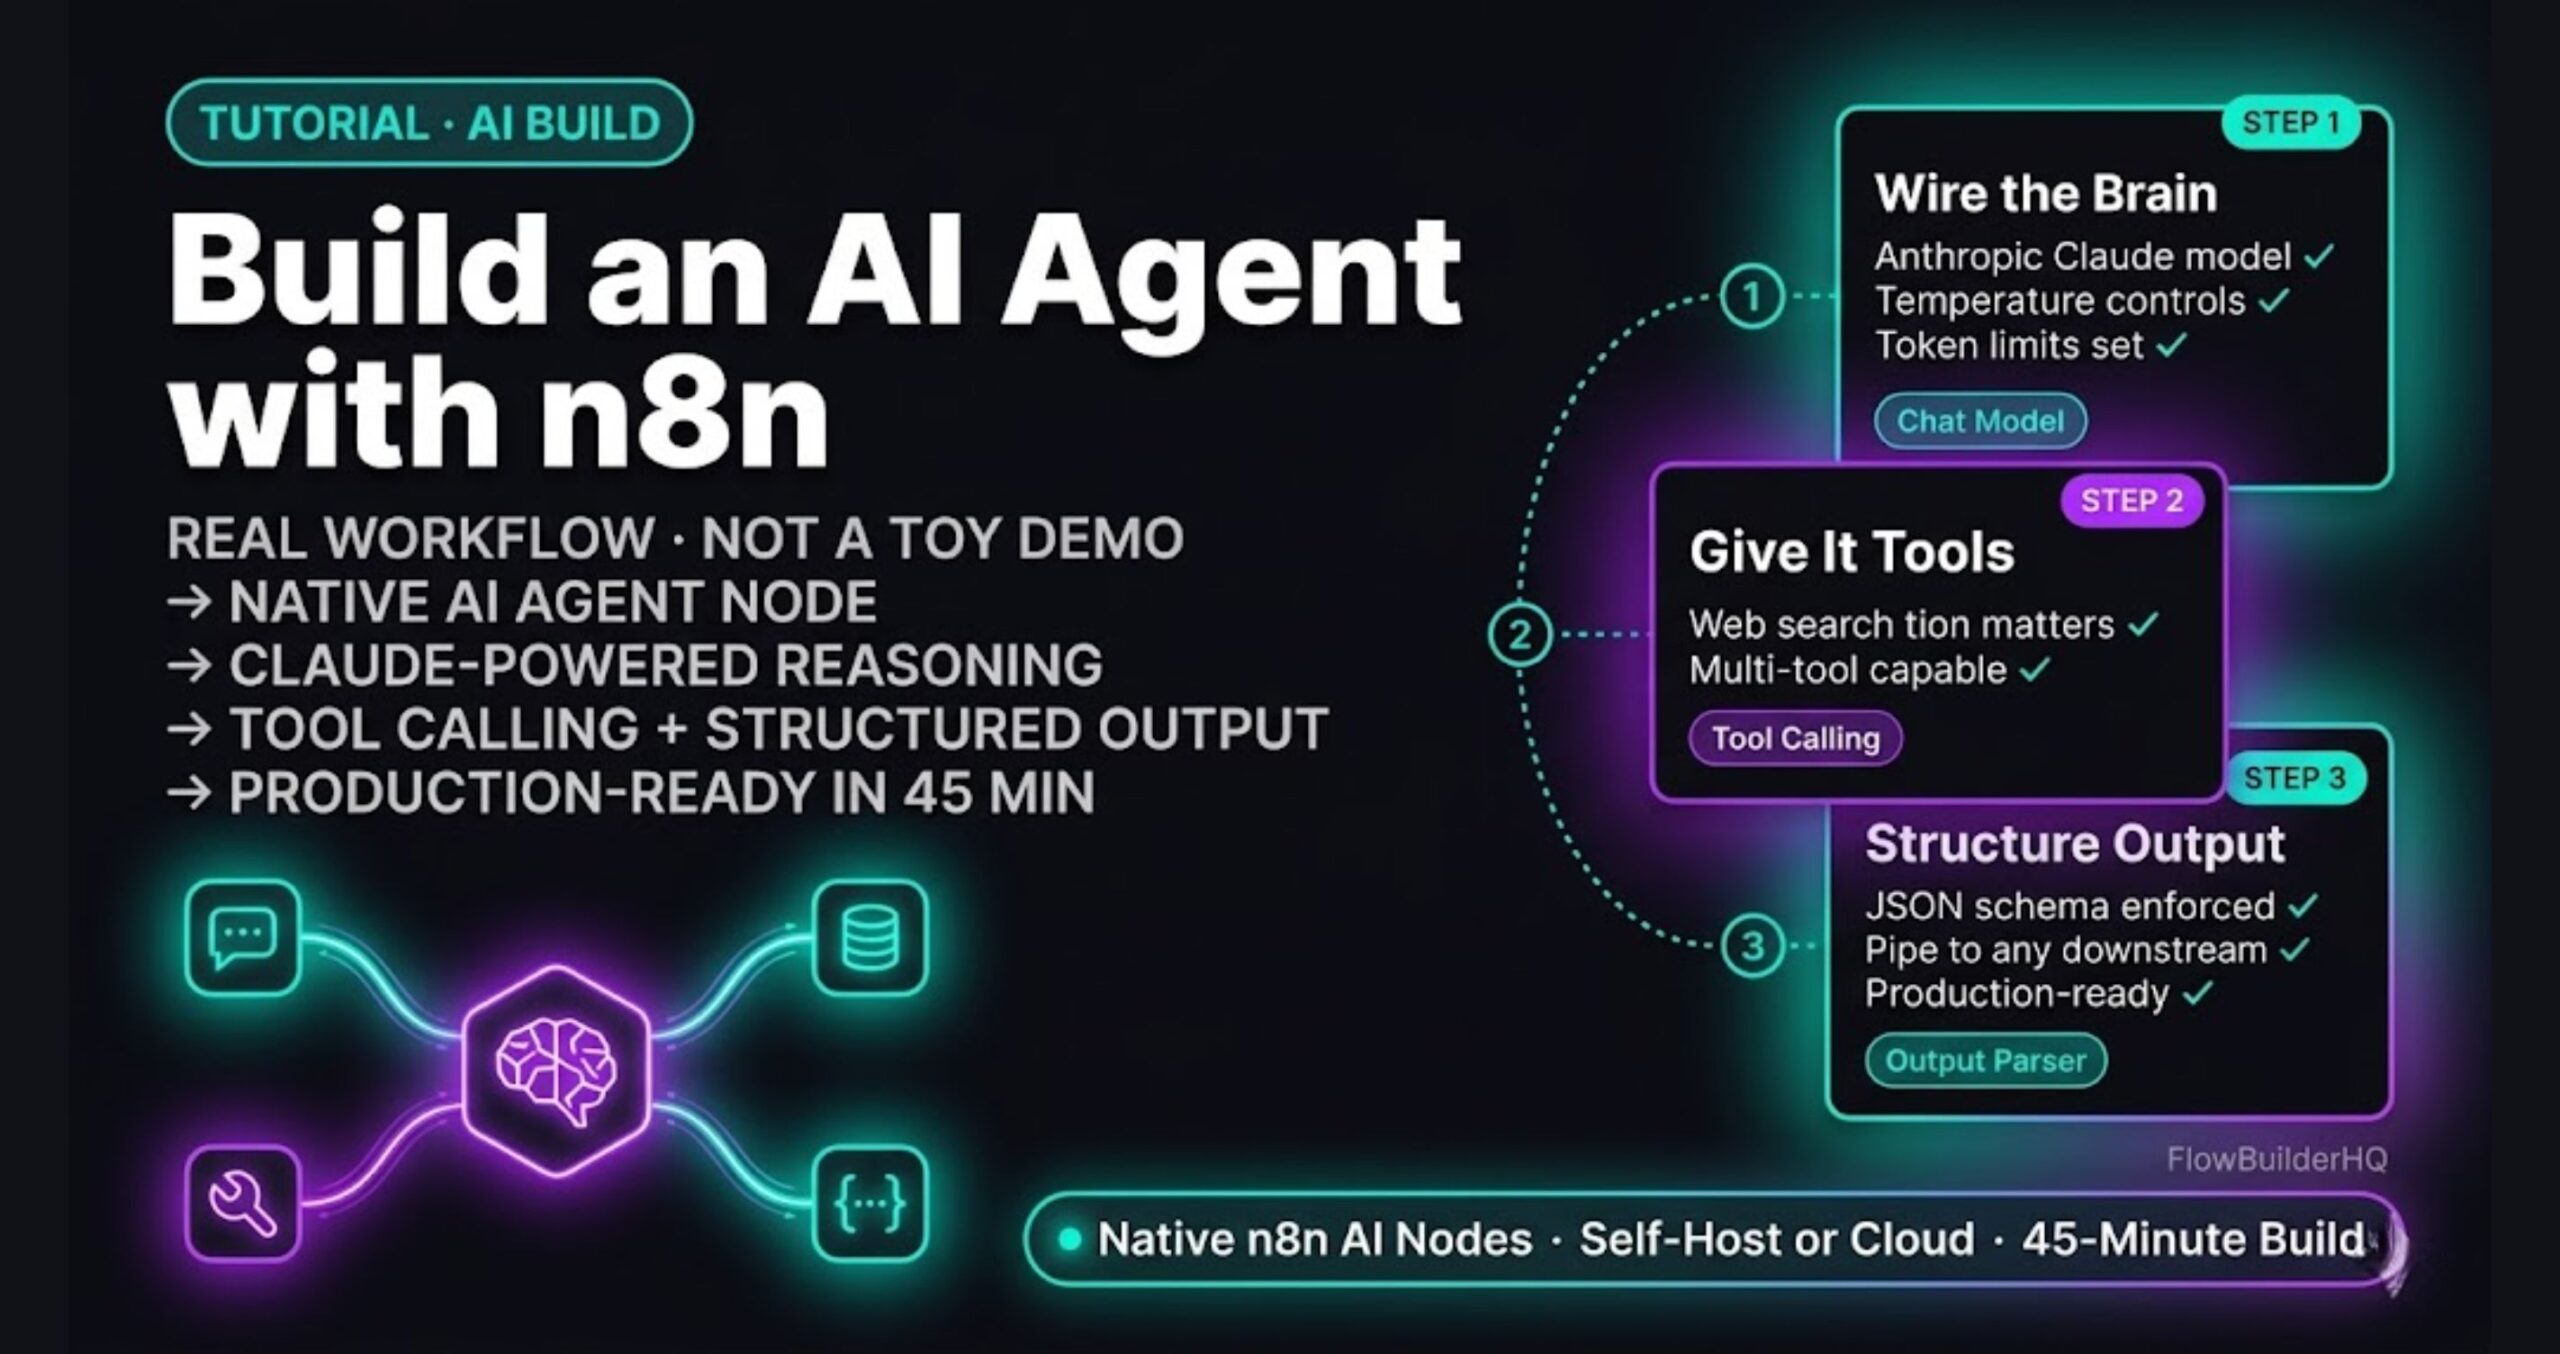
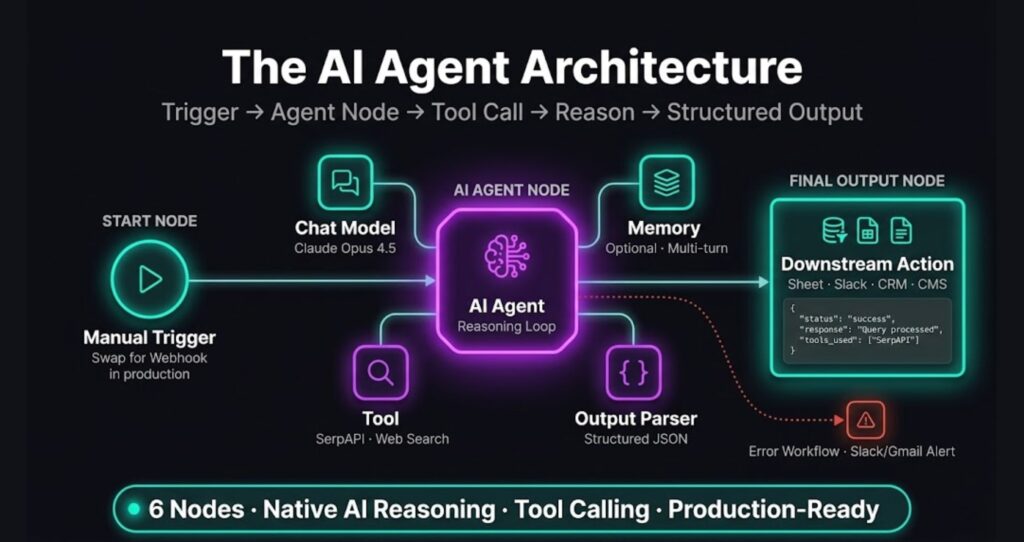
By the end of this tutorial, you’ll have a functional AI agent in n8n that receives a trigger, reasons through a task using an AI model, uses a tool (web search or a custom function), and returns a structured output you can actually act on. We’ll use n8n’s native AI Agent node, wire in a language model, and connect a real tool — no dummy data, no hand-waving.
What You Need Before You Start
-
- An n8n instance — Cloud or self-hosted. If you haven’t decided yet, read n8n Self-Hosted vs Cloud first. For this tutorial, Cloud is faster to get running.
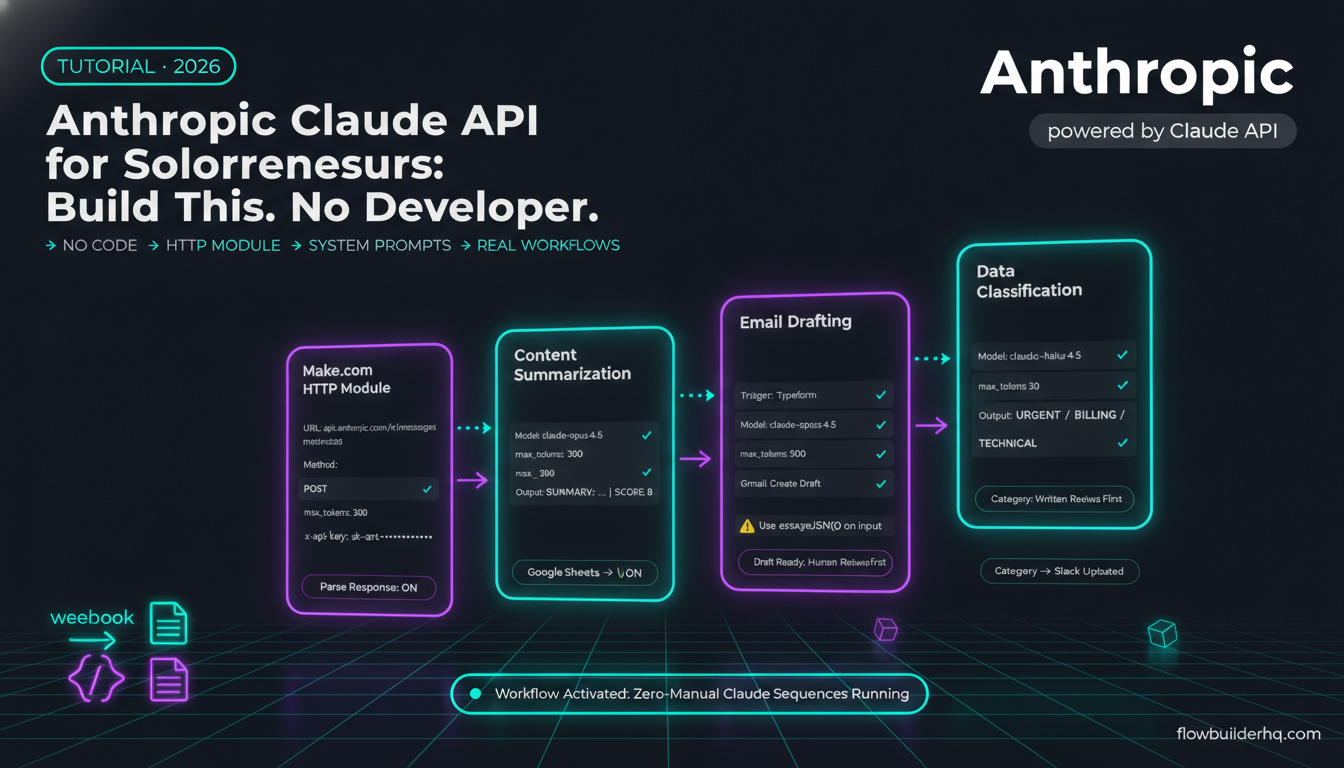
- An OpenAI API key or an Anthropic API key. I default to Claude for anything that requires nuanced output — the results are noticeably better for content and reasoning tasks.
- About 45 minutes.
You do not need to know how to code. Every step here is done inside the n8n canvas.
Step 1 — Create a New Workflow and Add a Trigger
Open n8n, click New Workflow, and name it something you’ll recognize — something like claude-agent-research works. The naming matters more than you think once you’re juggling 5+ workflows.
- On the empty canvas, click the + to add the first node
- Search for Manual Trigger and add it
- Use Manual Trigger for development — it lets you click “Execute Workflow” and step through every node to debug
- Once the agent works end-to-end, swap Manual Trigger for Webhook (if you want it called from another app) or Schedule Trigger (if it runs on a cron)
The Manual Trigger doesn’t need configuration. It just fires when you click Execute.
Step 2 — Add the AI Agent Node
This is the core of the build. n8n has a dedicated AI Agent node that handles tool calling, memory, and reasoning loops natively — you don’t have to wire those up yourself.
- Click the + after the Manual Trigger
- Search for AI Agent and add it (it’s under the AI category, not just “Agent”)
- In the node settings, you’ll see four required slots:
- Chat Model — the LLM doing the reasoning
- Memory — optional, for multi-turn context
- Tool — what the agent can call to do work
- Output Parser — optional, for structured JSON output
Don’t fill these in yet — we add them in the next steps. Just leave the AI Agent node on the canvas with its empty slots.
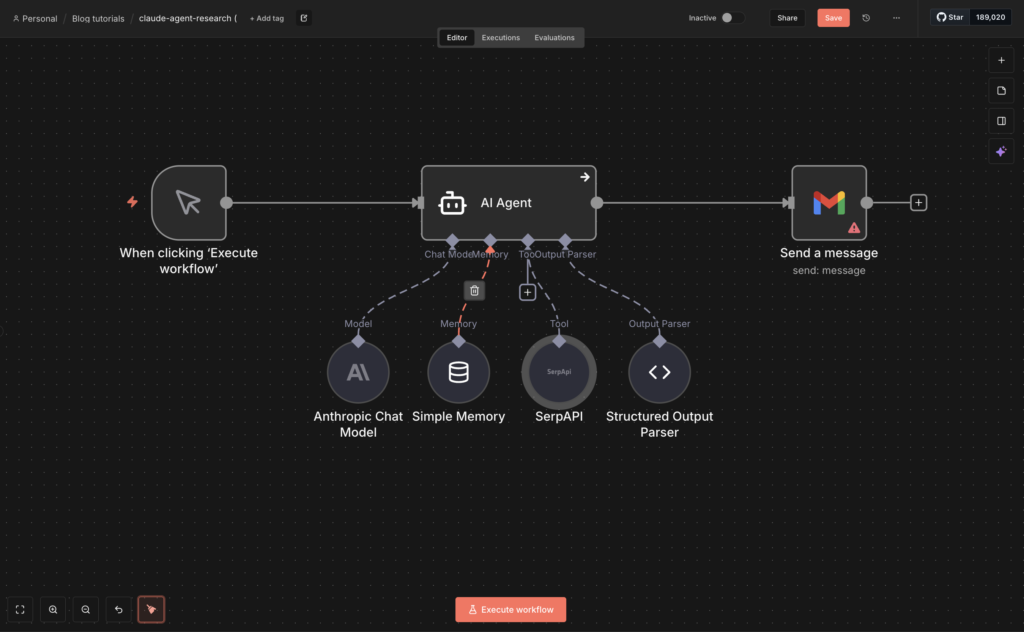
Step 3 — Connect Claude as the Chat Model
This is where you wire in the brain.
- On the AI Agent node, click the Chat Model sub-node slot
- Search for Anthropic Chat Model and add it
- In the Anthropic Chat Model settings:
- Credential: create new → paste your Anthropic API key from console.anthropic.com
- Model: select
claude-opus-4-5for the strongest reasoning, orclaude-sonnet-4-5for faster/cheaper runs - Temperature:
0.2for analytical tasks,0.7for creative tasks - Max Tokens:
4096is a safe ceiling — increase if your agent needs to return long structured output
If you’d rather use OpenAI, swap Anthropic Chat Model for OpenAI Chat Model in step 2. The rest of the build is identical.
For deeper coverage of connecting Claude specifically — including credential setup gotchas — see Connect Claude AI to n8n.
Step 4 — Add a Tool the Agent Can Call
An agent without tools is just a chatbot. The point of the AI Agent node is that the model can decide to call a tool to gather information or perform an action, then reason over the result.
For this build, we’ll give the agent a web search tool. You can swap it for anything later — HTTP Request, Google Sheets, custom code.
- On the AI Agent node, click the Tool sub-node slot
- Search for SerpAPI (or any web search tool you have a key for — Tavily and Brave Search also work)
- Add the credential (your search API key)
- In the tool description field, write what the tool does in plain English:
Use this tool when you need current information from the web. Input should be a clear search query.
The description is critical. The AI Agent reads it to decide when to call the tool. Vague descriptions = the agent never uses it.
Alternative: if you don’t want to pay for a search API, add the HTTP Request Tool instead and point it at a free endpoint your agent can query. The setup pattern is identical.
Step 5 — Add the System Prompt
This is what shapes how the agent behaves.
- Back on the AI Agent node, find the System Message field
- Paste a prompt that defines the agent’s role, output format, and rules. Example:
You are a research agent. When given a topic, use the web search tool
to find 3 current, credible sources. Summarize the key findings in
under 200 words. Always return your response in this format:

SOURCES:
1. [URL]
2. [URL]
3. [URL]

SUMMARY:
[Your summary]
The clearer the system prompt, the more reliable the agent. Vague prompts produce vague output — this is the single biggest factor in whether your agent works in production or wanders off.
Step 6 — Add an Output Parser (Optional but Recommended)
If you want the agent’s output as structured JSON instead of free text, add an output parser.
- Click the Output Parser sub-node slot
- Add Structured Output Parser
- Define the JSON schema you want returned, e.g.:
json
{
  "type": "object",
  "properties": {
    "sources": {
      "type": "array",
      "items": { "type": "string" }
    },
    "summary": {
      "type": "string"
    }
  },
  "required": ["sources", "summary"]
}
Now the agent returns clean JSON you can pipe into any downstream node — a Google Sheet, a database, a Slack message, a WordPress draft.
Step 7 — Test the Agent
Click Execute Workflow at the bottom of the canvas.
In the input field that appears, type a real query: What are the latest pricing changes for Anthropic API in 2026?
Watch the agent run. You should see:
- The Manual Trigger fires
- The AI Agent node activates
- The model decides to call the SerpAPI tool
- The tool returns search results
- The model reasons over the results and produces a final response
- The Output Parser formats it as JSON
If any of those steps fail, the n8n execution log shows exactly where — click the red-flagged node and read the error.
Common Errors and Fixes
Error: “No tool calls produced” The agent didn’t use the tool at all. Cause: your tool description is too vague, or the system prompt doesn’t push the agent toward tool use. Rewrite the tool description with concrete trigger phrases (“Use when the user asks about current events, recent news, or anything dated after January 2025”).
Error: “Output parser validation failed” The model returned text that doesn’t match your JSON schema. Either loosen the schema or add an explicit instruction in the system prompt: “Always return valid JSON matching the specified schema. No commentary outside the JSON.”
Error: “Rate limit exceeded” on Anthropic You’re hitting tier limits on the API. Add a Wait node before retries, or split high-volume runs across multiple credentials. Anthropic’s tier system caps tokens per minute — check your usage in the console.
Error: AI Agent runs forever The agent is in a tool-calling loop. Open the AI Agent node settings and set Max Iterations to 5 or 10. Without this cap, an agent can call its tool indefinitely if it’s not satisfied with the output.
Scaling This Agent into Production
Once the manual version runs cleanly, three changes make it production-ready:
Replace Manual Trigger with a real trigger. Webhook for app-triggered calls (Slack message, form submission). Schedule Trigger for cron jobs (daily research reports, weekly summaries).
Add an Error Workflow. In the workflow settings, set an Error Workflow to fire when this one fails. The error workflow should notify you via Gmail or Slack with the failed node and input data so you can debug fast.
Persist agent output. Add a downstream node after the AI Agent — Google Sheets, Notion, Airtable, or a database — so every run logs its input, output, and timestamp. This is how you spot drift in agent quality over time.
For the lead generation version of this pattern — using an AI agent to qualify and route inbound leads — see How to Automate Lead Generation with n8n.
Should You Build an AI Agent with n8n at All?
Honest answer: yes, if you want full control over the agent loop, native AI nodes, and the ability to self-host. n8n’s AI Agent node handles tool calling and memory better than most no-code alternatives in 2026.
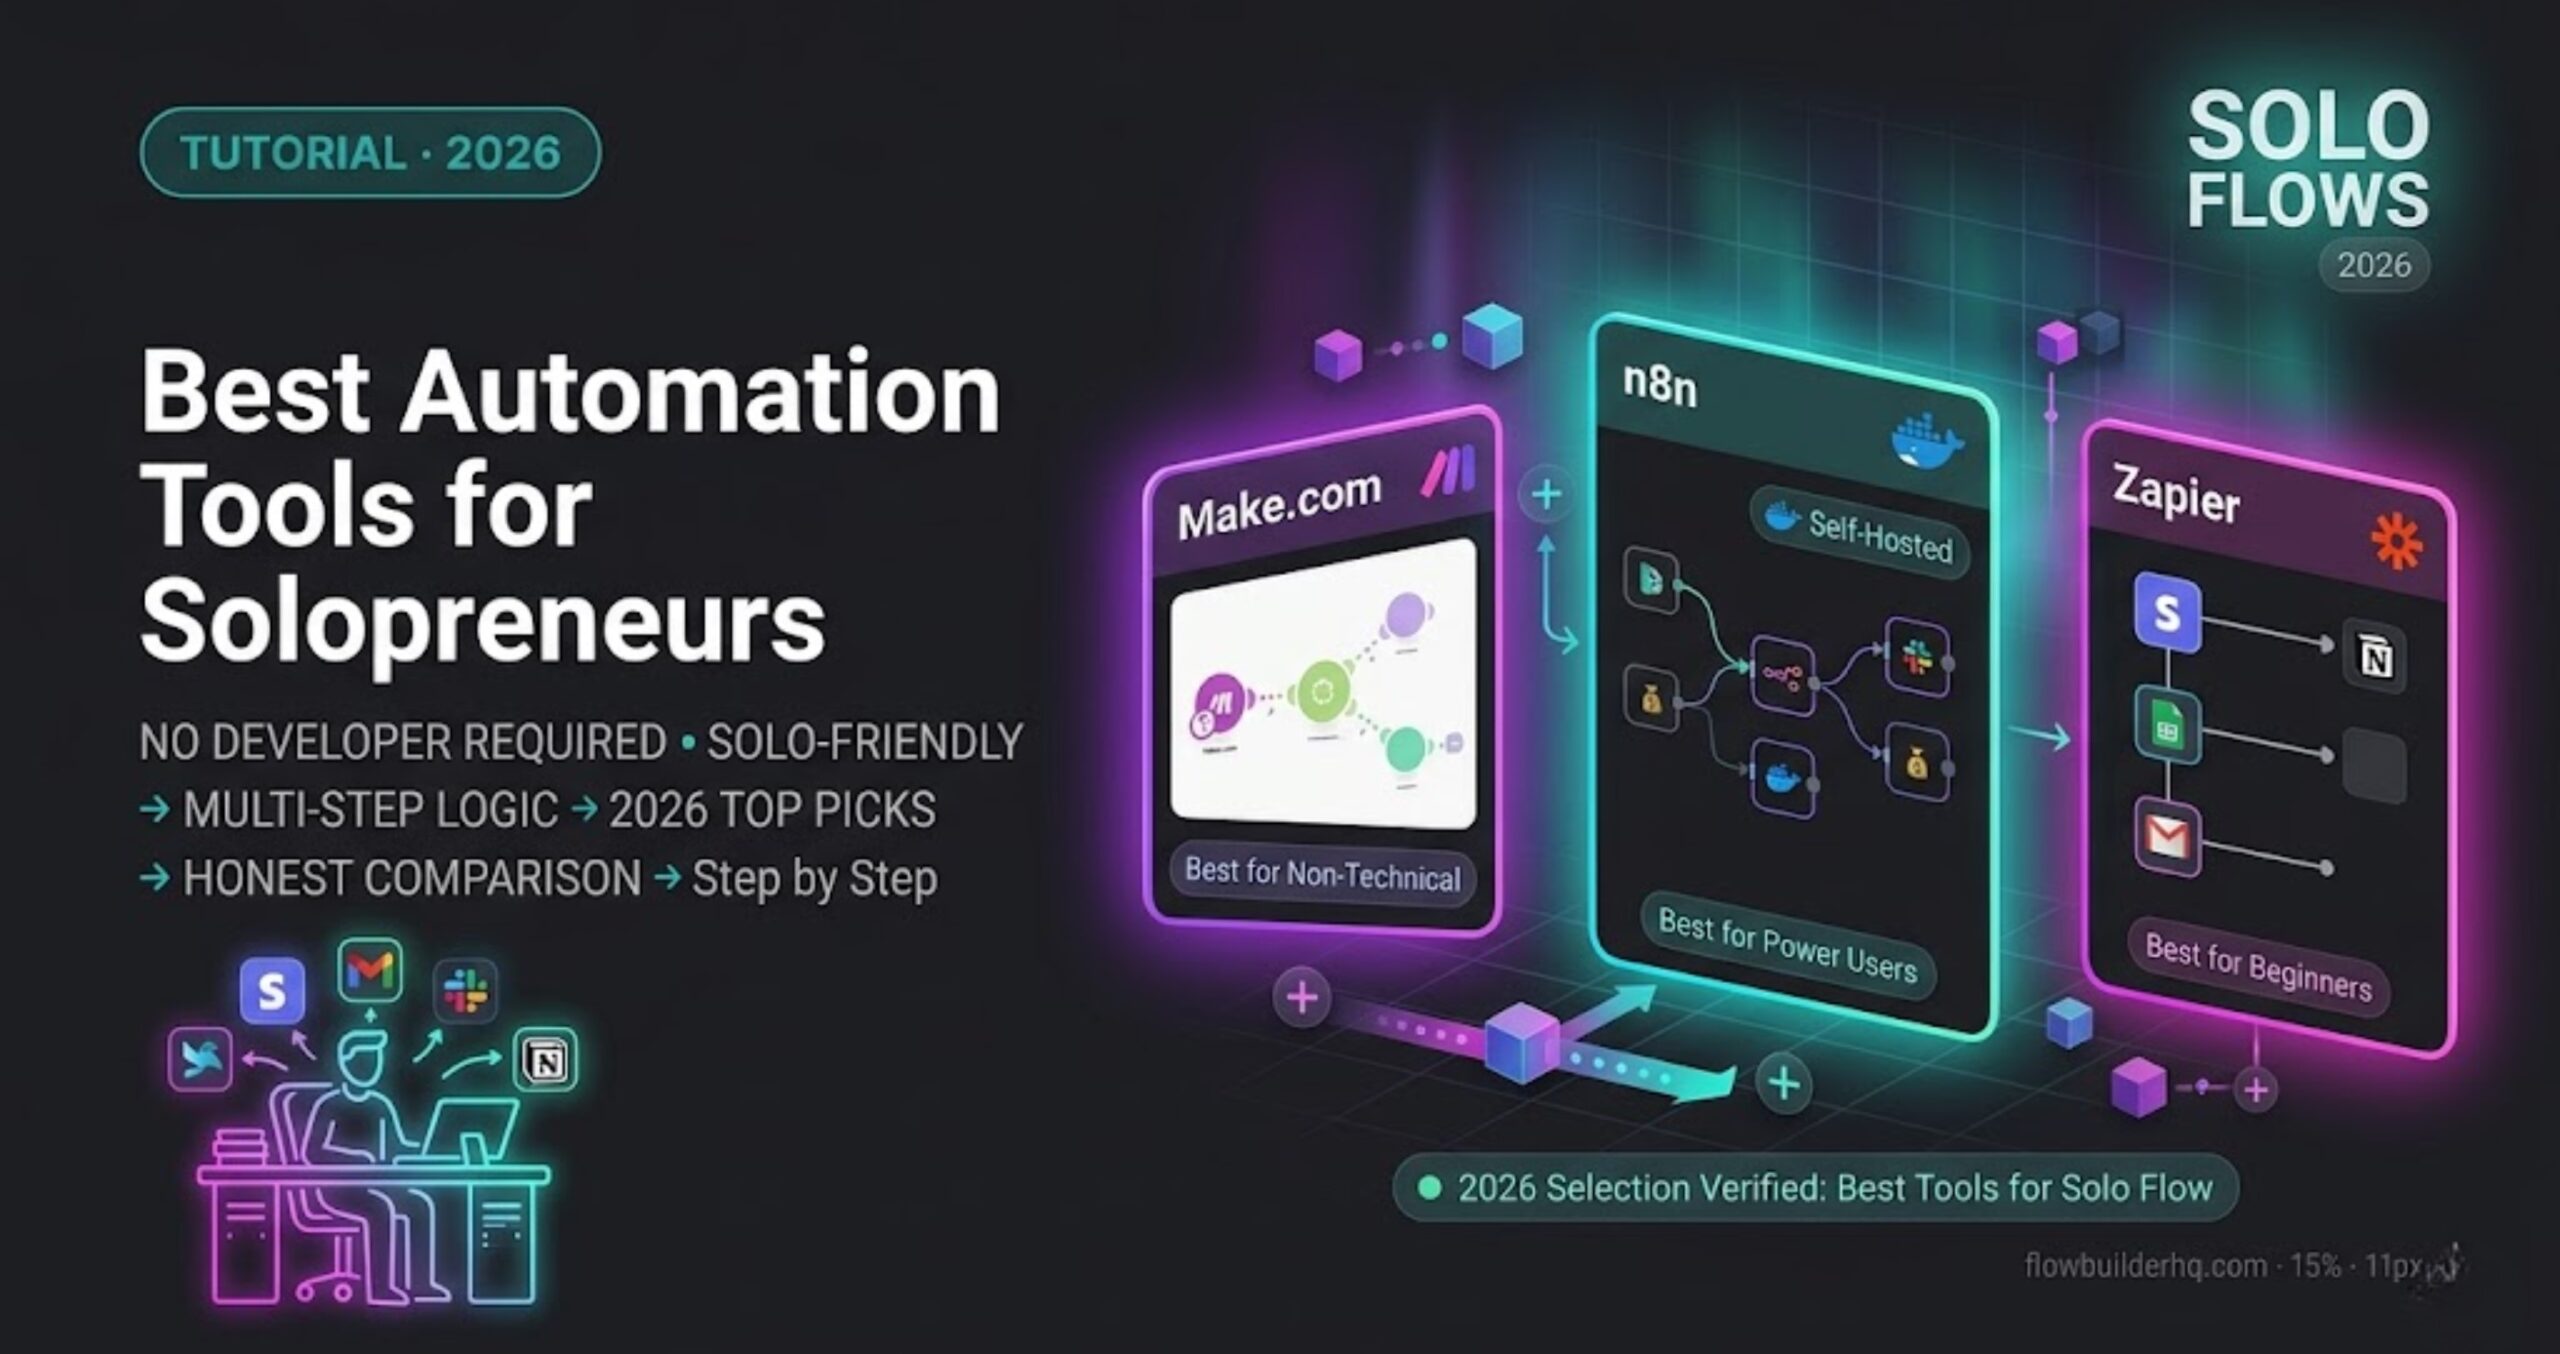
If you want a simpler visual builder and don’t need self-hosting, Make.com handles basic AI workflows well too — though its agent capabilities are shallower. For a full comparison of where each tool fits, see the n8n Review 2026.
Try n8n
n8n Cloud’s Starter plan handles everything in this build. Self-hosting is free if you’re comfortable with Docker.
Want to see the same agent pattern applied to a different use case? How to Automate Lead Generation with n8n shows how to route inbound leads through an AI qualification step before they hit your CRM.