How to Automate Social Media Posting with Make.com (Step-by-Step)
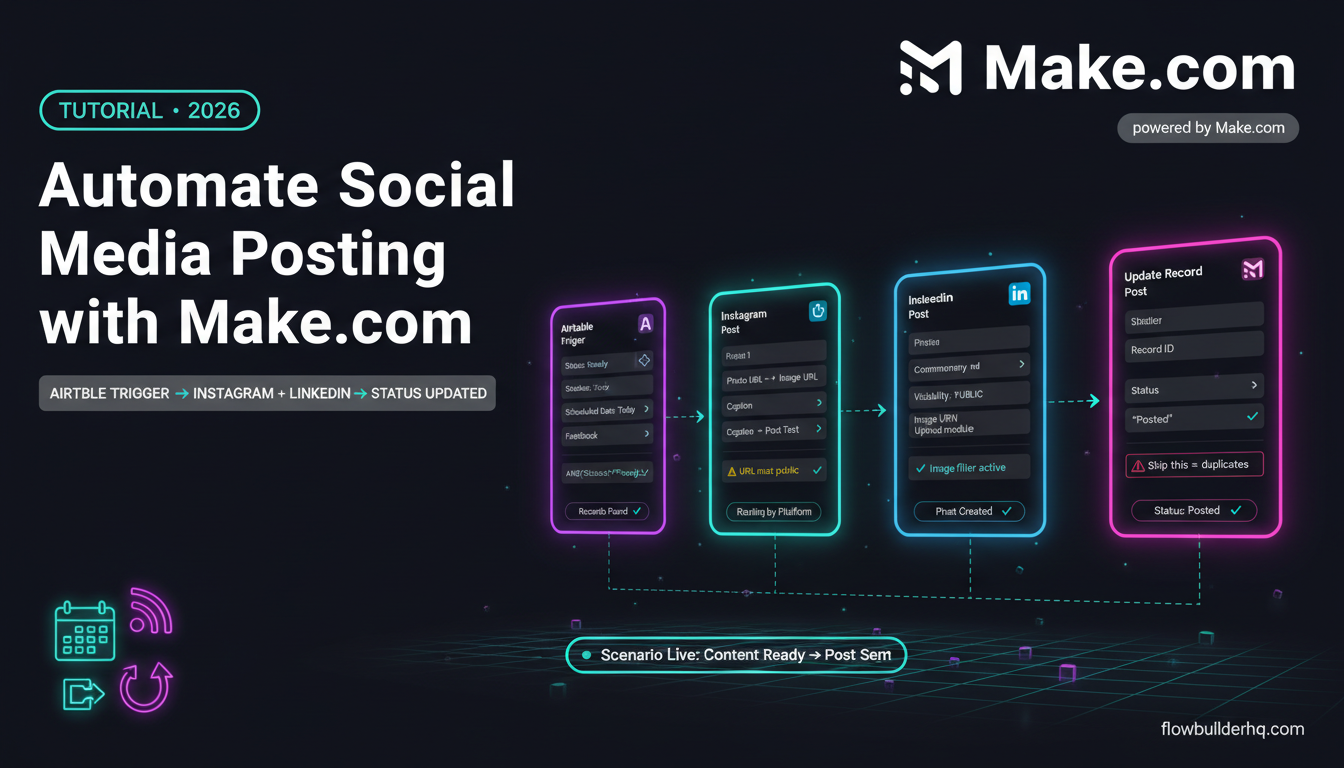
If you want to automate social media posting with Make.com, the setup is faster than most people expect — and more flexible than any native scheduler. This isn’t a tutorial for switching tools. It’s about wiring Make.com into whatever content pipeline you already have so posts go out without you touching them.
The core idea: a trigger fires when content is ready (a new Airtable row, a Google Sheets entry, a completed Notion database item), Make.com formats it, and your post hits the platform. No manual copy-paste. No missed slots. No tool sitting open in a browser tab.
Here’s the exact workflow setup, step by step.
What You’ll Need Before You Start
- A Make.com account (free tier covers this build)
- A content source — Airtable, Google Sheets, or Notion work well
- Platform access — this tutorial covers Instagram and LinkedIn, but the pattern applies to Facebook Pages, Twitter/X, and Pinterest too
- A Google Cloud project if you use Sheets as the trigger (for OAuth)
Make.com’s native integrations cover all the major social platforms directly — no middleware required. If the platform you want isn’t natively supported, you can hit it with an HTTP module using its API.
Step 1: Build Your Content Source
Before the automation does anything, the content needs to live somewhere structured. The most practical setup is an Airtable base with these fields:
- Post Text (long text) — the caption or body copy
- Image URL (URL field) — a direct link to the image, hosted on Dropbox, Google Drive, or S3
- Platform (single select) — Instagram, LinkedIn, Facebook, etc.
- Scheduled Date (date) — when it should go out
- Status (single select) — Draft, Ready, Posted
The Status field is how Make.com knows what to pick up. The trigger will watch for rows where Status = “Ready” and Scheduled Date is today or earlier.
If you’d rather use Google Sheets, the same column structure works. The trigger module is just different.
Step 2: Create a New Scenario in Make.com
Log in, go to Scenarios, and click Create a new scenario. You’ll land on the visual editor. Click the big plus to add your first module.
Search for Airtable and select the Search Records trigger. Connect your Airtable account using the API key (found in your Airtable account settings under Developer Hub).
Configure it:
- Base: your content base
- Table: your posts table
- Filter formula:
AND({Status}="Ready", IS_BEFORE({Scheduled Date}, DATEADD(TODAY(), 1, 'days')))
This pulls every record marked Ready with a scheduled date of today or earlier. If you want it to run daily, set the scenario schedule to once per day at whatever time you want posts queued.
Step 3: Add a Router for Multi-Platform Posting
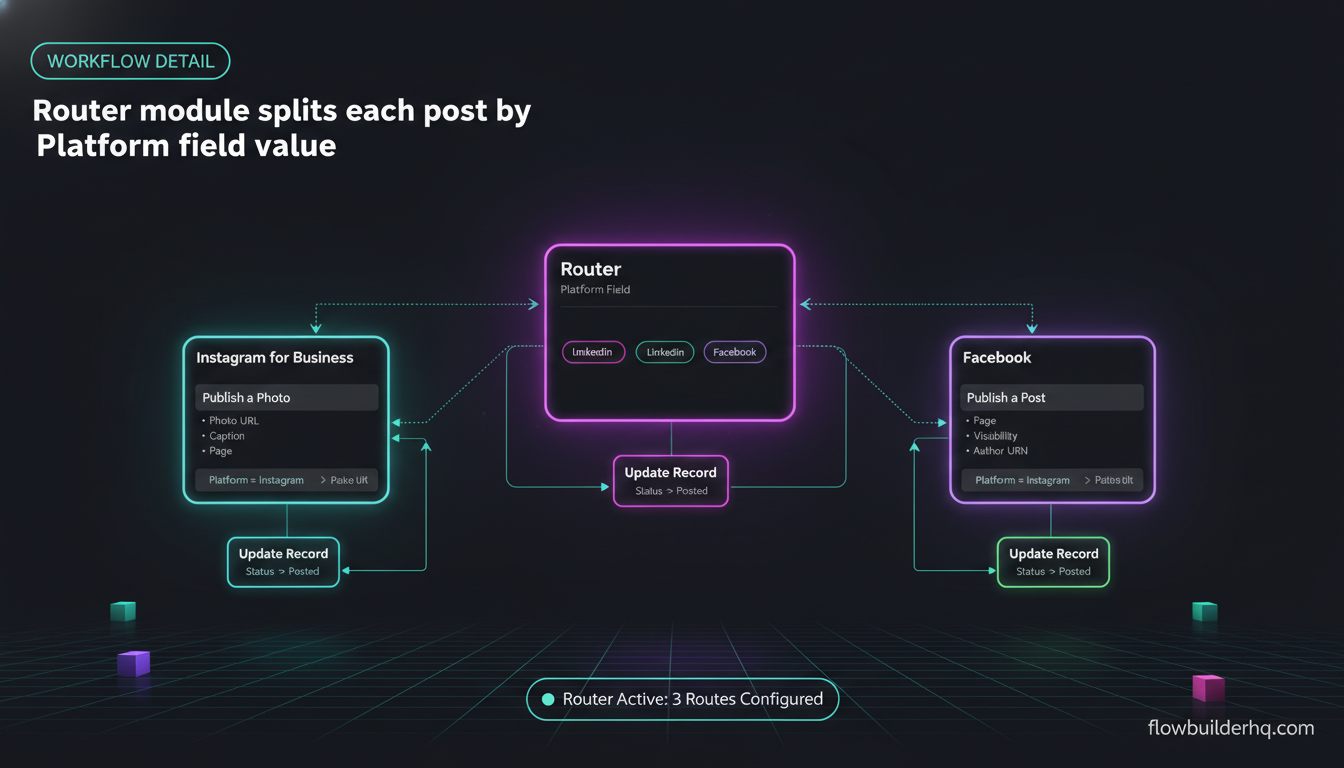
Since the Platform field in Airtable tells Make.com where each post should go, you need a Router module to direct the flow. Add a Router after the Airtable trigger.
Each route gets a filter condition:
- Route 1 filter:
Platform = "Instagram" - Route 2 filter:
Platform = "LinkedIn" - Route 3 filter:
Platform = "Facebook"
Each route then has its own posting module. This is cleaner than trying to use conditional logic inside a single module — and it makes debugging easier when something breaks on one platform but not others.
Step 4: Configure the Instagram Posting Module
Instagram posting via API requires a Facebook Business account, an Instagram Business or Creator account linked to a Facebook Page, and access through the Meta Graph API. Make.com handles the OAuth flow — you just need the accounts connected.
Add the Instagram for Business > Publish a Photo module to Route 1.
Map:
- Page: your connected Instagram Business account
- Photo URL: the Image URL field from Airtable
- Caption: the Post Text field from Airtable
One thing to watch: the Image URL must be publicly accessible. A private Google Drive link will fail. Use a public Dropbox link or an S3 bucket with public read access. This catches a lot of people on the first run.
Step 5: Configure the LinkedIn Posting Module
Add the LinkedIn > Create a Post module to Route 2.
Connect your LinkedIn account. Map:
- Author: your person or organization URN
- Commentary: the Post Text field
- Visibility: PUBLIC
For image posts on LinkedIn, the flow is slightly different — you need to use a LinkedIn > Upload an Image module first, then reference the returned image URN in the Create a Post module. Make.com’s LinkedIn integration handles this with two separate modules chained together. Set the image source to URL and map your Image URL field.
If the post has no image (the Image URL field is empty), you’ll want a filter on the upload module to skip it. Add a filter: Image URL is not empty.
Step 6: Update the Status Back in Airtable
After each posting module, add an Airtable > Update a Record module. Map the Record ID from the original trigger and set Status to “Posted”.
Without this step, every run will re-process the same records. This is the step most people forget on their first build, and it turns into duplicate posts across platforms until they figure it out.
Do this on every route — after Instagram posts, after LinkedIn posts, etc. Each route should close with the status update.
Step 7: Handle Errors
Make.com’s error handling deserves its own section because social media API errors are common — rate limits, token expiry, image format rejections — and ignoring them means silent failures.
Right-click on any module in Make.com to add an error handler. The most useful options:
- Rollback: undoes any committed changes in the current execution (good if you’re writing to databases)
- Ignore: the scenario keeps running, that bundle fails silently — use this only if the failure doesn’t matter
- Break: stops processing that bundle and logs the error, which is usually what you want here
For a social media workflow, use Break on each posting module. That way, if the Instagram post fails because of a bad image URL, Make.com logs the error, skips that record, and continues to the next one. The failed record stays in “Ready” status so it gets retried next run — which is the behavior you actually want.
You can also add an email or Slack notification module after the error handler to ping you when something breaks. Map the error message from the error bundle into the notification body.
Step 8: Set the Schedule and Test
Before turning the scenario live, run a test with one record marked “Ready” with today’s date. Make.com’s test run shows you the exact data at each module step, so you can see whether the image URL is resolving, what the post caption looks like, and whether the module connections are clean.
Common test failures and their fixes:
- Error: “The provided image URL is not accessible” — the image URL is private or requires authentication. Make it public.
- Error: “Invalid OAuth token” — reconnect the social account in your Make.com connections. Tokens expire, especially LinkedIn and Facebook.
- Error: “Media type not supported” — Instagram requires JPEG or PNG. If your image is a WebP or HEIC, convert it before storing the URL. A Make.com HTTP module can’t do this directly — you’d need to run it through an image conversion API first, or just store the image in the right format from the start.
Once the test passes, set the scenario schedule. Daily at 8 AM is a common choice for content queues, but Make.com also supports cron expressions if you want more precise timing.
Scaling This Workflow
Once the basic flow works, there are a few expansions worth knowing about.
Multi-account posting: If you manage social accounts for multiple brands or clients, you can add a “Brand” field to your Airtable base and use router routes to direct posts to different connected accounts. Each brand’s posts go through its own module with its own OAuth connection.
AI-generated captions: Drop an OpenAI or Anthropic module before the posting modules. Pass a topic or product description in from Airtable and let the model generate the caption. Map the output into the post text field. This is particularly useful if you’re running a content calendar based on a product catalog — the posts can generate themselves from SKU descriptions.
Image generation: Tools like fal.ai expose image generation via API. An HTTP module in Make.com can hit their endpoint, generate an image from a prompt stored in Airtable, and return a URL you use directly in the posting module. No manual image creation required.
Cross-posting with format differences: LinkedIn and Instagram have different character limits and tone expectations. Rather than storing one post text for all platforms, add separate fields in Airtable — “LinkedIn Copy” and “Instagram Caption” — and map each to the right module. Slightly more work on the content side, but the posts perform noticeably better when they’re written for the platform.
How This Compares to Native Schedulers
Buffer, Later, and Hootsuite handle scheduling fine for simple calendars. The moment you want conditional logic — post this only if the product is in stock, pull the caption from your CRM, skip the post if a campaign is paused — they hit a wall. Make.com has no such ceiling.
The trade-off is setup time. A native scheduler takes 10 minutes. This Make.com build takes an hour the first time, maybe longer if the OAuth flows give you trouble. That hour pays back quickly once the workflow is running — and unlike a scheduler subscription, the Make.com free tier at 1,000 operations/month handles a solid content calendar without any cost.
For a deeper look at what Make.com can and can’t do across automation use cases, the Make.com 2026 review covers pricing tiers, limitations, and where the tool actually breaks down. And if you want to see how this pairs with client onboarding, the client onboarding automation guide covers the complementary workflow on the intake side.
Final Notes on Automate Social Media Posting with Make.com
The workflow above is production-ready. The Airtable trigger, router, platform-specific modules, and status update close the loop cleanly. Error handling with Break keeps bad records from blocking good ones. The schedule runs it daily without you being involved.
What makes this worth building: the workflow doesn’t care how you generate content. Write it manually, pull from a CMS, generate it with AI — as long as a row shows up in Airtable with Status = “Ready”, the post goes out. That separation between content creation and content distribution is where the real time savings sit.
Ready to build it? Start with Make.com’s free tier — 1,000 operations/month is more than enough to run this daily for a single-brand content calendar.
Building this yourself? Get the workflow pack.
5 ready-to-import n8n workflows — lead capture, invoicing, content repurposing, onboarding, social posting. Free.