Make.com for Content Creators: Automate Your Publishing Workflow
If you create content as a core part of your business — blog posts, newsletters, course modules, long-form articles — you already know the problem. The writing is maybe 30% of the work. The rest is moving files, reformatting text, posting to platforms, notifying collaborators, and filing the finished piece somewhere you can actually find it later. Make.com for content creators solves that operational overhead by automating the full publishing pipeline, not just the final “post to social” step.
This tutorial walks through building a complete content ops scenario in Make.com: from a Google Doc draft through an approval gate, platform-specific formatting, distribution, and archiving. By the end you’ll have a working scenario you can adapt to your own stack.
What This Workflow Actually Does
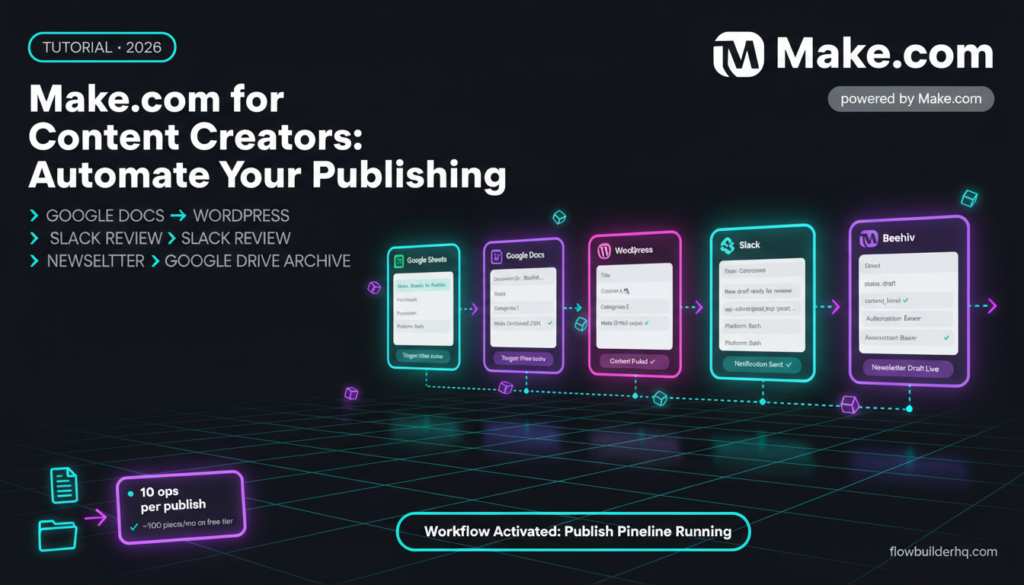
Here’s the full pipeline we’re building:
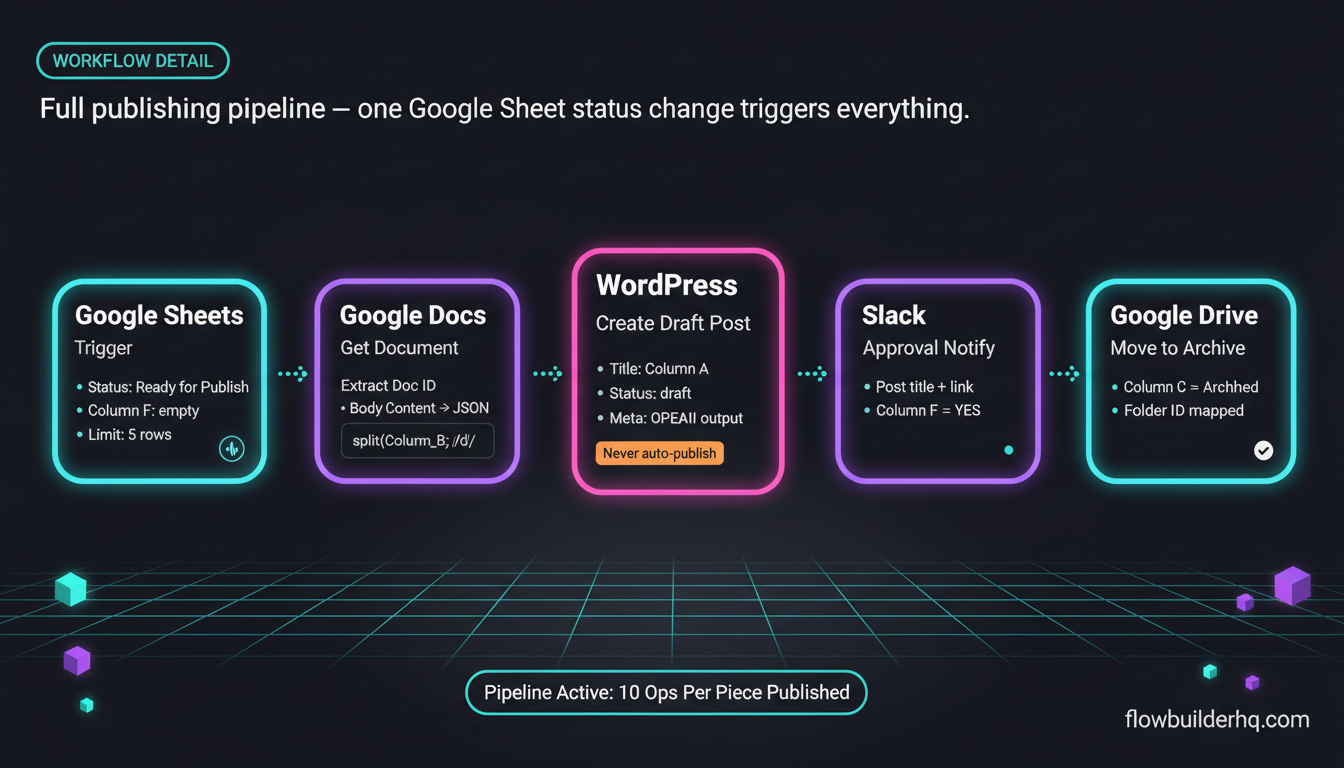
- A Google Doc is marked “Ready for Publish” (via a status field in a linked Google Sheet)
- Make.com pulls the doc content and runs it through a formatting step
- The formatted content gets pushed to WordPress as a draft
- A Slack notification fires to your review channel (or just to yourself)
- On approval, the WordPress post publishes and a newsletter draft gets created in Beehiiv
- The original doc gets moved to an “Archived” folder in Google Drive
This is a real, complete pipeline — not a demo. Each step maps to a specific Make.com module. If your stack differs (Ghost instead of WordPress, ConvertKit instead of Beehiiv), the logic is identical — you’re swapping modules, not rebuilding from scratch.
If you’re new to building Make.com scenarios, this beginner scenario walkthrough covers the core interface concepts before you get into multi-step builds like this one.
Prerequisites
- A Make.com account (free tier works for initial testing; Core at $9/mo handles production volume)
- Google Workspace (Docs + Sheets + Drive)
- A WordPress site with the REST API enabled (default on all modern installs)
- A Beehiiv account (if you run a newsletter — optional but covered in Step 5)
- A Slack workspace (optional for the approval notification step)
Step 1: Set Up Your Content Tracker in Google Sheets
The scenario needs a reliable trigger. The cleanest approach for a content pipeline is a Google Sheet that acts as your editorial calendar and status board. Each row is one piece of content.
Create a sheet with these columns:
- Column A: Content title
- Column B: Google Doc URL
- Column C: Status (
Draft,Ready for Publish,Published,Archived) - Column D: Target platform (
Blog,Newsletter,Both) - Column E: Category / Tag
- Column F: Processed (leave blank — Make.com will write
YEShere to prevent double-processing)
When you finish a draft, you change Column C to Ready for Publish. That’s the only manual input you’ll do after writing. Everything else fires automatically.
If you want a deeper look at using Google Sheets as a lightweight operational database inside Make.com, this setup guide covers the pattern in detail.
Step 2: Build the Make.com Scenario — Trigger Module
In Make.com, create a new scenario. For the trigger, use Google Sheets → Search Rows.
Configure it like this:
- Spreadsheet: Select your editorial calendar sheet
- Sheet: Select the correct tab
- Filter: Column C =
Ready for PublishAND Column F is empty (not equal toYES) - Limit: 5 (processes up to 5 pieces per run — adjust based on your publishing volume)
Set the scenario to run on a schedule — every 30 minutes is fine for most solo content ops. Make.com’s scheduler handles this with no extra cost against your ops count.
Important: The Column F “Processed” check is non-negotiable. Without it, every scheduled run will re-process every row with status Ready for Publish. You’ll end up with duplicate WordPress drafts and multiple Slack pings. Add the filter before you test anything.
Step 3: Pull the Google Doc Content
Add a Google Docs → Get a Document module. Map the Document ID from the Google Doc URL in Column B of your sheet.
The URL format is: https://docs.google.com/document/d/DOCUMENT_ID/edit
You need only the DOCUMENT_ID portion. Use Make.com’s built-in text parsing function to extract it:
{{split(split(2.Column_B; "/d/"); "/edit")[1]}}This splits the URL on /d/, takes the second segment, then splits again on /edit to isolate the ID. Test this in the module’s formula field — if the doc loads correctly, you’ll see the document title and content appear in the module output.
The output you care about is Body Content — Make.com returns this as structured JSON with paragraph blocks. You’ll work with this in the next step.
Step 4: Format the Content for Each Platform
This is where most DIY pipelines fall apart. Raw Google Docs content comes out as JSON block objects, not clean HTML. You need to convert it before pushing to WordPress or any newsletter tool.
Add a Tools → Set Variable module (or use a Text Aggregator if you’re iterating over paragraphs). The goal is to assemble the doc content into clean HTML.
For a blog post, you want something like:
<h2>{{paragraph.heading}}</h2>
<p>{{paragraph.content}}</p>
If you want AI-assisted formatting — for example, automatically generating a meta description or rewriting the intro paragraph for a newsletter — add an OpenAI → Create a Completion module here. Pass the doc content and a prompt like:
You are a content editor. Given the following blog post content, write a 155-character SEO meta description. Return only the meta description, no quotes.

Content: {{3.body_content}}
Store the output as a variable. You’ll use it when creating the WordPress post. For a comparison of which AI API works best in automation contexts like this, this technical comparison gives an honest breakdown of Make.com integration with both.
Step 5: Push a Draft to WordPress
Add a WordPress → Create a Post module. Connect it to your site via the WordPress connection (you’ll need your site URL and an application password from your WordPress user settings).
Map the fields:
- Title: Column A from your sheet (the content title)
- Content: Your formatted HTML from Step 4
- Status:
draft(never publish directly from automation on the first run) - Categories: Column E from your sheet
- Excerpt / Meta Description: OpenAI output from Step 4 (if using)
Always create as draft first. The publish step comes after a human approval check (Step 6). Automating straight to publish without review is how formatting errors go live at 2am.
Step 6: Fire the Approval Notification
Add a Slack → Create a Message module (or Gmail if you don’t use Slack). This fires immediately after the WordPress draft is created.
The message should include:
- The post title
- A direct link to the WordPress draft (Make.com returns the post ID — construct the URL as
https://yoursite.com/wp-admin/post.php?post={{post_id}}&action=edit) - The target platform (Blog / Newsletter / Both) from Column D
For detailed Slack message formatting — including using Block Kit for cleaner notifications — this Slack automation walkthrough covers the module configuration in depth.
Now update Column F to YES using a Google Sheets → Update a Row module. This marks the row as processed so the trigger filter won’t pick it up again. Map the Row Number from the Search Rows output.
Step 7: The Approval Branch — Publish and Newsletter
This is a second scenario (or a separate trigger path). When you’re happy with the WordPress draft, you change Column C to Approved and Column F back to blank. The scenario picks it up on the next run and takes a different action path based on Column C value.
Use a Router module with two branches:
Branch 1 — Publish to WordPress:
- Filter: Column C =
Approved - Module: WordPress → Update a Post, set Status to
publish - Update Column C to
Published
Branch 2 — Create Newsletter Draft (if Column D = “Newsletter” or “Both”):
- Filter: Column C =
ApprovedAND Column D containsNewsletter - Module: HTTP → Make a Request to the Beehiiv API
- Endpoint:
POST https://api.beehiiv.com/v2/publications/{publication_id}/posts - Body: JSON with
title,content_json(orcontent_html), andstatus: "draft"
Beehiiv has a clean REST API — the HTTP module handles it without a native Make.com integration. You’ll need your publication ID and API key from the Beehiiv dashboard. Set the Authorization header as Bearer YOUR_API_KEY.
If you’re already running a newsletter alongside your blog, this dual-publish step alone saves the manual copy-paste cycle that eats 20-30 minutes per issue.
Step 8: Archive the Google Doc
After publishing, move the source doc out of your active drafts folder. Add a Google Drive → Move a File module.
- File ID: Extracted from Column B (same parsing logic as Step 3)
- Destination Folder: Your “Published / Archived” Drive folder ID
Then update Column C to Archived in the sheet. Your editorial calendar now serves as a clean historical log — every published piece has a status, a Drive location, and a timestamp Make.com wrote automatically.
Common Error: Google Docs Permissions
The most frequent failure point in this scenario is the Google Docs module returning a permissions error: “The caller does not have permission.”
This happens when the Google account connected to Make.com doesn’t have edit access to the specific Doc. If you’re working with multiple Google accounts (one personal, one workspace), Make.com may be authenticating with the wrong one.
Fix: In Make.com, go to the Google Docs module → click the Connection dropdown → check which account is active. If it’s the wrong one, add a new connection with the correct account and reassign it. Also check that the Doc isn’t owned by a different user without sharing permissions set to “Editor” or “Viewer” for your automation account.
For a full breakdown of how to handle module errors, retries, and fallback paths in Make.com scenarios, this error handling tutorial is the most useful reference.
Ops Count Reality Check
Every module execution in Make.com consumes operations. Here’s the count for one full run of this scenario (one piece of content through the full pipeline):
| Step | Module | Ops Used |
|---|---|---|
| Trigger | Google Sheets Search Rows | 1 |
| Get Doc | Google Docs Get Document | 1 |
| AI formatting | OpenAI Completion | 1 |
| Create WP draft | WordPress Create Post | 1 |
| Slack notification | Slack Create Message | 1 |
| Mark processed | Google Sheets Update Row | 1 |
| Publish WP post | WordPress Update Post | 1 |
| Beehiiv draft | HTTP Request | 1 |
| Move to archive | Google Drive Move File | 1 |
| Update status | Google Sheets Update Row | 1 |
| Total per piece | 10 ops |
At Make.com’s free tier (1,000 ops/month), you can run this full pipeline for about 100 pieces of content per month — more than enough for most solo content businesses. If you publish at high volume, the Core plan at $9/mo gives you 10,000 ops. For a detailed look at how Make.com’s ops pricing scales, the 2026 pricing breakdown covers the real numbers at each tier.
Extending the Workflow
Once this base scenario is running, the natural extensions are:
- Social distribution: After WordPress publishes, trigger a separate scenario that pulls the post URL and pushes platform-specific snippets to LinkedIn, Twitter/X, or a scheduling queue. This social media posting workflow plugs in directly after your publish step.
- Content repurposing: Pass the published blog URL back into an AI module to generate a Twitter thread, a LinkedIn post, and a short email teaser. This content repurposing workflow shows exactly how to structure that branching logic.
- SEO metadata: Add an API call to score the content before it goes to WordPress draft — flag anything below a target score for manual review.

Make.com for Content Creators: Who This Fits
This pipeline is built for solopreneurs who publish consistently — bloggers, newsletter writers, course creators — where the ops overhead genuinely compounds across every piece of content. If you publish once a month, the setup time doesn’t pay back fast. If you publish weekly or more, the time savings across formatting, cross-posting, notifications, and archiving add up quickly per publish cycle.
The scenario also scales well when you bring in a contractor or editor. The approval step in Column C means a second person can mark content approved without needing access to WordPress, Beehiiv, or any other platform directly. Everything flows from the Google Sheet.
If you want to see how this kind of automation fits into a broader solopreneur toolstack, this workflow prioritization framework helps you figure out what to automate first when you’re working across multiple business functions at once.
Ready to build it? Start your Make.com scenario here — the free tier is enough to test the full pipeline before you commit to a paid plan.
Building this yourself? Get the workflow pack.
5 ready-to-import n8n workflows — lead capture, invoicing, content repurposing, onboarding, social posting. Free.