Make.com for Virtual Assistants: Automate the Tasks You Keep Delegating
Before you post that VA job listing, run through this checklist: how many of the tasks you plan to hand off are actually just triggered, repeatable actions with no real judgment involved? Intake form responses routed to a spreadsheet. Status update emails sent when a project moves. Data copied from one tool to another. If the honest answer is “most of them,” you don’t have a staffing problem — you have an automation problem.
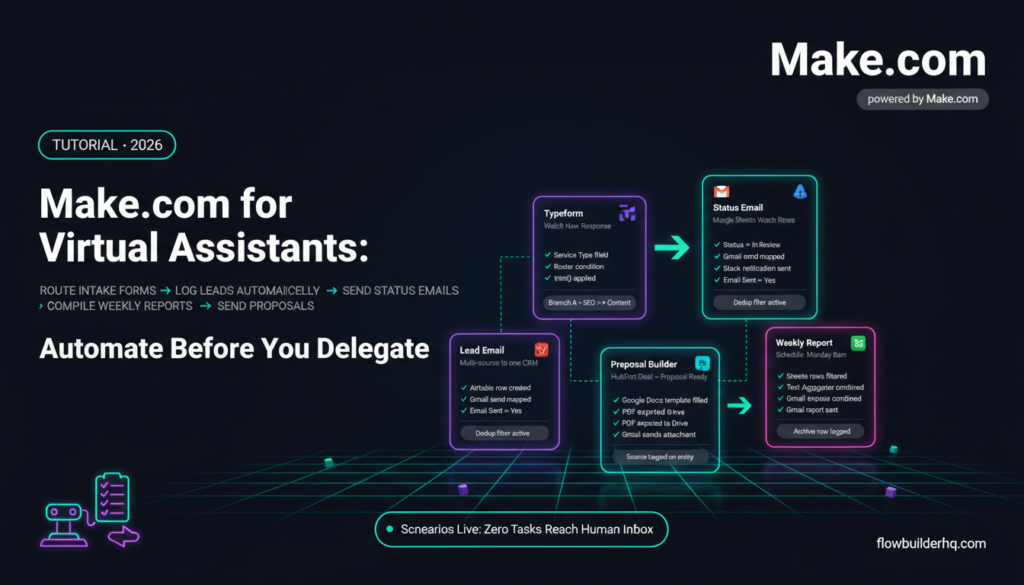
This tutorial covers five tasks solopreneurs commonly delegate to VAs that Make.com can handle end-to-end, before a human ever needs to touch them. Each one comes with a real workflow build you can follow. Make.com for virtual assistants isn’t about replacing the people who handle judgment-heavy work — it’s about making sure repetitive mechanical tasks never reach a human inbox in the first place.
If you’re new to Make.com’s interface, start with this beginner walkthrough for building your first scenario before going through these workflows. If you’re already comfortable with triggers and modules, keep going.
Why Automate Before You Delegate?
VAs are expensive relative to what automation costs. Make.com’s Core plan is $9/month for 10,000 operations. A VA working 5 hours a week at $15/hour runs $300/month. Those costs aren’t competing — they serve different functions — but too many solopreneurs hand off work to a VA without first stripping out the parts a scenario could handle in milliseconds.
The practical result: your VA spends a chunk of their time doing data entry, sending templated emails, and copying information between tools. That’s the lowest-value use of a human brain, and it’s also where errors compound. Automation handles the mechanical layer. Your VA handles the thinking layer. That’s the division worth building toward.
For a broader view of what’s worth automating first, this prioritization framework for solopreneur automation helps you identify which workflows to tackle before you add any headcount.
Task 1: Route Intake Form Submissions Automatically
The scenario: someone fills out a contact or inquiry form. You (or your VA) open the submission, read it, figure out which category it falls into, and forward it to the right place. That routing decision is usually the same 80% of the time.
The Make.com Workflow
- Trigger: Typeform (or Jotform, or a native webhook) — Watch New Response
- Router module: Add a Router with conditions based on a field value. For example, if “Service Type” equals “SEO Audit,” route to Branch A. If it equals “Done-for-you content,” route to Branch B.
- Branch A: Create a row in Google Sheets (or Airtable) tagged “SEO,” send a Gmail notification to yourself, and create a task in Notion with the submission details pre-filled.
- Branch B: Same structure, different tag and destination folder.
- Both branches: Send the submitter an auto-reply Gmail with a confirmation specific to what they selected.
The VA sees a pre-tagged Notion task with all context already populated. They don’t need to read the raw form email, decide where it goes, or copy anything manually. For a full walkthrough of this exact Typeform-to-workflow setup, see this Typeform automation tutorial.
Common error: The Router conditions use “equals” but the form response has trailing whitespace. Fix: add a Text > Trim function around the field variable in your condition. In Make.com’s mapping panel, wrap the variable: {{trim(1.answers.service_type.text)}}.
Task 2: Send Status Update Emails Without Touching Gmail
Client asks for a status update. You (or your VA) open Gmail, type a version of the same email you typed last week, send it. This is almost never worth a human’s time.
The Make.com Workflow
- Trigger: Google Sheets — Watch Rows (poll every 15 minutes) OR Airtable — Watch Records. Set the watch condition to fire when a “Status” column changes to a specific value, like “In Review.”
- Gmail module: Send Email. Map the client name, email address, and project name from the row. Write the template email directly in the Gmail module body — use Make.com’s variable mapping to personalize with their name and project details.
- Optional: Google Sheets Update Row: Add a column called “Status Email Sent” and set it to “Yes” after the email fires. Add a filter before the Gmail module so it only runs when “Status Email Sent” is NOT “Yes.” This prevents duplicate sends if the scenario polls multiple times.
For more on using Google Sheets as a trigger layer inside Make.com, this guide on automating Google Sheets reporting covers the polling setup and deduplication logic in detail.
Common error: Scenario fires for every existing row on first run, spamming every client. Fix: before activating, set the “Where to start” option in the trigger to “From now on” rather than “All.” This tells Make.com to only watch for new changes, not process historical rows.
Task 3: Log Leads from Any Source to One Place
Leads come in from a contact form, a LinkedIn DM, an email reply, a referral via a Google Form. A VA manually copies them into a CRM or spreadsheet. This is pure data entry — the kind automation was literally built to eliminate.
The Make.com Workflow
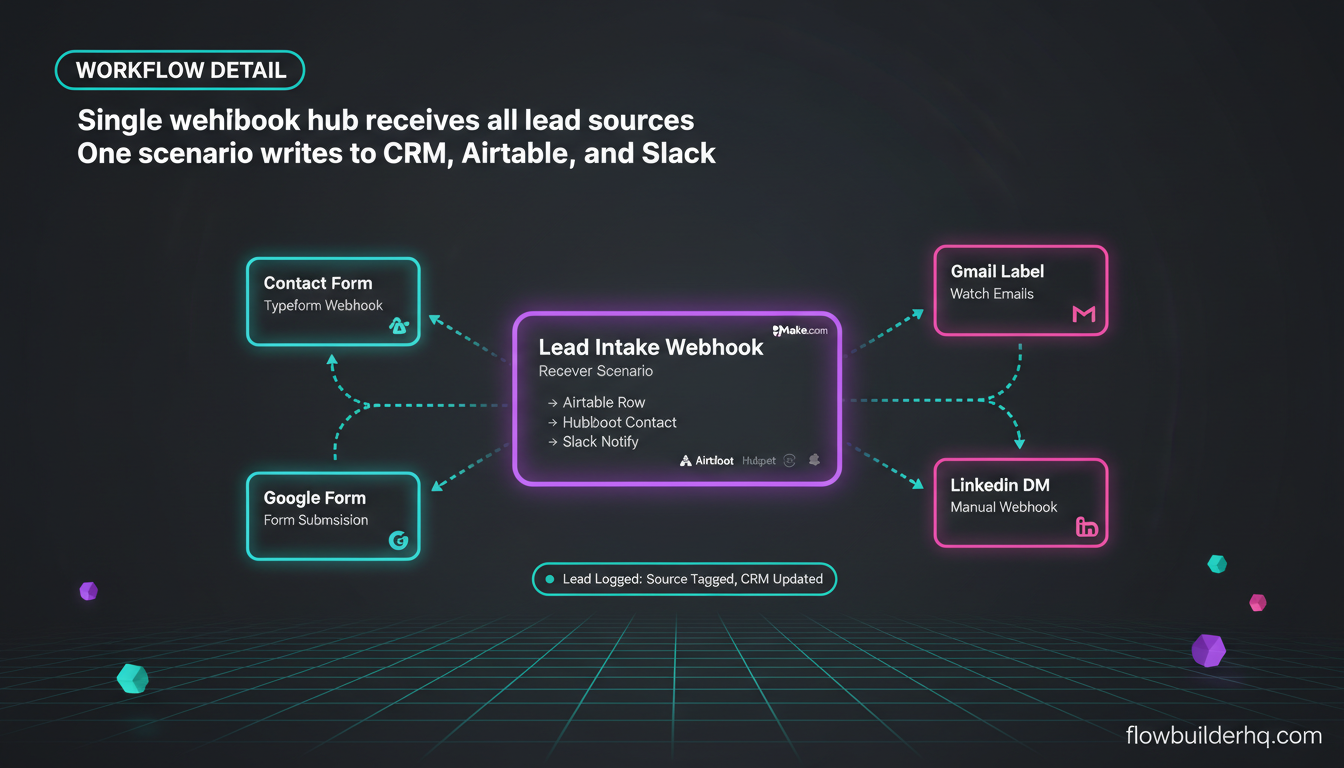
- Multiple triggers via separate scenarios: One scenario per lead source (contact form webhook, Gmail label watch, Google Form submission). Each scenario extracts name, email, source, and any notes.
- Each scenario calls a Make.com Webhook (custom): Rather than building the CRM connection into every scenario separately, point each trigger scenario to a single “Lead Intake” webhook scenario that handles the write.
- Webhook receiver scenario: Receives the standardized payload and does three things: creates a row in Airtable (or Google Sheets), creates a contact in HubSpot Free CRM, and sends you a Slack notification with the lead summary.
This architecture means you only maintain one CRM write scenario. Add a new lead source? Build a thin trigger scenario that parses it and fires the same webhook. Your VA sees every lead in one place, pre-logged, with source tagged. No copy-pasting.
For the HubSpot side of this, this step-by-step Make.com to HubSpot integration tutorial covers the connection setup and field mapping. For the Airtable side, this Make.com and Airtable workflow guide walks through the project management structure that works well as a lead log.
Task 4: Automate Proposal Sending
Once you have a qualified lead in your pipeline, someone needs to send a proposal. Often this is a VA: they take a template, fill in the client name, service, and price, export it as a PDF, attach it to an email, and send. Make.com can handle everything except writing the custom scope.
The Make.com Workflow
- Trigger: HubSpot — Watch Deals. Fire when a deal stage changes to “Proposal Ready.”
- HubSpot — Get Deal: Pull all deal properties (contact name, email, service tier, price).
- Google Docs — Create Document from Template: Use a Google Doc template with placeholder variables like
{{client_name}}and{{service_price}}. Make.com replaces them with the deal data. - Google Drive — Export as PDF: Export the newly created Doc as a PDF and store it in a designated Drive folder.
- Gmail — Send Email: Attach the PDF and send to the client’s email from the deal record. Use a pre-written email template in the Gmail module body.
For a full build of this workflow including the PDF export step, this proposal automation tutorial covers it from trigger to sent email. For the scheduling side of the follow-up after the proposal, this appointment scheduling workflow connects Calendly into the sequence.
Common error: Google Docs template placeholders don’t replace because variable names are case-sensitive. The template uses {{Client_Name}} but the mapping uses client_name. Fix: standardize all placeholders to lowercase with underscores and match exactly in your module mapping.
Task 5: Weekly Report Compilation
Every week, someone pulls numbers from three different places, pastes them into a doc or spreadsheet, and sends a summary. If those sources have accessible data (Google Analytics, a Google Sheet, an Airtable base), Make.com can assemble that report automatically.
The Make.com Workflow
- Trigger: Schedule module — every Monday at 8am.
- Google Sheets — Search Rows: Pull last week’s entries filtered by date range (use Make.com’s date functions:
{{addDays(now; -7)}}for start date). - Airtable — Search Records: Pull any completed tasks from last week tagged with the relevant project.
- Text Aggregator module: Combine all the pulled data into a single formatted text block.
- Gmail — Send Email: Send the aggregated report to yourself (or directly to a client) with the data formatted in the email body.
- Optional: Google Sheets — Add Row: Archive the report data into a “Weekly Reports” sheet for historical tracking.
For a deeper look at scheduled Google Sheets automation including aggregator logic, this step-by-step Google Sheets automation guide covers the date filtering and row search setup. If your report pulls from Slack activity or project update logs, this Slack + Make.com tutorial shows how to route message data into a scenario.
What Make.com Can’t Replace in a VA Relationship
Automation handles the predictable. VAs handle the ambiguous. Make.com won’t read a difficult client email and decide how to de-escalate. It won’t notice that a deliverable looks off before it goes out. It won’t manage a vendor relationship or exercise judgment on an edge case.
The honest framing: if you currently have a VA spending 10 hours a week on work, 3-5 of those hours are likely automatable with the workflows above. That means your VA either costs less (fewer hours needed) or delivers more (those hours go toward actual judgment work). Either outcome is better than the current state.
For solopreneurs who haven’t hired a VA yet, this is the right order of operations: automate the mechanical layer first, then assess what remains. What’s left after automation is what actually requires a person. That’s what you hire for — not the data entry.
If you’re evaluating whether Make.com is the right tool for this kind of infrastructure, this 2026 Make.com review covers the platform’s actual capabilities and limits for small business use. For pricing specifics as your operation scales, this Make.com pricing breakdown walks through what you actually pay at different operation volumes.
Getting Started with Make.com for Virtual Assistants
Make.com’s free plan gives you 1,000 operations/month — enough to test all five of these workflows before committing to a paid tier. The Core plan at $9/month handles 10,000 ops, which covers most solopreneur VA-replacement scenarios comfortably. The Make.com platform supports all the app connections used in these workflows natively — no custom API code required.
For error handling once your scenarios are live (because they will break at some point), this Make.com error handling tutorial is the resource to bookmark. It covers retry logic, error routes, and how to set up notifications when a scenario fails silently.
The Make.com integrations directory lists every native app connection — worth checking before you assume you’ll need a webhook workaround. Most common tools solopreneurs use (Typeform, HubSpot, Airtable, Google Workspace, Notion, Slack, Gmail) have full native modules with no configuration overhead.
Build the first scenario this week. Pick the one task from this list that you’ve delegated most recently and rebuild it as a Make.com scenario. Once it runs cleanly for two weeks without intervention, pick the next one. By the time you hire a VA — if you still need to — you’ll know exactly what you’re actually hiring for.
Ready to start? Try Make.com free and build your first VA-replacement scenario today.
Building this yourself? Get the workflow pack.
5 ready-to-import n8n workflows — lead capture, invoicing, content repurposing, onboarding, social posting. Free.