Make.com Google Sheets Integration Tutorial for Solopreneurs: 3 Real Workflows That Replace Manual Data Entry
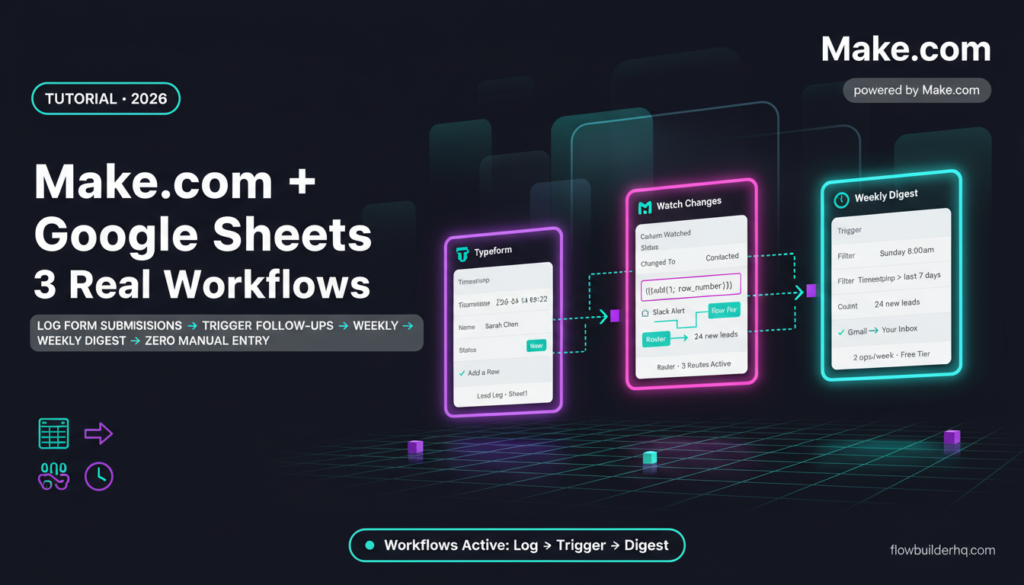
Google Sheets is already your CRM — here’s how to make it actually work automatically. Most solopreneurs already track leads, clients, and tasks in Sheets. The problem isn’t the tool. The problem is that data still moves by hand: copying form submissions, updating rows after calls, exporting reports on Sunday nights.
This Make.com Google Sheets integration tutorial skips the toy examples. You’ll build three real data pipelines that solopreneurs actually run: logging form submissions straight into a sheet, triggering follow-up sequences when a row updates, and generating a weekly digest from sheet data. Each scenario maps to a real operational problem.
Before anything else: you’ll need a Make.com account (free tier works for testing) and a Google account with Sheets access. Make.com’s free plan gives you 1,000 operations per month — enough to run all three workflows at low volume. Start your free Make.com account here if you haven’t already.
How Make.com Connects to Google Sheets
Make.com has a dedicated Google Sheets module with around a dozen actions and triggers. The ones you’ll use most:
- Watch Rows — triggers when a new row is added to a sheet
- Watch Changes — triggers when any existing row is modified
- Add a Row — appends data to the next empty row
- Update a Row — writes to a specific row by row number
- Search Rows — finds rows matching a filter value
- Get a Row — pulls a single row by number
Connecting the module is standard OAuth. In any scenario, add a Google Sheets module, click “Create a connection,” and follow the Google auth flow. Make.com will request permission to read and write Sheets — approve it. Your connection appears in the module and is reusable across all scenarios.
One thing to set up before building: your sheets need a header row. Make.com reads column names from row 1. If your sheet doesn’t have headers, the module throws an error when it tries to map fields. If you’re pulling from an existing messy sheet, add a clean header row first.
For a broader look at what Make.com can do beyond Sheets, our full Make.com review covers the platform’s overall strengths and where it falls short for solo operators.
Scenario 1: Log Form Submissions to Google Sheets
This is the most common entry point. Someone fills out a Typeform, Jotform, or a Gravity Forms on your WordPress site — and that response lands in a Google Sheet row automatically, no copy-paste required.
Step 1: Set Up Your Sheet
Create a Google Sheet named something like Lead Log. Row 1 should have your column headers: Timestamp, Name, Email, Source, Message, Status. The Status column is important — you’ll use it to trigger follow-up in Scenario 2.
Step 2: Create the Make.com Scenario
- In Make.com, click Create a new scenario.
- Add your form app as the trigger module (Typeform → Watch Responses, or Webhooks → Custom Webhook if your form supports webhook output).
- Add a Google Sheets → Add a Row module as the next step.
- Select your spreadsheet and the sheet tab name (e.g.,
Sheet1orLeads). - Map each form field to the corresponding column: form submission timestamp →
Timestamp, respondent name →Name, etc. - For
Status, hardcode the valueNew— every new submission starts with this status.
Step 3: Test It
Run the scenario once with a test form submission. Check your sheet. If rows are appearing at the wrong position (skipping rows, or writing to row 1 and overwriting your headers), scroll to the Google Sheets module settings and confirm “Table contains headers” is set to Yes. This is the most common first-time error — Make.com defaults vary by module version.
Also: if you’re using a Custom Webhook as your trigger instead of a native form app, make sure the webhook fires once before you try to map fields. Make.com can’t show you field options until it receives at least one real payload.
If your form submissions involve client intake rather than cold leads, the workflow pairs naturally with a broader client onboarding automation sequence that handles everything after the initial capture.
Scenario 2: Trigger a Follow-Up Sequence When a Row Updates
This is where Google Sheets starts behaving like a CRM. The idea: when you change the Status column of a lead row from New to Contacted, Make.com detects the change and fires an email sequence, Slack notification, or CRM update automatically.
The Watch Changes Module — and Its Row-Number Quirk
This is the non-obvious part. The Watch Changes module in Make.com doesn’t behave like Watch Rows. It polls for changes on a schedule (every 15 minutes on free/Core plans, down to 1 minute on Pro). More importantly: it returns the row number of the changed row, but that row number is relative to the data range, not the actual spreadsheet row number.
Practically: if your header is row 1 and your first data row is row 2, Watch Changes will return that first data row as row number 1. If you feed that number into an Update a Row module expecting the real spreadsheet row number, you’ll write to the wrong row. The fix: add 1 to any row number returned by Watch Changes when passing it to Update a Row (use Make.com’s built-in math: {{add(1; row_number)}} in the row field).
Building the Trigger
- Create a new scenario. Add Google Sheets → Watch Changes as the trigger.
- Select your Lead Log spreadsheet and sheet tab.
- Set the column to watch: choose
Status. - Run the scenario once to establish the starting point. Make.com needs to take a snapshot before it can detect changes.
Adding the Follow-Up Action
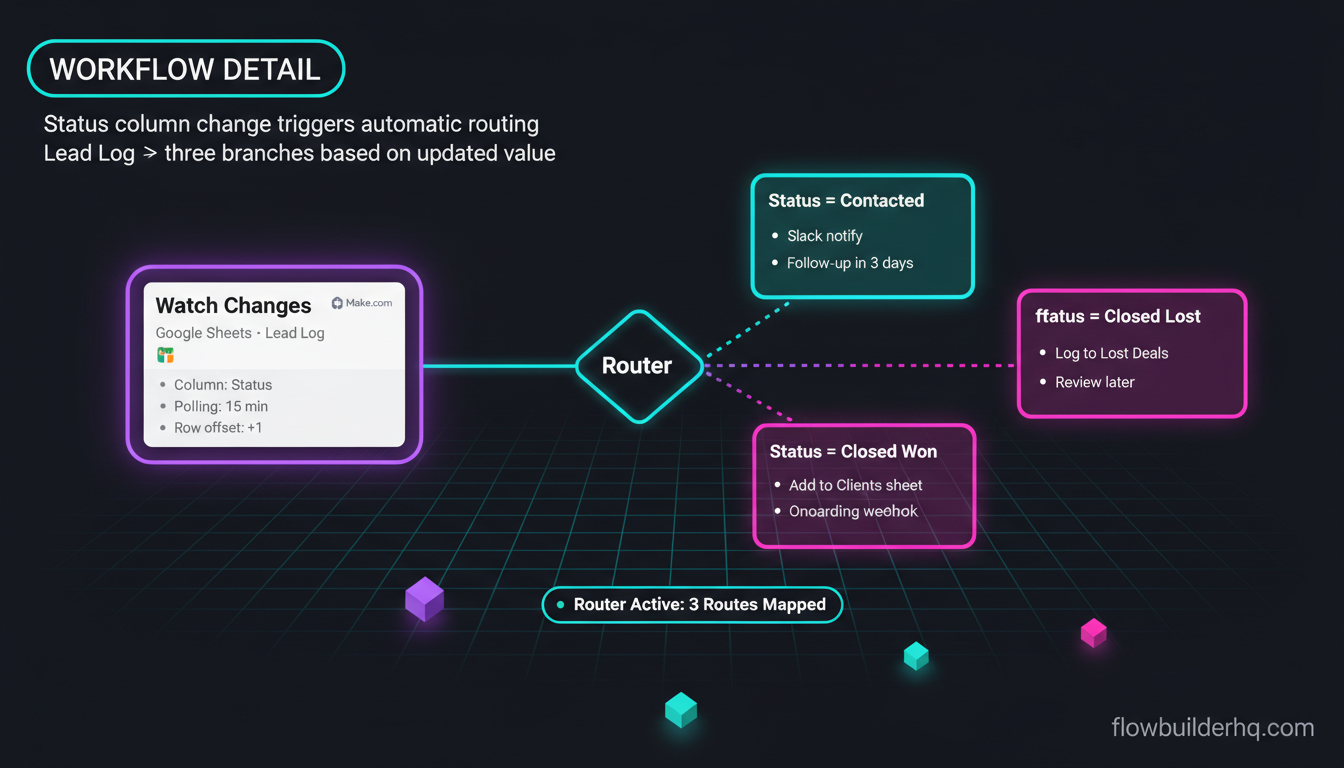
- Add a Router module after the trigger. This lets you branch based on what the Status value changed to.
- Route 1: filter for
Status = Contacted→ send an internal Slack or email notification reminding you to follow up in 3 days. - Route 2: filter for
Status = Closed Won→ add the row data to a separate “Clients” sheet and trigger an onboarding webhook. - Route 3: filter for
Status = Closed Lost→ log to a separate “Lost Deals” sheet for later review.
For the email follow-up branch specifically, this walkthrough on automating email follow-ups with Make.com covers the exact Gmail and MailerLite modules to use.
If your goal is feeding closed-won contacts into a real CRM rather than keeping everything in Sheets, connecting Make.com to HubSpot is the natural next step — you can pass row data directly into HubSpot contact creation.
Scenario 3: Generate a Weekly Digest from Sheet Data
Every Sunday at 8am, Make.com reads your Lead Log sheet, counts the rows added that week, pulls the most recent five leads, and sends you a formatted email summary. No dashboards. No exports. Just a clean digest in your inbox.
Step 1: Set Up the Schedule Trigger
- Create a new scenario. Add a Schedule trigger (clock icon).
- Set it to run weekly on Sunday at 8:00am in your timezone.
Step 2: Pull Last Week’s Rows
- Add Google Sheets → Search Rows.
- Select your Lead Log sheet.
- In the filter, set
Timestampis greater than{{addDays(now; -7)}}. This is Make.com’s date formula syntax — it returns the date 7 days ago. Any row with a timestamp more recent than that is included. - Set the maximum number of rows to return: 100 is safe for most solopreneurs.
Step 3: Aggregate the Data
Add a Tools → Numeric Aggregator to count total rows returned. Then add a Text Aggregator to build a formatted list of the most recent leads: set it to iterate over the Search Rows output and format each row as {{Name}} — {{Email}} — {{Status}}, joined by a line break.
Step 4: Send the Digest Email
- Add a Gmail → Send an Email (or Email → Send an Email for non-Gmail accounts) module.
- Set recipient to your own email address.
- Subject:
Weekly Lead Digest — {{formatDate(now; "MMM D")}} - Body: paste in your aggregated text, plus the total count from the Numeric Aggregator.
This scenario uses zero operations for reading (Search Rows is one operation regardless of how many rows it returns), plus one operation per email sent — so the weekly cost is 2 operations total.
If you want to push this further into a full reporting workflow rather than just a personal digest, the client reporting automation post shows how to format and deliver data to external stakeholders.
Common Errors and Fixes
Error: “Unable to load data from Google Sheets”
This usually means the connection token has expired or the sheet permissions changed. Go to Make.com → Connections, find your Google Sheets connection, and click “Reauthorize.” If you renamed or deleted the sheet tab, update the module to point to the new tab name — Make.com stores the tab name as a string, not an internal ID.
Error: Watch Rows Misses Submissions
Watch Rows only picks up rows added after the scenario’s starting row is set. If you added rows before activating the scenario, those won’t trigger anything. To process historical rows, use Search Rows with a date filter instead of Watch Rows.
Error: Duplicate Rows Appear
If your scenario runs and you see the same row added twice, check whether you have the scenario set to run multiple times during the same polling interval, or whether the trigger app (e.g., your form) fired twice. Add a Tools → Set Variable to log the submission ID and a Google Sheets → Search Rows filter at the start to skip rows that already exist in the sheet.
Error: Date Formatting Is Wrong
Make.com passes timestamps in ISO 8601 format by default. If your Sheets column is formatted as plain text, it stores the raw ISO string, which looks ugly and won’t sort correctly. Fix: format the date inside Make.com before it reaches Sheets using {{formatDate(timestamp; "YYYY-MM-DD HH:mm")}}. This writes a clean, sortable string.
For webhook-based triggers specifically — which are faster than polled triggers — the Make.com webhooks tutorial explains how to set up instant triggers that fire the moment data arrives rather than waiting for the next poll cycle.
Pricing Reality Check
All three scenarios above run comfortably on Make.com’s free tier at low volume. The free plan gives you 1,000 operations per month. At typical solopreneur scale (10-30 leads per week), you’ll use roughly 150-300 operations monthly across all three workflows combined — well inside the free limit.
Once you’re processing more volume or adding operations-heavy steps (like AI modules or multiple API calls per trigger), the Core plan at $9/month adds 10,000 operations and removes the 15-minute minimum polling interval. Pro at $16/month drops polling to 1 minute, which matters for the Watch Changes scenario if you want near-real-time response to status updates.
For a full breakdown of where costs actually accumulate, the Make.com pricing breakdown shows exactly how operations add up at different workflow scales — worth reading before you scale beyond the free tier.
If you’re comparing whether Make.com is the right tool for this kind of data pipeline versus alternatives, the Make.com vs Zapier comparison covers pricing math at scale, and the Zapier alternatives roundup includes options worth considering if you’re just starting out.
Make.com Google Sheets Integration: What It’s Actually Good At
The integration handles append-heavy workflows (logging, capturing, storing) extremely well. It’s reliable for scheduled reads and for simple conditional branching based on cell values. The module selection is mature — Make.com’s official Google Sheets integration page lists the full module library if you want to see what’s available beyond the core six.
Where it’s less clean: complex two-way sync between Sheets and a CRM. If you need real bidirectional sync — changes in HubSpot propagate to Sheets and vice versa — you’re dealing with loop-prevention logic that gets messy fast. For that level of complexity, a dedicated sync tool or a proper database like Airtable is cleaner. See the Make.com vs Airtable comparison for when to graduate from Sheets entirely.
Also: Google Sheets has a 10 million cell limit per spreadsheet. If you’re logging high-volume events (thousands of rows per day), you’ll hit performance degradation before you hit the hard limit. Split your logs by month or quarter rather than keeping one ever-growing sheet. For technical details on Sheets limits, see Google’s support documentation.
The official Make.com Google Sheets documentation is worth bookmarking — it covers module-specific quirks like the Watch Changes row-number offset in more detail than the UI tooltips do.

What to Build Next
Once these three workflows are running, the natural extensions are:
- Add an AI summarization step — pass new lead messages through an OpenAI or Claude module before logging to Sheets, and store a one-line summary alongside the raw message. Useful for high-volume intake forms. The Claude AI for business automation guide shows how to wire that up inside Make.com.
- Connect to a real CRM — use Sheets as the intake layer and push confirmed leads into HubSpot or ActiveCampaign automatically. Setting up a HubSpot sales pipeline first gives you the destination to write into.
- Add a Slack or Telegram notification step to the Watch Changes scenario — so instead of just logging the update, you get a ping the moment a lead status changes.
For ready-to-import starting points instead of building from scratch, the Make.com scenario templates post includes pre-built templates for common solopreneur workflows including lead capture.
Google Sheets isn’t going anywhere as a tool. The workflows above are straightforward to maintain once they’re running. The gap between “spreadsheet I manually update” and “automated data pipeline that happens to be a spreadsheet” is three Make.com scenarios. Build the first one free on Make.com and the rest follow the same pattern.
Building this yourself? Get the workflow pack.
5 ready-to-import n8n workflows — lead capture, invoicing, content repurposing, onboarding, social posting. Free.