How to Build a Make.com Multi-Step Workflow with Filters and Routers
You built your first Make.com scenario. It works. A form submits, a row appears in a spreadsheet, maybe an email fires. Then you look at a real business problem — lead routing by source, conditional follow-up sequences, a client intake that branches by service type — and the single-path scenario you built doesn’t cut it anymore.
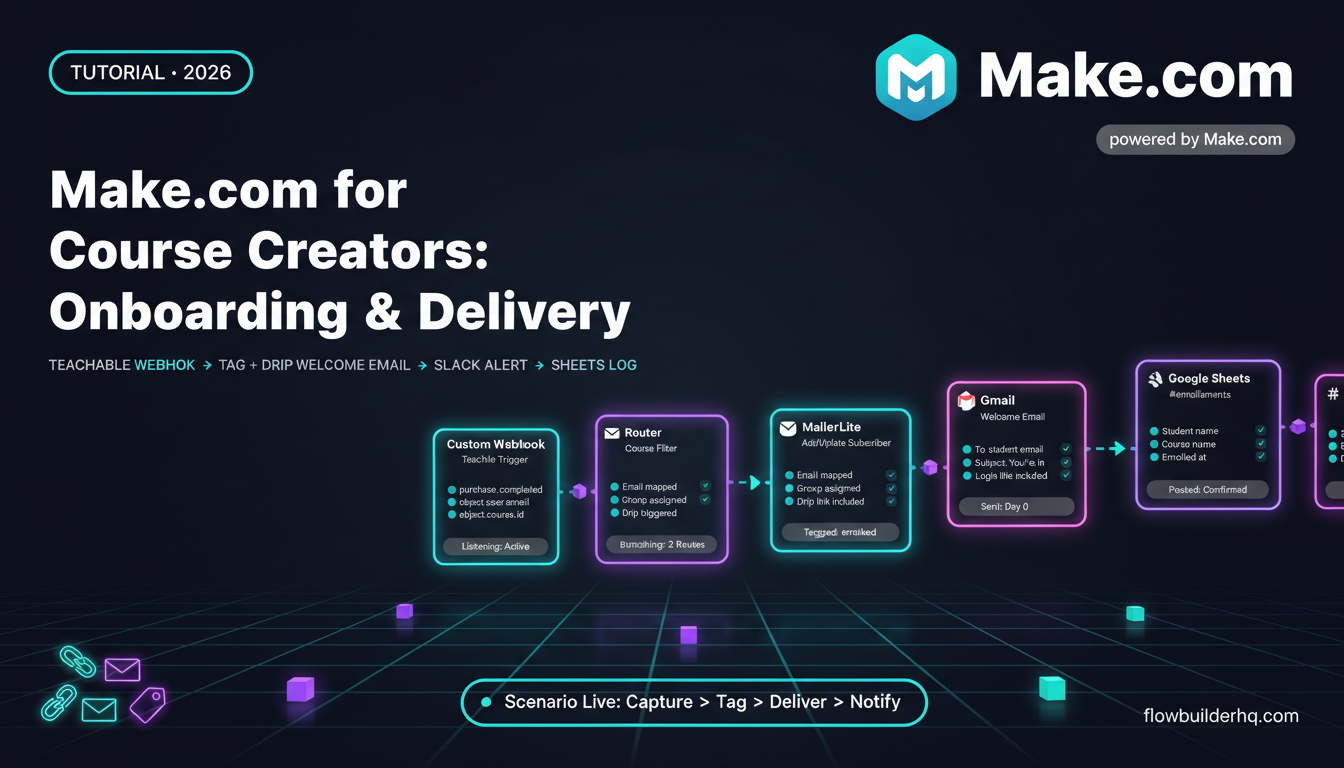
That’s where filters and routers come in. These two tools are what separate a basic automation from one that actually thinks. This tutorial walks through how to build a Make.com multi-step workflow with filters and routers using three concrete examples: lead routing by traffic source, a conditional email sequence, and a branching client intake. Every step is real — no placeholder logic, no toy examples.
If you haven’t built your first scenario yet, start with this beginner walkthrough first. This tutorial picks up right where that one ends.
What Filters and Routers Actually Do (Fast Version)
A filter sits between two modules in Make.com. It evaluates a condition and either passes the bundle through or stops it dead. No branching — it’s a gate. If the condition is false, that execution path simply doesn’t continue.
A router splits one incoming bundle into multiple parallel paths. Each path gets its own filter (called a route condition). The bundle travels down every path whose condition is true. That’s different from a traditional if/else — by default, Make.com will run all matching paths, not just the first one. If you want exclusive branching (only one path runs), you need to set that up deliberately.
Knowing this distinction matters because a lot of multi-path workflow failures come from people expecting router behavior from filters, or not realizing multiple router branches can fire simultaneously.
Setting Up: The Scenario Structure Before You Add Logic
Before you touch a filter or router, build the skeleton. Get your trigger module connected and tested with a real data bundle. Make.com’s visual canvas makes it tempting to wire up logic before you have real sample data — resist that. Run the trigger at least once so every field in the bundle is populated. Filters built against empty fields will silently fail in ways that are frustrating to debug.
For all three examples in this tutorial, the trigger is a webhook receiving form data. If you’re using Typeform, Jotform, or a native HTML form, the structure is the same: your scenario starts with a Custom Webhook module, and Make.com parses the incoming JSON automatically.
For a detailed look at automating intake forms end to end, see this Typeform + Make.com workflow.
Example 1: Lead Routing by Traffic Source
This is the most common real-world use case for routers. A lead submits a contact form. The source field tells you where they came from — organic search, a paid ad, a referral, or a partner. Each source gets different handling: different CRM tags, different notification channels, different response templates.
Step 1: Add a Router After Your Trigger
Click the small arrow that appears when you hover between your webhook module and any downstream module. Select Add a router. Make.com inserts a router node, and your existing connection becomes the first route. You’ll see a plus icon to add more routes.
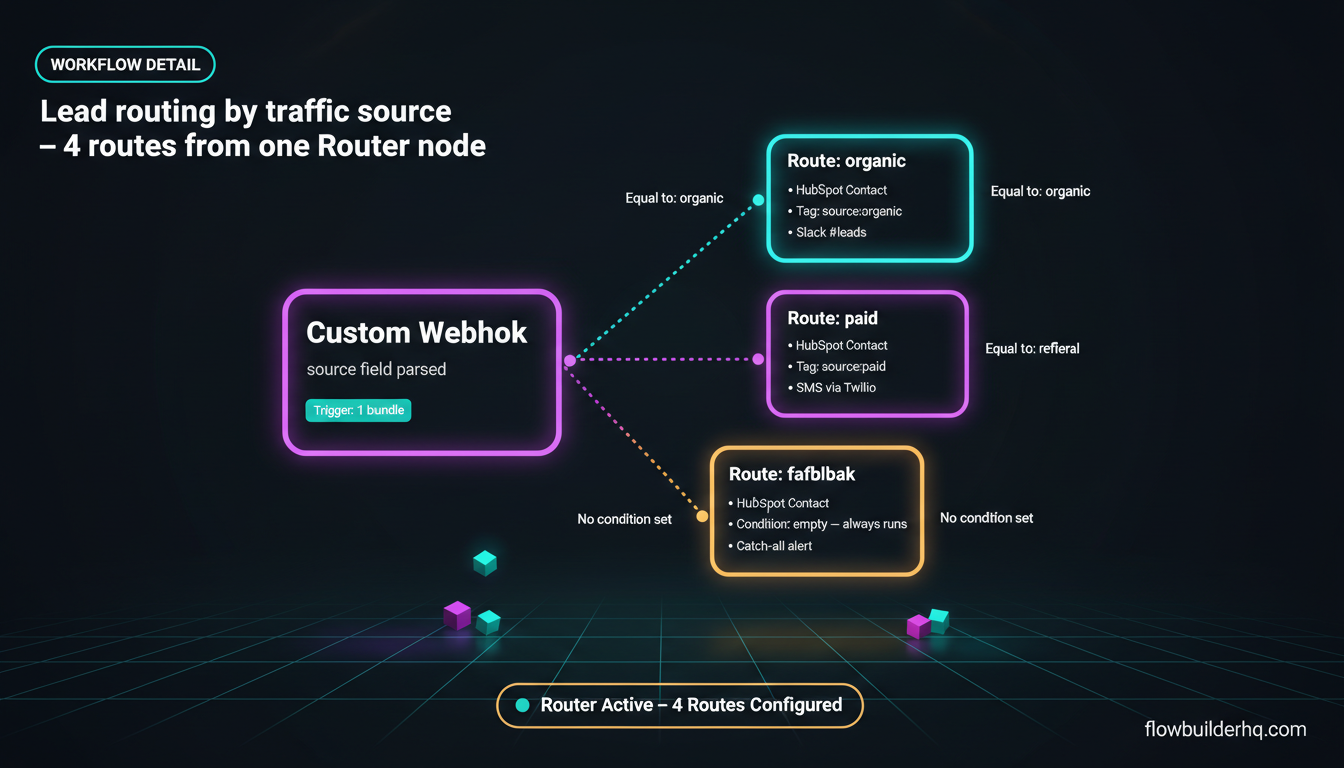
Add four routes total: one for organic, one for paid, one for referral, and one fallback for anything else.
Step 2: Set Route Conditions
Click the wrench icon on the first route path (the small filter icon between the router and the first downstream module). This opens the route condition editor — it works identically to a standalone filter.
For Route 1 (organic):
- Condition:
1. Webhook Data > source— Equal to (case insensitive) —organic
For Route 2 (paid):
- Condition:
1. Webhook Data > source— Equal to (case insensitive) —paid
For Route 3 (referral):
- Condition:
1. Webhook Data > source— Equal to (case insensitive) —referral
For Route 4 (fallback):
- Leave the route condition blank. An empty condition means the route always runs. This catches anything that didn’t match routes 1-3.
Common error here: If your form sends Organic with a capital O but your filter says organic lowercase, a case-sensitive match will fail. Use Equal to (case insensitive) or add a lower() function around the source field in the condition to normalize it.
Step 3: Wire Up Each Route’s Modules
Each route gets its own module chain. For the organic route: add a HubSpot CRM module to create a contact, tag it source:organic, and send a Slack notification to your #leads channel. For the paid route: create the same HubSpot contact but tag it source:paid and trigger an immediate SMS via your preferred SMS module (Twilio, ClickSend, whatever you’re using). For referrals: create the contact and send a templated “thanks for the referral” email to the referring party if that data is in your form.
For more on connecting Make.com to HubSpot specifically, this step-by-step integration guide covers the auth setup and common field mappings.
Example 2: Conditional Email Sequence Trigger
A new subscriber opts in to your list. Depending on which lead magnet they downloaded, they should enter a different email sequence. You have three lead magnets: a checklist, a video course, and a free audit template. Each triggers a different sequence in your email platform.
This is a filter problem, not a router problem — if you’re using a single entry point and want to activate exactly one sequence, standalone filters between modules are cleaner than a router here. But if the data can legitimately match multiple paths (unlikely in this case but worth considering), a router gives you more control.
Step 1: Add Filters Between Your Trigger and Email Platform Modules
Add your trigger module (webhook or form). Then add three separate module chains — one per lead magnet — each starting with the email platform module that adds the subscriber to a specific sequence.
Between the trigger and the first email module, add a filter:
- Condition:
1. Webhook Data > lead_magnet— Equal to —checklist
Between the trigger and the second email module:
- Condition:
1. Webhook Data > lead_magnet— Equal to —video_course
And so on. Each path is independent. Make.com processes all of them, but only the one whose filter condition is true will run its downstream modules.
Step 2: Add a Fallback Notification
Add a fourth path with a filter that uses Does not equal for all three known values (using AND logic). Or more practically: use a router with an empty fallback route. Wire it to a Slack or email alert that tells you an unknown lead magnet value came through. This is how you catch form field changes before they silently break your workflow for weeks.
This kind of defensive pattern — always having a fallback alert — is one of the most valuable habits in automation. If you want to go deeper on what breaks scenarios and how to handle it, the Make.com error handling tutorial covers this properly.
For context on how automated email sequences connect to your CRM, see the broader CRM automation workflow guide.
Example 3: Multi-Path Client Intake
This is the most complex of the three and the one that actually uses both filters and routers together in the same scenario.
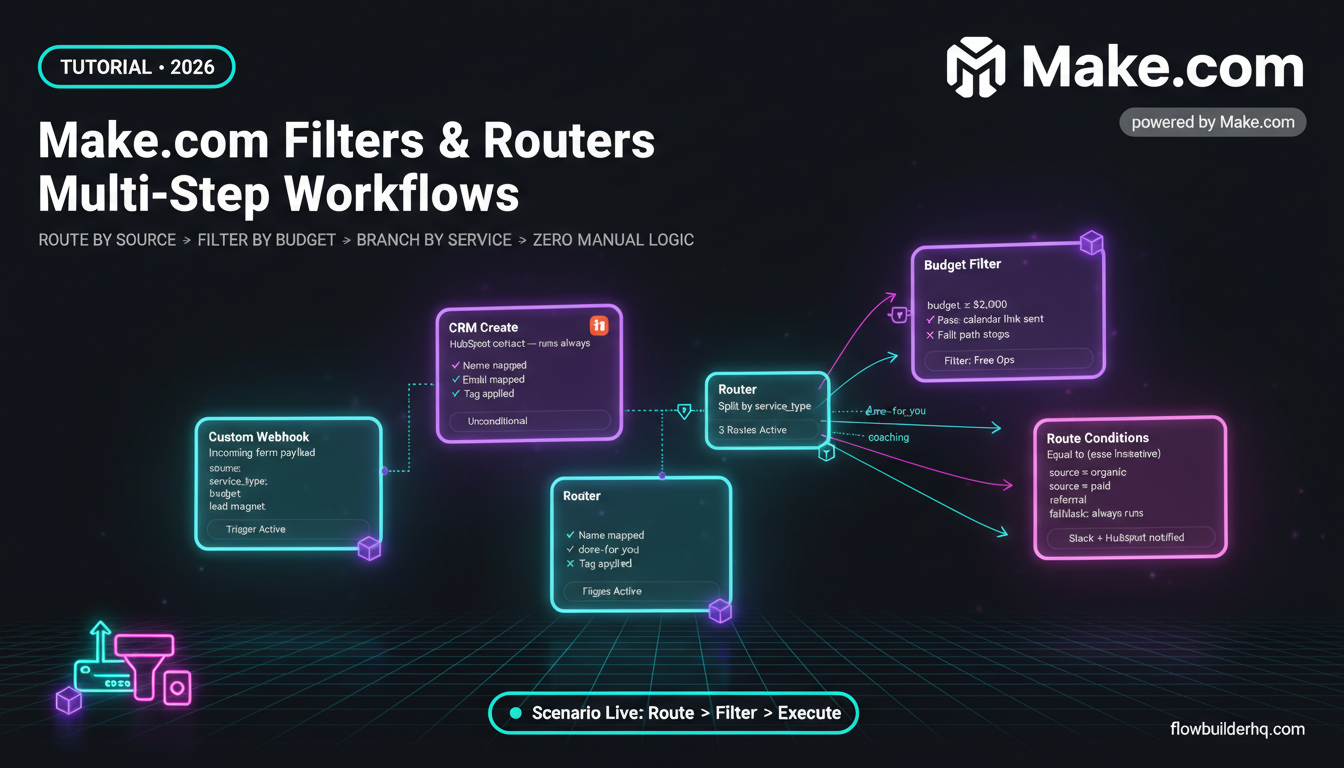
A prospective client fills out your intake form. The form collects: name, email, service type (consulting / done-for-you / coaching), budget range, and how they heard about you. Based on those inputs, the scenario needs to:
- Always create a contact record in your CRM
- Route to different notification channels based on service type
- Filter out low-budget leads before triggering a calendar booking link
- Send a different welcome email per service type
Step 1: The Universal First Module
Put your CRM contact creation module immediately after the trigger, before any router or filter. This runs for every submission regardless of what comes next. You always want a contact record — even if the lead doesn’t qualify for the next steps.
This is a structural decision that matters: anything that should happen unconditionally goes before branching logic, not inside a branch.
Step 2: Budget Filter Before the Calendar Module
After the CRM module, add a filter with a numeric condition:
- Condition:
1. Webhook Data > budget— Greater than or equal to —2000
Only leads with a stated budget of $2,000 or more pass through. Everyone else stops here for this path. Below the filter, put the module that sends the calendar booking link (via email or directly via Calendly’s API if you’re using that integration).
For a full Calendly + Make.com setup, this appointment scheduling workflow covers the exact trigger and notification chain.
Step 3: Router for Service Type
After the CRM creation module (but on a separate path from the budget filter), add a router. Set three routes:
Route 1 — Consulting:
- Condition:
1. Webhook Data > service_type— Equal to (case insensitive) —consulting - Modules: Send Slack DM to you, send a “consulting intake received” email to the client
Route 2 — Done-for-you:
- Condition:
1. Webhook Data > service_type— Equal to (case insensitive) —done-for-you - Modules: Send Slack DM with higher-priority tag, send a “DFY intake received” email with your project questionnaire link
Route 3 — Coaching:
- Condition:
1. Webhook Data > service_type— Equal to (case insensitive) —coaching - Modules: Tag lead in CRM as coaching prospect, send coaching-specific welcome email
This scenario now has two independent branching structures running in parallel: the budget filter path and the service type router path. Both fire from the same trigger, after the same universal CRM creation. That’s a real multi-path scenario.
For a fully built version of this type of intake workflow, this client onboarding Make.com workflow walks through the complete build including the CRM setup.
The Specific Error That Trips Everyone Up: Router vs. Filter Scope
Here’s the mistake that causes the most confusion when building multi-step workflows with filters and routers: putting a filter inside a router branch when it should be on the router branch.
In Make.com, each router path has a route condition (accessed via the wrench/filter icon on the connector line). That’s different from a standalone filter module you drag into the canvas. If you drag a filter module inside a route instead of using the route condition, you’re consuming operations and creating an extra processing layer with no benefit. Use route conditions for router branching. Use standalone filter modules for conditional logic outside of routers.
Another one: If you need a router to behave like a true if/else (only one branch fires), Make.com doesn’t enforce this by default. You need to order your routes intentionally and make conditions mutually exclusive. There is no “else if” built in — you build it with careful condition design.
For a broader look at the automation logic mistakes that silently break workflows like these, this breakdown of common automation errors is worth reading alongside this tutorial.
Operations Cost: What These Scenarios Actually Use
Make.com charges operations per module execution, not per scenario run. A router itself costs 1 operation. Each module inside a route that executes costs 1 operation. Filters are free — they don’t consume operations.
In the client intake example above: 1 (webhook) + 1 (CRM create) + 1 (router) + 2-3 (modules inside the matched route) + 1 (budget filter check, free) + 1-2 (calendar email if budget passes) = roughly 7-9 operations per submission.
On Make.com’s free plan (1,000 ops/month), that’s around 110-140 intake submissions before you hit the ceiling. The Core plan at $9/month gives you 10,000 ops, which is more than enough for most solopreneurs running this kind of workflow. See the full Make.com pricing breakdown for how ops scale across plans if you’re calculating at volume.
Testing Multi-Path Scenarios Without Breaking Live Data
Make.com has a Run once mode that processes only the next incoming bundle. Use this for testing. Send a test form submission with each variation of your data (each lead source, each service type, each budget tier) and watch which paths execute in the scenario visualizer.
The scenario visualizer shows you exactly how many bundles passed through each module and how many were filtered out. A module with a “0 bundles” badge means your filter condition stopped everything — that’s either correct behavior or a logic error, and the visualizer makes it immediately obvious which.
Don’t test with real client data. Create a test contact with a fake email (something like test+organic@yourdomain.com) so you can trace the full execution without polluting your CRM or triggering real emails to real people.
Where to Go After This
Filters and routers are the foundation of conditional automation. Once you’re comfortable with multi-path logic, the next layer is using Make.com’s Iterator and Aggregator modules to process arrays — useful when one trigger returns multiple records (a new order with multiple line items, a batch of leads from a daily report, etc.).
If you’re using Airtable as your data layer instead of or alongside a CRM, this Make.com + Airtable workflow guide shows how filtering and routing work against Airtable data specifically.
For solopreneurs running content-heavy operations, this publishing workflow uses routers to handle multi-platform distribution — same structural concepts as the lead routing example above, applied to content.
Ready to start building? Try Make.com free — the free plan gives you 1,000 operations a month, which is plenty to build and test everything in this tutorial before committing to a paid tier.
Building this yourself? Get the workflow pack.
5 ready-to-import n8n workflows — lead capture, invoicing, content repurposing, onboarding, social posting. Free.