Make.com for Photographers: Automate Client Delivery and Booking Workflows
If you’re a photographer running your business solo or with a small team, you already know the drill: shoot the session, cull and edit, then spend the next hour copying a client’s details into a confirmation email, manually sharing a Drive folder, following up for a testimonial, and somehow remembering to do all of that again for the next booking. That’s not a business — that’s a conveyor belt you’re powering by hand.
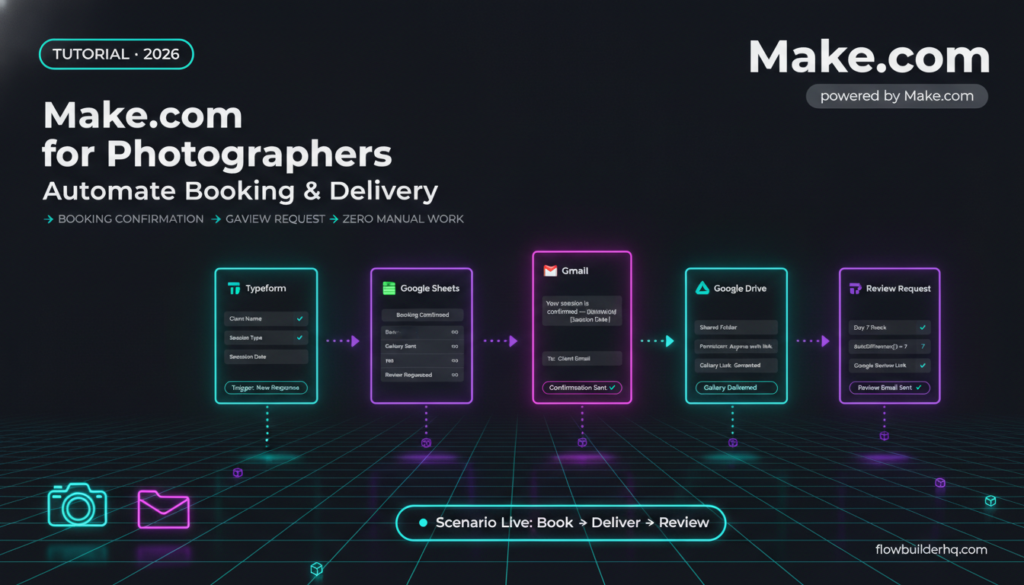
Make.com for photographers changes that equation completely. Three automations — a booking confirmation, a gallery delivery, and a review request — can eliminate the majority of that manual work. And unlike Zapier, where multi-step logic gets expensive fast, Make.com’s operation-based pricing means you can run all three workflows for years on the free plan or spend $9/month on Core when volume picks up.
This tutorial builds those three workflows from scratch. You’ll need a Make.com account, a booking form (Typeform or similar), Google Drive for gallery storage, and Gmail or a transactional email provider. No code required.
Why Make.com Wins Over Zapier for This Use Case
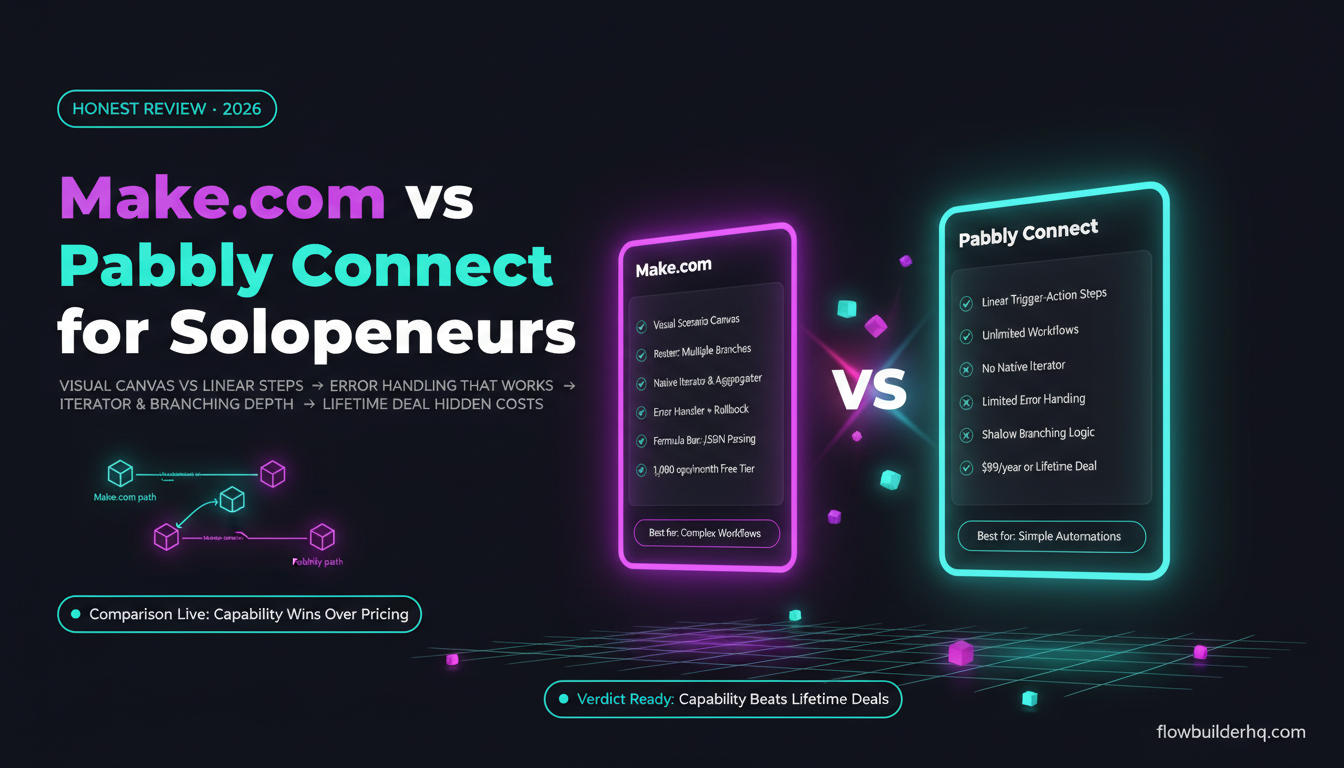
Zapier charges per task. One booking confirmation email — trigger, lookup, send — burns three tasks. Scale that to 20 bookings a month and add gallery delivery and review requests, and you’re well past Zapier’s free tier (100 tasks) and creeping toward the Professional plan at $69/month.
Make.com charges per operation, and its free plan includes 1,000 operations per month. A three-step scenario uses three operations per run. At 20 bookings a month, your entire booking confirmation workflow costs 60 operations. Even if you add gallery delivery and review requests, you’re unlikely to breach the free plan at typical photographer volumes — and the Core plan at $9/month handles serious capacity. The full pricing comparison between Make.com and Zapier shows how dramatic the difference gets at real business scale.
Make.com also handles conditional routing natively. You can branch a workflow so wedding clients get one email template and portrait clients get another — without paying for separate Zaps or using workarounds. That’s the feature photographers specifically need.
What You’re Building: Three Real Workflows
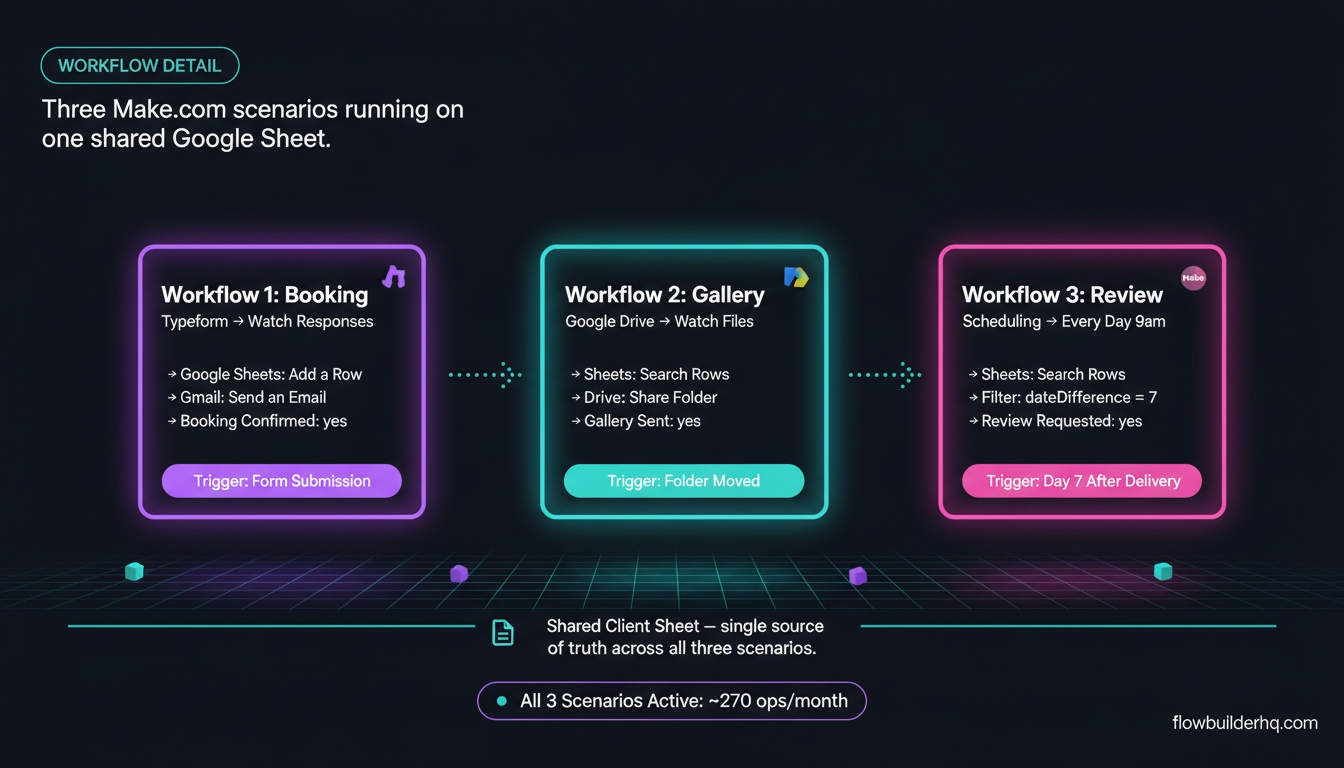
- Workflow 1: Booking confirmation — triggered by form submission, creates a client record, sends a branded confirmation email
- Workflow 2: Gallery delivery — triggered manually or by a Google Drive folder event, sends the client their gallery link with access instructions
- Workflow 3: Review request — triggered 7 days after gallery delivery, sends a follow-up email asking for a Google or Yelp review
Each workflow is a separate Make.com scenario. They share the same Google Sheet as a lightweight client database — which keeps the logic clean and gives you a readable record without paying for a CRM.
Workflow 1: Booking Confirmation Automation
Step 1 — Set Up Your Booking Form
Use Typeform, JotForm, or any form tool that Make.com connects to. Your form needs to capture: client name, email, session type (wedding, portrait, commercial), session date, and any special notes. If you’re already using a booking form, you may not need to change anything.
In Make.com, create a new scenario. Set the trigger module to Typeform → Watch Responses (or your form provider’s equivalent). Connect your Typeform account, select your booking form, and test the trigger by submitting a sample response. Make.com will pull in the field data — confirm the field names match what you’ll reference later.
The same logic used in a Typeform-to-Make.com intake workflow applies directly here — the trigger setup is identical.
Step 2 — Log the Client to Google Sheets
Add a Google Sheets → Add a Row module. Create a sheet with these columns: Client Name, Email, Session Type, Session Date, Notes, Booking Confirmed (yes/no), Gallery Sent (yes/no), Review Requested (yes/no), Gallery Link, Date Booked.
Map each Typeform field to the corresponding column. Set Booking Confirmed to yes as a static value — you’re confirming it by running this scenario. Leave Gallery Sent and Review Requested as no for now. This sheet becomes the shared state that all three workflows read from and write to.
If you want to use Airtable instead of Google Sheets, the module swap is direct — see how Make.com works with Airtable for lightweight project tracking for setup context.
Step 3 — Send the Confirmation Email
Add a Gmail → Send an Email module (or use SMTP if you send from a custom domain). Map the To field to the client’s email from the form data. Write your confirmation email directly in the module body — Make.com supports HTML, so you can include your logo and formatting.
A working template:
Subject: Your session with [Studio Name] is confirmed — [Session Date]

Hi [Client Name],

Your [Session Type] session on [Session Date] is confirmed.
Here's what to expect next:

- You'll receive your edited gallery within [X] business days of your session.
- Reply to this email with any questions.

Looking forward to working with you.

[Your Name]
[Studio Name]
Use Make.com’s variable picker to insert {{1.answers.client_name}}, {{1.answers.session_date}}, and {{1.answers.session_type}} into the template. The exact variable names depend on your form field IDs — Make.com shows them in the data inspector after the test run.
Common Error: Gmail Authentication Loop
If your Gmail module throws a 403: Access Not Configured error on first run, the fix is to disconnect and reconnect the Gmail connection inside Make.com’s connections manager — not inside the module itself. Go to the left sidebar → Connections → find Gmail → click Reauthorize. This clears the OAuth scope issue that appears when the Gmail API wasn’t enabled in your Google Cloud project. Full error recovery patterns are covered in the Make.com error handling tutorial.
Once the email sends cleanly on test, activate the scenario. Every new form submission now triggers this entire chain automatically.
Workflow 2: Gallery Delivery Automation
Gallery delivery has two viable trigger options depending on how you work.
Option A — Manual trigger: You build the scenario but trigger it yourself from Make.com’s dashboard or via a webhook when you’re ready to deliver. This works well if your editing turnaround varies.
Option B — Google Drive trigger: The scenario watches a specific Google Drive folder. When you drop a new folder in (named with the client’s email or session date), Make.com picks it up and kicks off delivery automatically.
Option B is more elegant but requires consistent folder naming. Option A is more reliable for photographers who don’t follow rigid file organization. Build whichever fits your actual workflow — the email sending logic is identical.
Step 4 — Trigger and Look Up the Client Record
For Option B: set the trigger to Google Drive → Watch Files in a Folder. Point it at your “Delivered Galleries” parent folder. When you move a finished gallery folder there, Make.com fires.
Add a Google Sheets → Search Rows module. Search the client sheet by email or session date — whichever you embedded in the folder name. This pulls the client record so you have their name and email for the delivery email.
Step 5 — Generate the Shareable Gallery Link
Add a Google Drive → Share a File/Folder module. Set the sharing permission to “Anyone with the link can view.” The module outputs a shareable URL — map that into the next step. Also update the Google Sheets row to set Gallery Sent to yes and log today’s date in a Delivery Date column. You’ll need that date for Workflow 3.
Step 6 — Send the Gallery Delivery Email
Add another Gmail module. Map the client’s email from the Sheets lookup and write the delivery email:
Subject: Your photos are ready — [Session Date]

Hi [Client Name],

Your gallery is ready to view and download. Here's your private link:

[Gallery Link]

This link won't expire. Download your favourites at full resolution anytime.

A few things to know:
- Right-click any image and select "Download" for full resolution
- Mobile downloads work the same way
- Reply here if anything looks wrong

Thank you for trusting me with this — it was a great session.

[Your Name]
Map {{gallery_link}} from the Google Drive share output into the email body. Test this with a real folder. The delivery email should arrive within seconds of you moving the folder.
This is the same general pattern as automating lead magnet delivery with Make.com — trigger, fetch the asset URL, send the email. The modules are different, the logic is the same.
Workflow 3: Review Request Automation
This is where photographers consistently leave money on the table. A well-timed review request — sent when the client has had a few days to sit with their photos — converts at a dramatically higher rate than one sent at delivery or not at all.
Step 7 — Schedule-Based Trigger
This scenario runs on a schedule, not an event trigger. Set the trigger to Make.com Scheduling → Every day at 9am. Each morning, the scenario checks your Google Sheet for any rows where Gallery Sent is yes, Review Requested is no, and the Delivery Date is exactly 7 days ago.
Add a Google Sheets → Search Rows module with these filters:
- Gallery Sent =
yes - Review Requested =
no
Then add a Tools → Date/Time module to calculate whether today’s date minus the Delivery Date equals 7. Use Make.com’s built-in dateDifference() function: {{dateDifference(now; toDate(Delivery Date); "days")}}. Add a Filter between this module and the email step — only continue if that value equals 7.
Filters are one of the most underused features in Make.com. The guide to building multi-step Make.com workflows with filters and routers covers the exact interface for setting these up if this is your first time using them.
Step 8 — Send the Review Request Email
Subject: Quick favour — would you share your experience?

Hi [Client Name],

I hope you've had a chance to look through your photos from [Session Date].

If you enjoyed working together, I'd really appreciate a quick review. It helps other people find me and means a lot to the business.

Leave a Google review: [Your Google Review Link]

It takes about 60 seconds and makes a real difference. Thank you either way.

[Your Name]
Hardcode your Google review URL directly in the template. It won’t change. After the email sends, update the Google Sheets row to set Review Requested to yes — this prevents the scenario from sending a second request the following morning.
Step 9 — Update the Sheet Row
Add a Google Sheets → Update a Row module. Use the row number returned by the Search Rows module to target the correct record, then set Review Requested to yes. This is the stateful update that keeps the whole system honest.
If you want to collect structured feedback rather than just pushing people to Google, you can add a Tally or Typeform feedback link to this email and capture responses back into Make.com — the client feedback collection workflow with Make.com and Tally is a direct extension of this setup.
Routing by Session Type (Optional but Powerful)
If you shoot multiple session types with meaningfully different client experiences — say, weddings versus headshots — add a Router module after the Typeform trigger in Workflow 1. Route wedding clients to one email template and portrait clients to another. The router is free to use and doesn’t count as extra operations per branch — only the branch that actually executes counts.
This is the kind of conditional logic that breaks Zapier’s pricing model. On Zapier, you’d pay for each path check. On Make.com, you pay only for what runs. For a deeper look at how this plays out in practice, the Make.com vs Zapier comparison for solopreneurs lays out the exact operation math.
Keeping It All Running: Monitoring and Maintenance
Make.com logs every scenario run in the execution history panel. After going live, check runs daily for the first week. Look for:
- Gmail module errors (usually token expiry — reauthorize the connection)
- Google Sheets “Row not found” errors (usually a mismatch in your search filter — check for trailing spaces in the sheet column values)
- Scheduling scenarios that fire but find no matching rows (this is normal — just means no clients hit the 7-day mark that day)
Set Make.com to send you an email notification on scenario errors. That’s in Scenario Settings → Notifications. You don’t need to check manually — the system will tell you when something breaks.
For photographers managing multiple client projects simultaneously, combining this setup with a simple project tracking layer is worth considering. The approach to client management without a full CRM outlines when a Google Sheet is enough and when you need to graduate to something more structured.
If you want to understand how this kind of automation fits into a broader business system, the workflow automation prioritization framework for solopreneurs helps you decide which manual tasks to target next once these three are running.
What This Setup Costs
Make.com free plan: 1,000 operations/month. Three workflows at three operations per run each. At 30 bookings a month (aggressive for a solo photographer), you’re using roughly 270 operations — well inside the free tier. If you’re shooting 100+ sessions a month, Core at $9/month gives you 10,000 operations, which is more than enough. Zapier Professional at $69/month handles the same volume. That’s a $720/year difference for identical functionality.
The tools you already have — Typeform, Google Drive, Gmail — are free at the scale this tutorial targets. Your total new spend is $0 to start, and Make.com’s free plan covers most photographers completely.
For reference, Make.com’s full pricing page shows the operation limits per plan if you want to stress-test the math against your own volume.
What to Build Next
Once these three workflows are stable, the logical extensions are:
- Contract delivery automation: Trigger a DocuSign or PandaDoc contract send immediately after the booking confirmation, triggered by the same Typeform submission
- Invoice automation: Connect to QuickBooks or Wave via Make.com to generate and send an invoice at booking
- Session reminder: Schedule an email 48 hours before the session date with location, timing, and what to wear — pull the session date from the sheet and do the same date-difference logic as Workflow 3
Each of these is one additional scenario, typically 3-5 modules. The full client onboarding automation walkthrough shows how to stack these scenarios into a complete onboarding sequence without overcomplicating the setup.
The underlying structure — form trigger → sheet log → conditional email — is reusable across every service business. If you want to see how this same pattern applies in other contexts, the Make.com for virtual assistants post covers a nearly identical client task automation stack.
Build the booking confirmation first. Get one clean run. Then add gallery delivery. Then the review request. Three scenarios, a few hours of setup, and the admin work that was eating your evenings is gone.
Start with a free Make.com account — no credit card needed, and the free plan is enough to run all three workflows at typical photography volumes.
Building this yourself? Get the workflow pack.
5 ready-to-import n8n workflows — lead capture, invoicing, content repurposing, onboarding, social posting. Free.