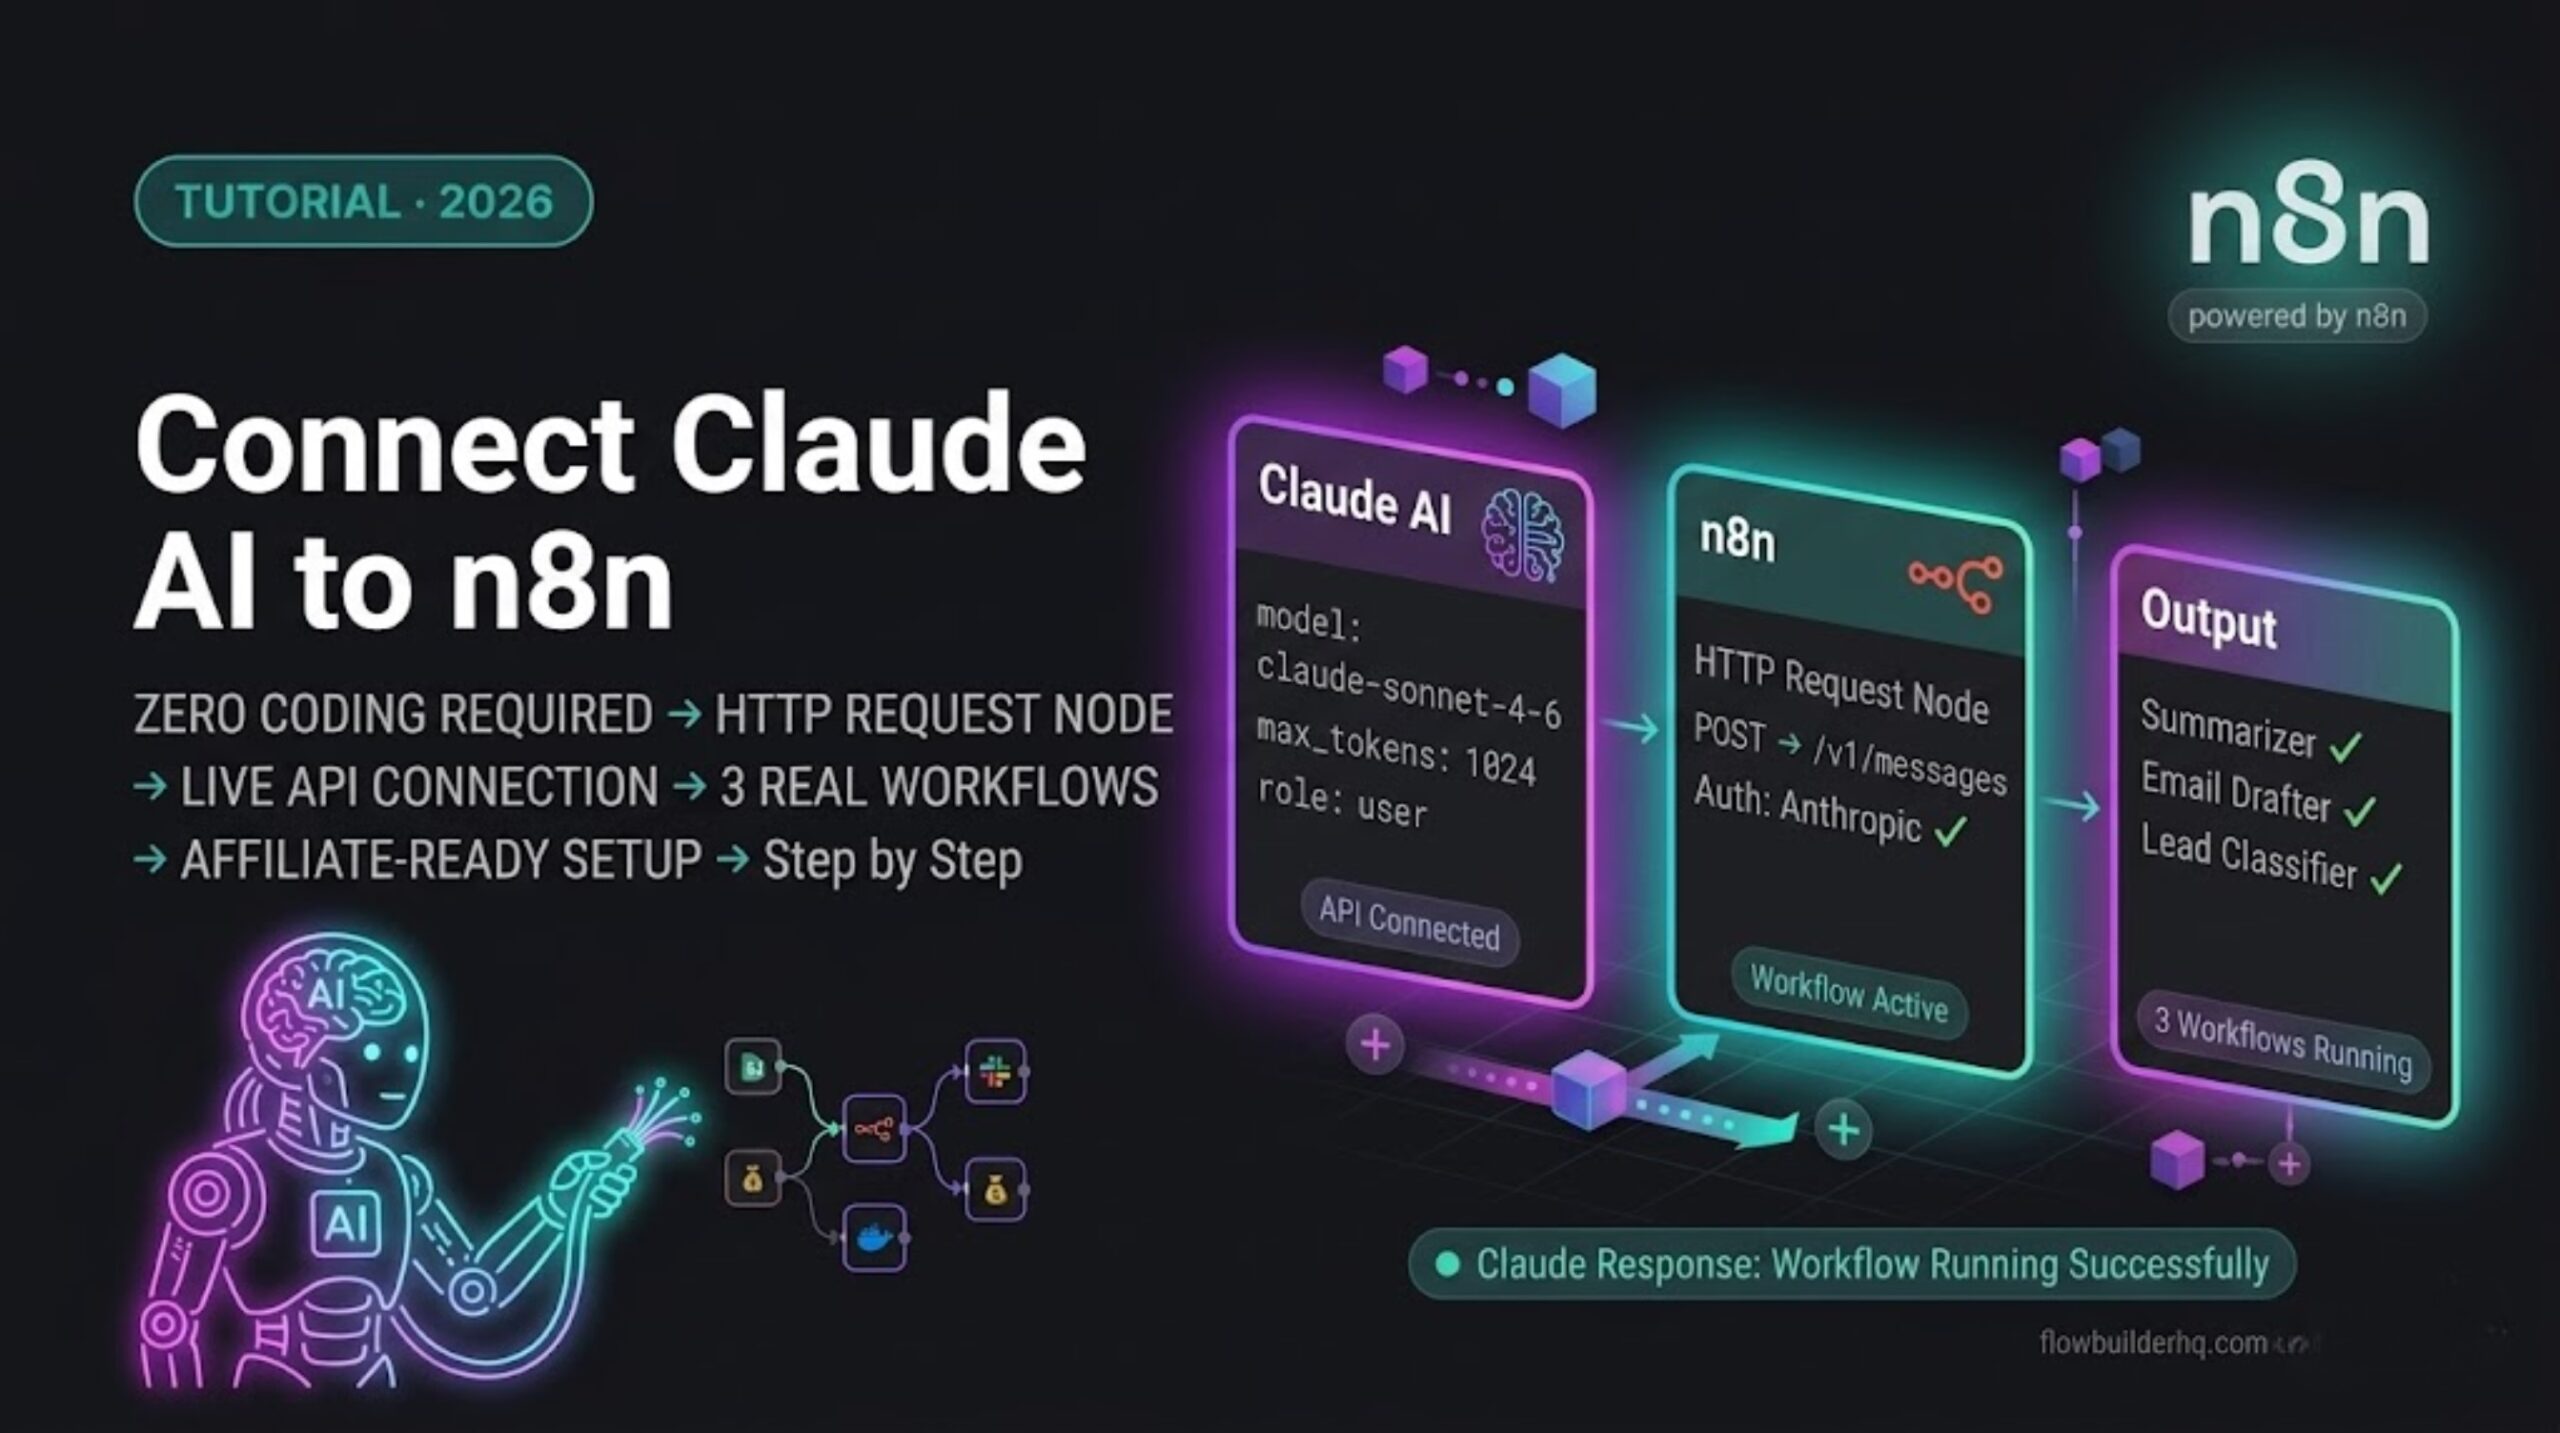
How to Connect Claude AI to n8n (And Actually Use It in Your Workflows)

What You’ll Build
If you want to learn how to connect claude AI to n8n by the end of this tutorial you’ll have Claude AI wired into n8n and running in three practical workflows:
- Summarizer: Pulls content from any source → sends it to Claude → returns a clean summary into Google Sheets or Notion
- Email drafter: New CRM lead comes in → Claude writes a personalized outreach email → saves draft to Gmail
- Lead classifier: Form submission arrives → Claude reads the response → scores and routes the lead based on fit
All three use the same core connection method — the n8n HTTP Request node calling the Anthropic API directly. Once you understand the pattern, you can drop Claude into any workflow in under 10 minutes.
Time to complete: 60–90 minutes for all three workflows.
Prerequisites
- n8n running — Cloud or self-hosted. Both work identically for this tutorial.
- Anthropic API key — get one at console.anthropic.com. You’ll need a paid account (pay-as-you-go). Claude API pricing is per token — for the workflows in this tutorial, costs run under $5/month for typical solopreneur volumes.
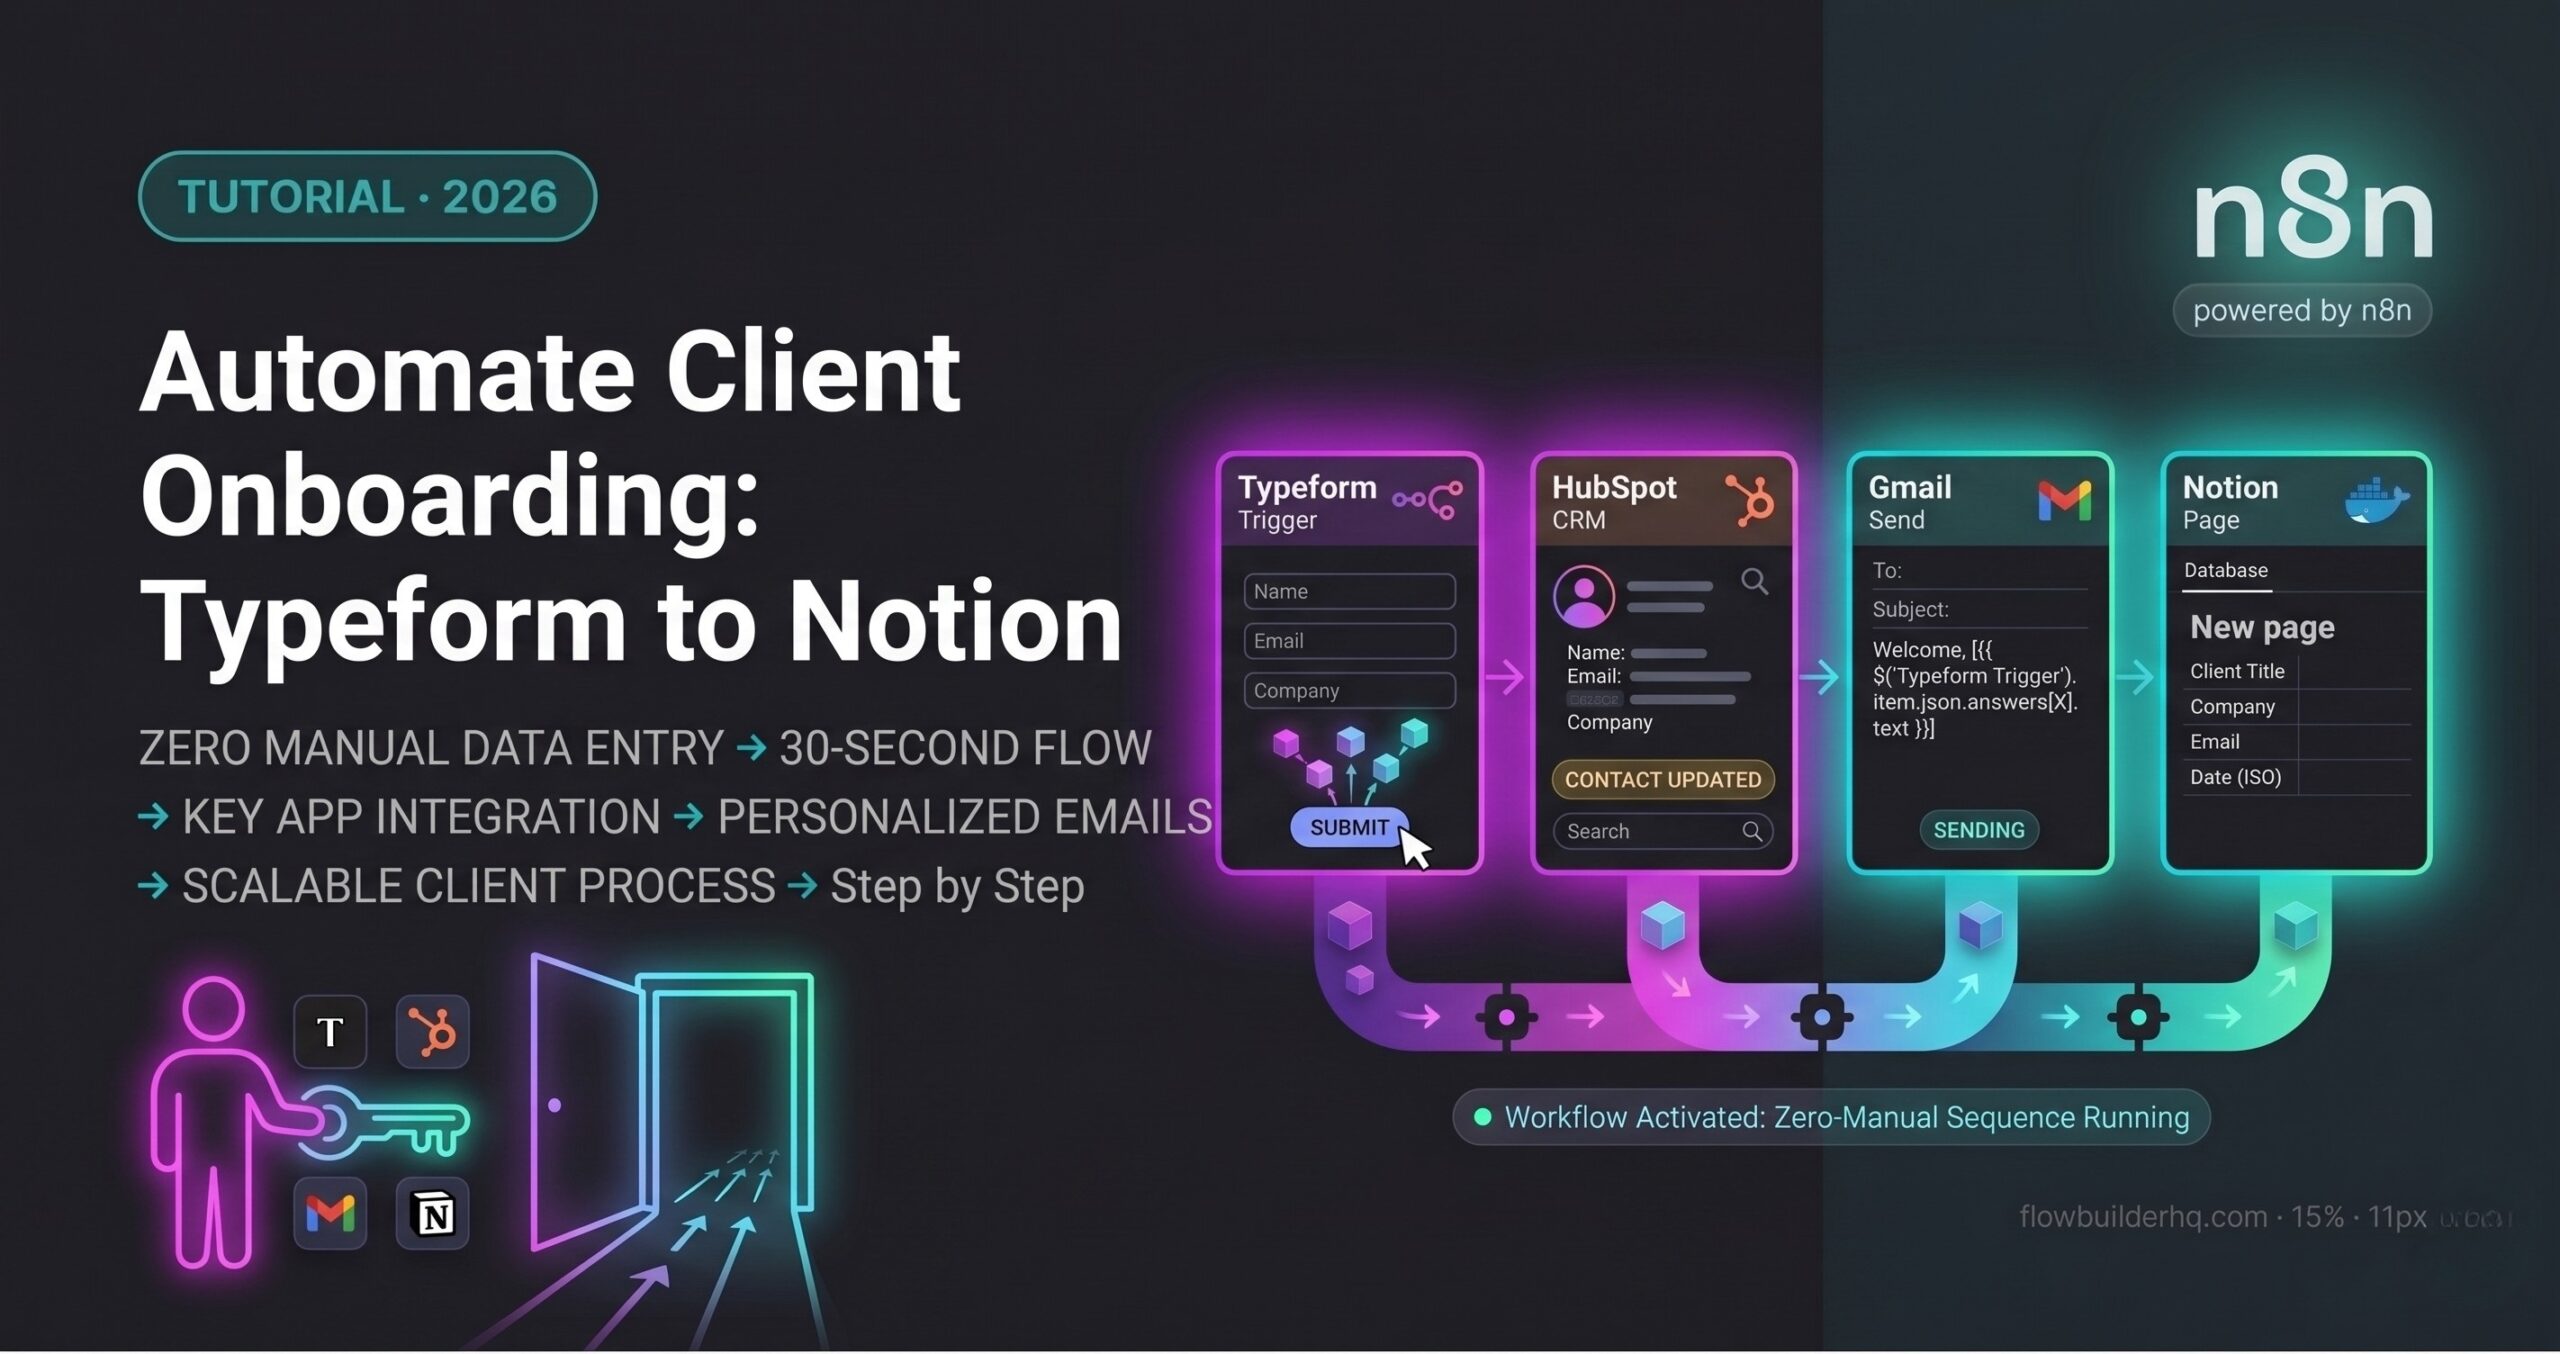
- Basic n8n familiarity — you should know how to add nodes and map data between them. If you’re starting from scratch, build the client onboarding workflow first.
[INTERNAL LINK: post about how to automate client onboarding with n8n
Method 1 — HTTP Request Node (Recommended)
This is the primary method. The HTTP Request node calls the Anthropic API directly — no third-party integration required, full control over every parameter, and works on every n8n version including self-hosted.
Step 1 — Store Your API Key as a Credential
In n8n, go to Credentials → New Credential → Search “Anthropic” Select Anthropic account Paste your API key into the API Key field Save and name it “Anthropic API”
In your HTTP Request node, set:
- Authentication: Predefined Credential Type
- Credential Type: Anthropic
- Select the credential you just created
n8n handles the x-api-key header automatically. Do not add it manually.
You’ll reference this credential in every HTTP Request node that calls Claude.
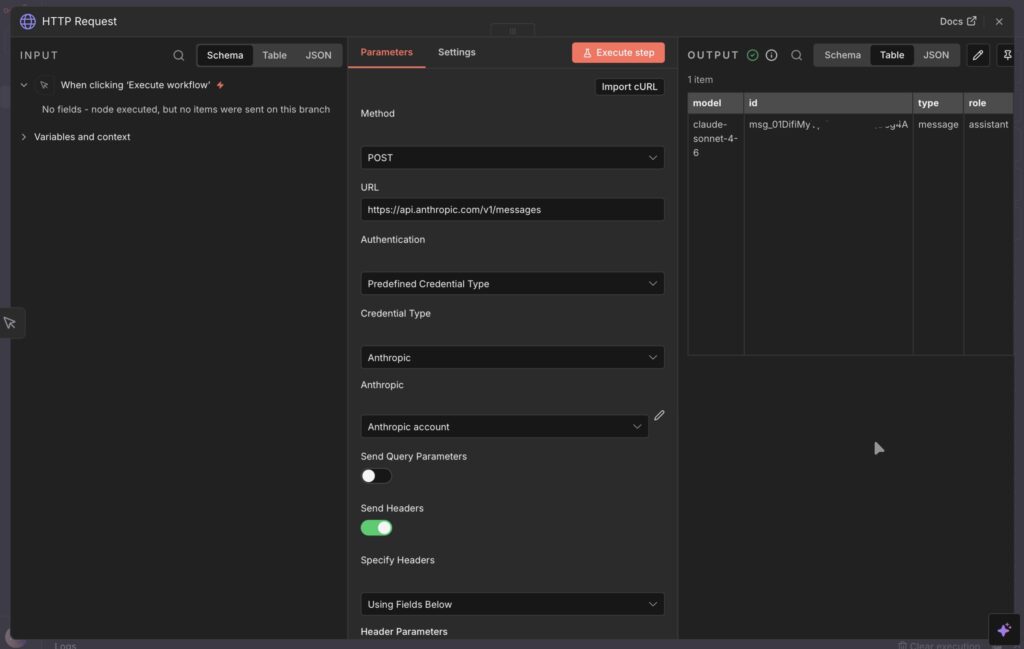
Step 2 — Configure the HTTP Request Node
Add an HTTP Request node to your workflow and configure it as follows:
- Method: POST
- URL:
https://api.anthropic.com/v1/messages - Authentication: Select the Anthropic API (Header Auth) credential you created in Step 1.
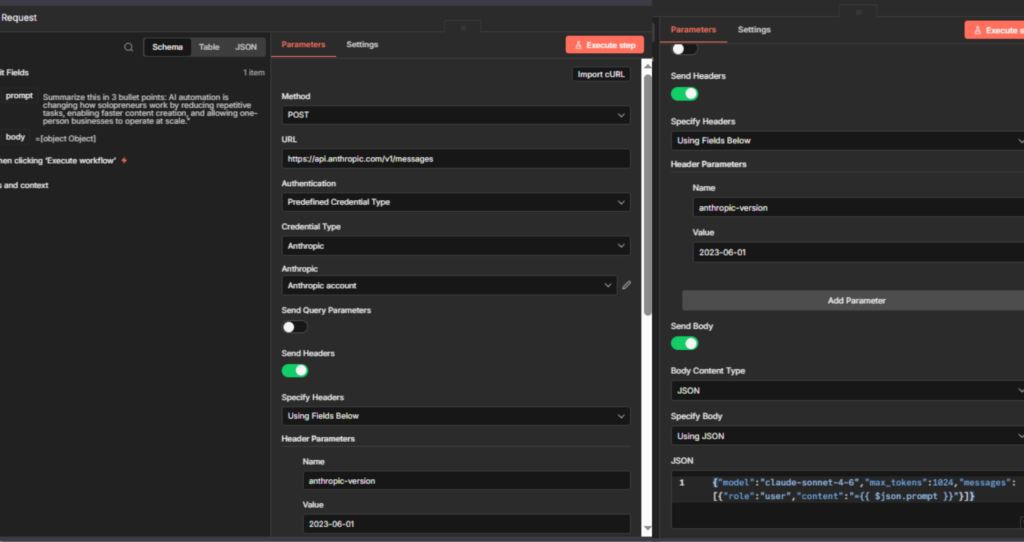
- Headers — add this:
anthropic-version:2023-06-01
Body: Set Body Content Type to JSON and Specify Body to Using JSON. In the JSON field, paste this exactly:{"model":"claude-sonnet-4-6","max_tokens":1024,"messages":[{"role":"user","content":"TEST PROMPT"}]}
Click Execute step to confirm the connection works. You should get a valid response from Claude.
Once confirmed, replaceTEST PROMPTwith your dynamic expression:{"model":"claude-sonnet-4-6","max_tokens":1024,"messages":[{"role":"user","content":"={{ $json.prompt }}"}]}
This two-step approach — hardcode first, then add expressions — lets you isolate connection issues from data mapping issues. If the hardcoded version fails, the problem is your credential or headers. If only the expression version fails, the problem is your upstream node output.
Step 3 — Extract Claude’s Response
Claude’s API returns a JSON object. The text response sits at:
{{ $json.content[0].text }}Use this expression in any downstream node to access what Claude wrote. Map it to a Google Sheets column, a Gmail draft body, a Notion page property — wherever the output needs to go.
Common issue: 401 Unauthorized error on the HTTP Request node. This means the credential isn’t attached correctly. Go back to the node → Authentication tab → confirm the Anthropic API Header Auth credential is selected. Also verify the header name is exactly x-api-key — lowercase, with a hyphen.
Common issue: 400 Bad Request with message anthropic-version header is required. Fix: add the anthropic-version: 2023-06-01 header to your HTTP Request node. It’s required on every call.
Method 2 — Community Node (Alternative)
If you’re on n8n self-hosted and want a cleaner interface without writing raw JSON, the community Claude node is worth installing.
Installation:
- Go to Settings → Community Nodes
- Search:
n8n-nodes-anthropicorn8n-nodes-claude - Install → restart n8n
- The Claude node appears in your node library
When to use it: Quick prototyping, simpler prompts, or if you’re sharing workflows with non-technical team members who need to edit prompts without touching JSON.
When to stick with HTTP Request: Any workflow requiring custom headers, streaming responses, system prompts with complex formatting, or if you’re on n8n Cloud where community node installation is restricted on lower plans.
The rest of this tutorial uses the HTTP Request method — it works on every setup and gives you full control.
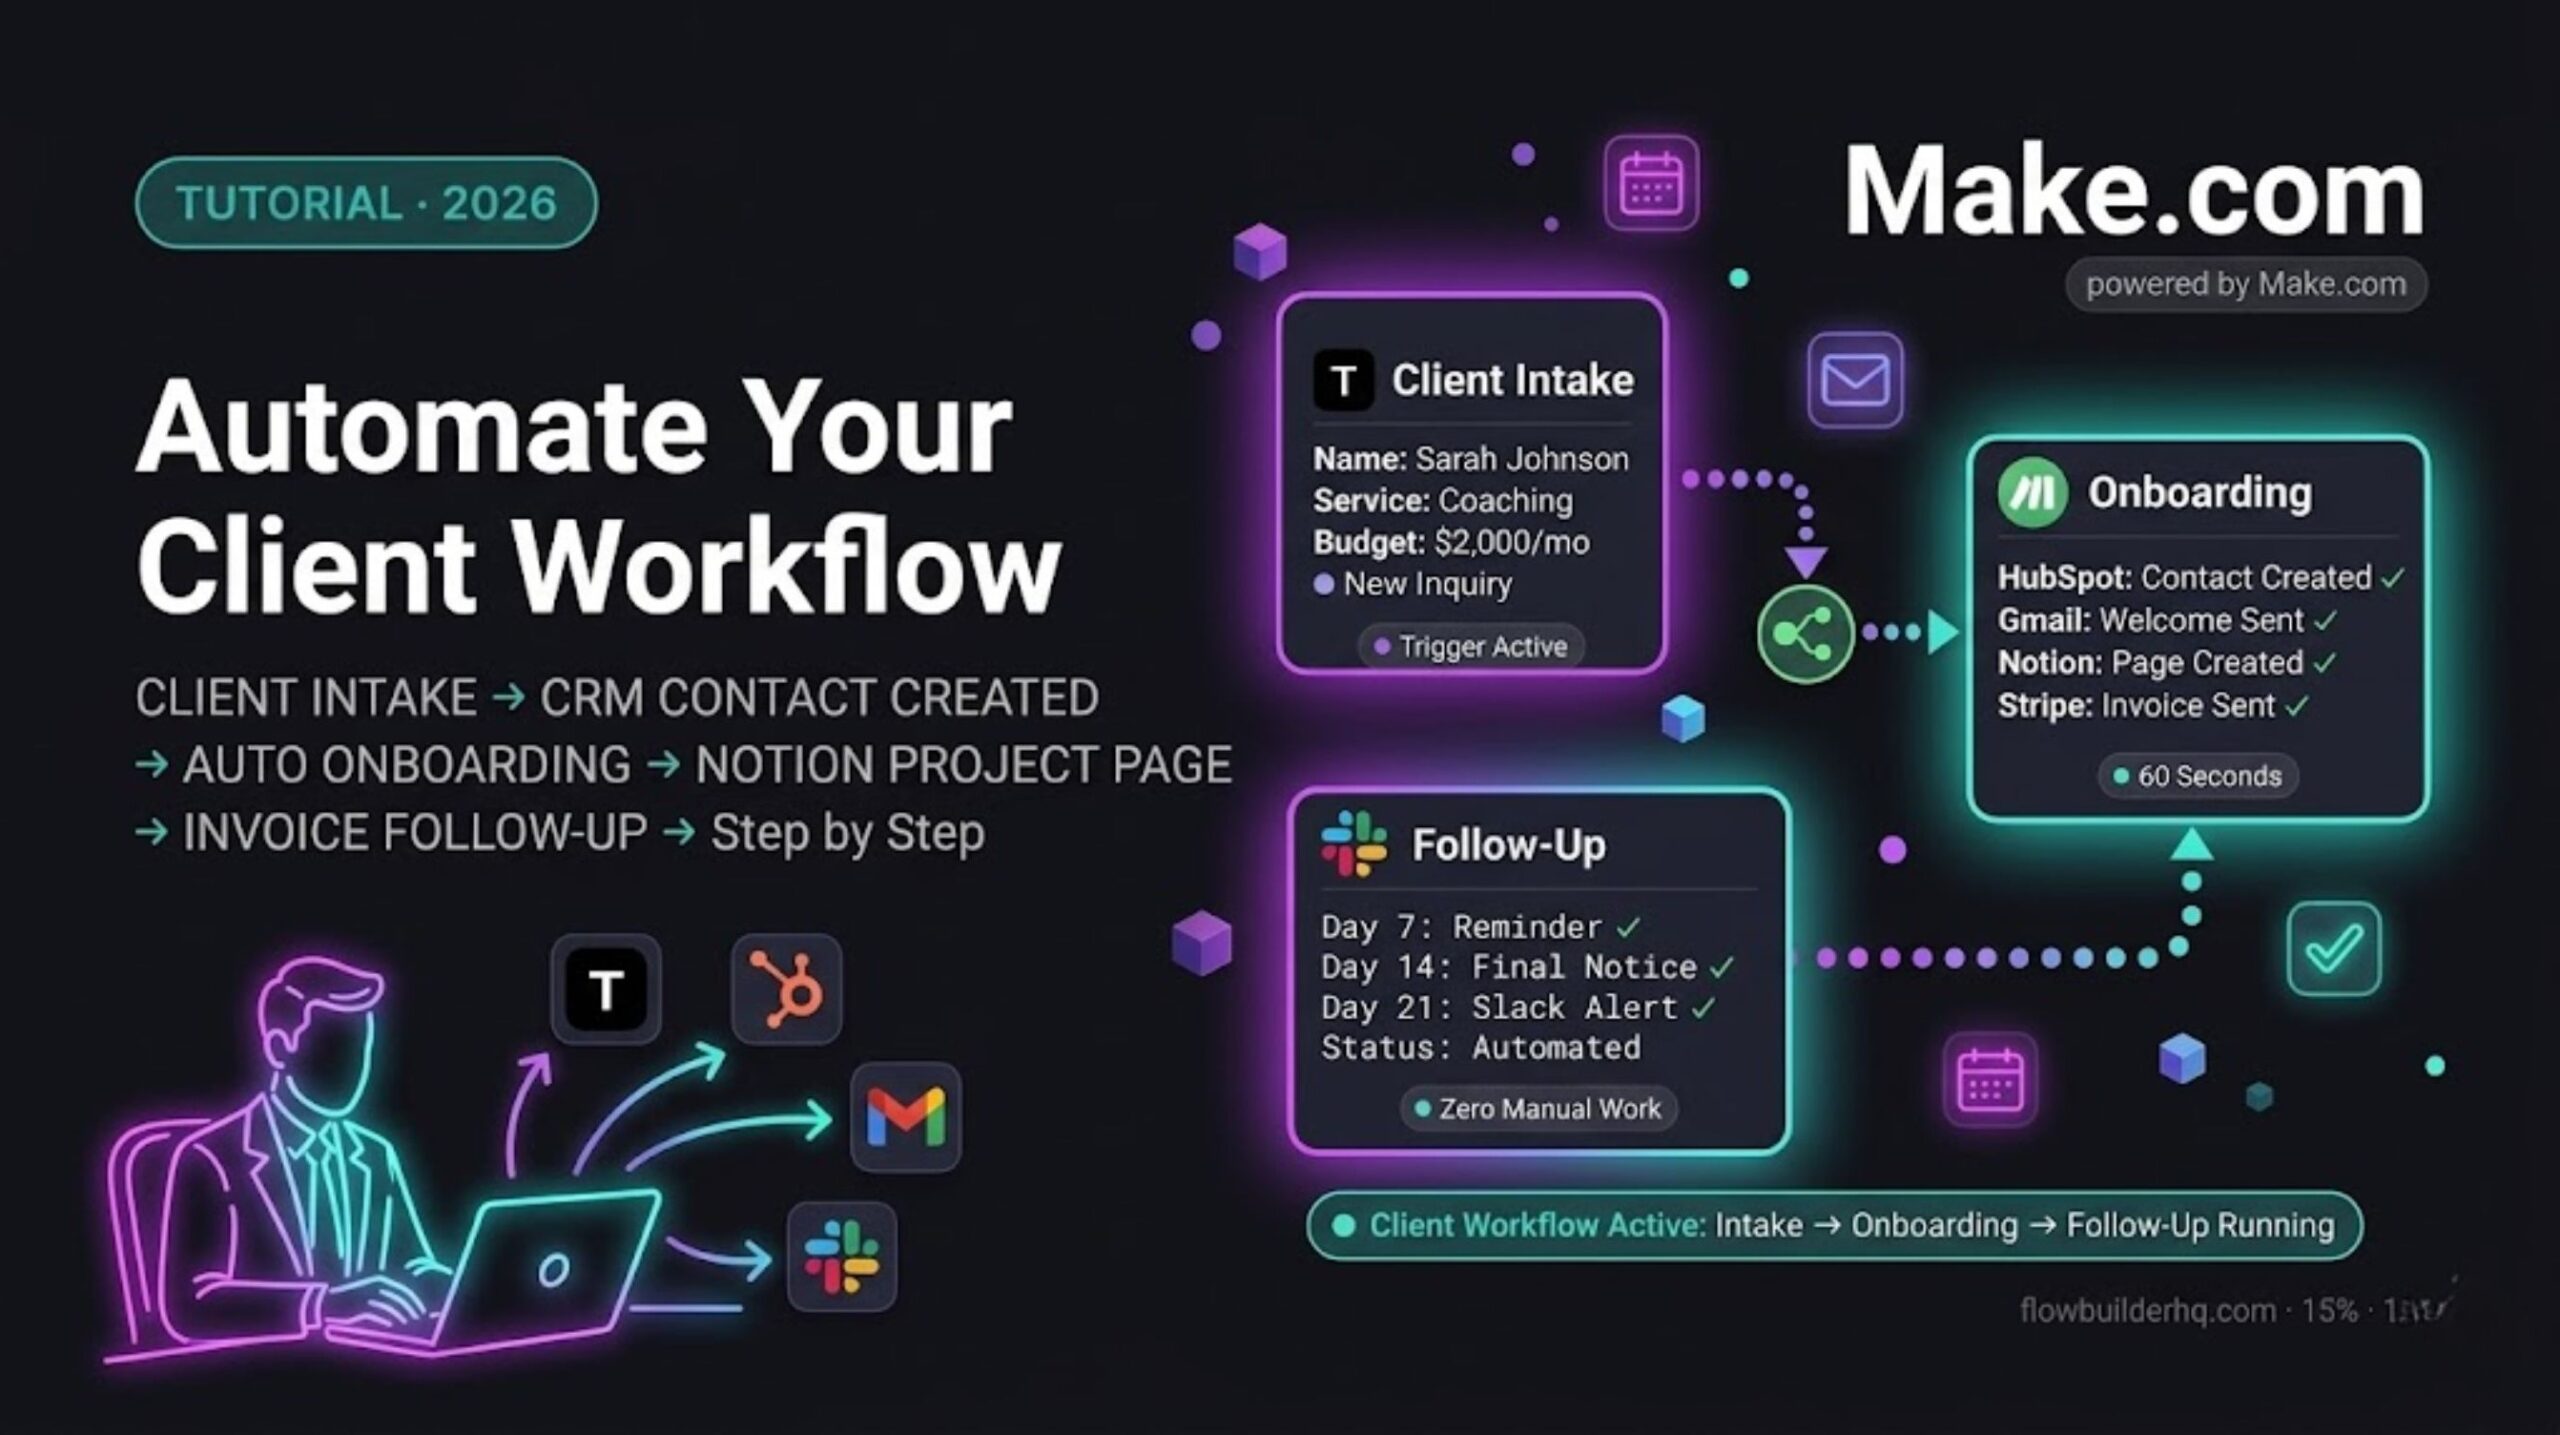
Workflow 1 — Automatic Content Summarizer
Pull articles, emails, or documents into n8n → Claude summarizes them → summaries saved to Notion or Google Sheets for review. Practical for a daily digest of competitor blog posts, newsletter summaries, or client email thread summaries before calls.
Step 1 — Schedule Trigger
Add a Schedule Trigger node — set to run daily at 7am.
Step 2 — Fetch Content
- Summarizing blog posts: use the RSS Feed Read node with your target feed URL
- Summarizing emails: use Gmail → Get Messages with a label filter
- Output: raw text content passed to Claude
⚠️ Before mapping: Run the RSS Feed Read node and check its output panel. The content field name varies by feed — it could becontent,contentSnippet, orsummary. Use whichever one contains the full article text.
Step 3 — HTTP Request (Claude)
Configure as in Method 1. Set the body content field to:
{
  "model": "claude-opus-4-6",
  "max_tokens": 600,
  "messages": [
    {
      "role": "user",
      "content": "Summarize the following in 3 actionable bullet points. Skip the intro and get straight to the facts:\n\n{{ $json.content }}"
    }
  ]
}
Step 4 — Google Sheets → Append Row
- Columns: Date, Source URL, Summary
- Summary field:
{{ $json.content[0].text }} - Run → your sheet populates with Claude’s summaries automatically
Tip: Add a Split In Batches node before the Claude HTTP Request if your trigger returns multiple items. This processes each article individually rather than dumping everything into one prompt.
Workflow 2 — Personalized Email Drafter
New lead enters HubSpot → Claude reads their details → writes a personalized first outreach email → saves it as a Gmail draft for you to review and send. Claude reads the lead’s company, role, and form answers and writes an email that references their specific situation — not a mail merge, an actual draft.
Step 1 — HubSpot Trigger
Add node: HubSpot → On New Contact Created (webhook trigger).
Step 2 — Get Full Contact Details
- Add node: HubSpot → Get Contact
- Pull: first name, company, job title, any notes or form answers
⚠️ Before mapping: Run the HubSpot Get Contact node and click its output panel. Find the exact field names n8n returns for your account — they may differ from the ones shown here. Replace$json.firstname,$json.company, and$json.service_typewith whatever you see in your output.
Step 3 — HTTP Request (Claude)
Change your prompt to include a “No Preamble” instruction to ensure the JSON is clean:
{
"model": "claude-sonnet-4-6",
"max_tokens": 400,
"messages": [
{
"role": "user",
"content": "Write a short, professional outreach email to {{ $json.firstname }} at {{ $json.company }}. They are interested in {{ $json.service_type }}. \n\nGoal: Acknowledge their specific interest and ask for a 15-minute intro call. No 'I hope you're doing well'—keep it modern and punchy. Under 120 words."
}
]
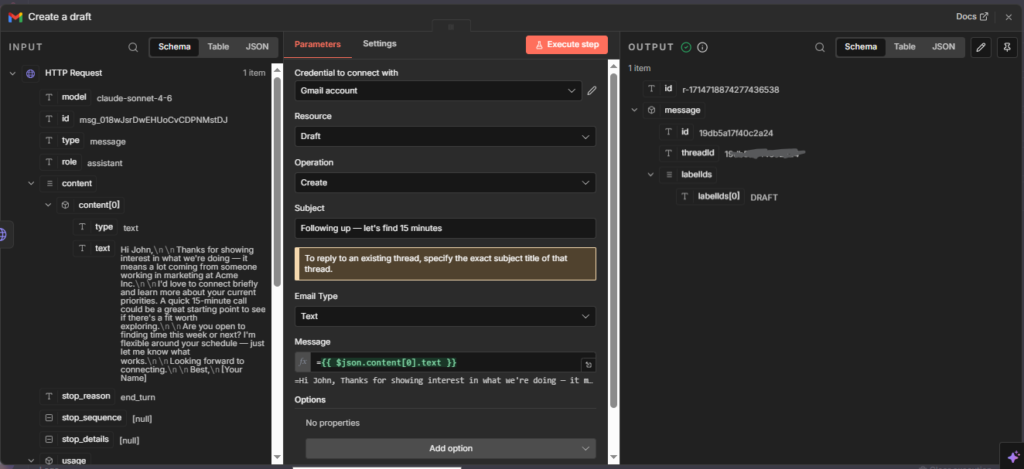
}Step 4 — Gmail → Create Draft
- To: lead’s email from HubSpot
- Subject: write a fixed subject or add a second Claude call to generate one
- Body:
{{ $json.content[0].text }} - The draft appears in your Gmail drafts folder — review, personalize if needed, send
Workflow 3 — Lead Classifier and Router
Form submission comes in → Claude reads the answers → scores the lead as High, Medium, or Low fit → routes them to different HubSpot pipelines or sends different follow-up sequences. Claude reads actual answers — budget range, timeline, specific pain points — and makes a judgment call the same way you would manually.
Step 1 — Typeform Trigger
Add node: Typeform Trigger — your inquiry or discovery form.
Step 2 — HTTP Request (Claude)
The prompt needs to return structured output you can parse in n8n:
{
  "model": "claude-sonnet-4-6",
  "max_tokens": 200,
  "messages": [
    {
      "role": "user",
      "content": "Classify this lead as HIGH, MEDIUM, or LOW fit based on this input: {{ $json.budget }}. \n\nRespond ONLY with a raw JSON object. No markdown blocks, no intro text. \n\nFormat: {\"score\": \"HIGH\", \"reason\": \"one sentence summary\"}"
    }
  ]
}
Step 3 — Parse Claude’s JSON Response
In a Set node, add a field:
- Name:
parsed - Value:
={{ JSON.parse($json.content[0].text) }}
Then reference {{ $json.parsed.score }} and {{ $json.parsed.reason }} in your Switch node. No code required.
Step 4 — Switch Node
- Condition 1:
score= “HIGH” → HubSpot high-priority pipeline + immediate Slack alert - Condition 2:
score= “MEDIUM” → HubSpot standard pipeline + automated email sequence - Condition 3:
score= “LOW” → HubSpot nurture list + no immediate follow-up
Step 5 — HubSpot → Update Contact
- Add the score and reason as custom properties on the contact
- Every contact in HubSpot now has Claude’s qualification score visible in their record
Common issue: Claude occasionally returns the JSON with extra text around it. Fix: add this to the prompt: “Respond with only the JSON object. No other text before or after it.” This eliminates the parsing error in the Code node.
Prompt Engineering Tips for n8n Workflows
Be explicit about output format. If you need JSON, say “respond only with valid JSON.” If you need bullet points, say “respond with exactly 3 bullet points, no intro sentence.” Ambiguous prompts produce inconsistent outputs that break downstream nodes.
Set a max_tokens ceiling. For classification tasks, 150 tokens is plenty. For summaries, 500. For email drafts, 300. Setting this prevents runaway responses that break your field mapping.
Use system prompts for consistent persona. Add a system field to your API call body to set Claude’s role once rather than repeating it in every user message:
{
  "model": "claude-opus-4-5",
  "max_tokens": 300,
  "system": "You are a professional business consultant assistant. Always respond concisely and professionally.",
  "messages": [
    {
      "role": "user",
      "content": "{{ $json.input }}"
    }
  ]
}
Test with edge cases. Run your workflow with unusual inputs — very short form answers, missing fields, non-English text — before activating it. Claude handles these gracefully but your downstream node mapping might not.
Token Cost Estimate
| Workflow | Avg tokens per run | Est. cost per run | 500 runs/month |
|---|---|---|---|
| Summarizer | ~800 | ~$0.004 | ~$2.00 |
| Email drafter | ~400 | ~$0.002 | ~$1.00 |
| Lead classifier | ~200 | ~$0.001 | ~$0.50 |
At typical solopreneur volumes, Claude API costs for all three workflows combined run under $5/month. This is not a meaningful line item.
What to Build Next
These three workflows are the foundation for AI-augmented automation. Once they’re running, the natural next step is combining them — a lead comes in, Claude classifies it, writes the outreach email, and routes it, all in one workflow without your involvement.
n8n Cloud handles all of this on the Starter plan at $8/month
→ Try n8n Cloud