How to Track Leads in HubSpot Free CRM Without a Sales Team
HubSpot’s free CRM was built for sales teams. Here’s how to make it work when it’s just you.
Most HubSpot tutorials assume you have pipeline stages for SDRs, hand-off points between reps, and someone whose job it is to update deal records. You have none of that. You’re the one sending the proposal, following up three days later, and closing the deal — all while doing the actual client work.
This tutorial is specifically about how to track leads in HubSpot free CRM as a solo operator. No team configuration. No enterprise features. Just a practical system that tells you who’s in your pipeline, where they are, and what needs to happen next — without spending your mornings clicking through CRM records.
If you’re still deciding whether HubSpot free is even the right tool, check out our comparison of Notion CRM vs HubSpot Free before going further. If you’ve already committed, let’s get into it.
Why Most Solopreneurs Set Up HubSpot Wrong
The default HubSpot pipeline has five stages: Appointment Scheduled, Qualified to Buy, Presentation Scheduled, Decision Maker Bought-In, Contract Sent. That’s a B2B SaaS sales motion with three people involved. It maps to nothing in a solo service business.
When the stages don’t match your actual process, you stop updating them. After two weeks, the pipeline is stale. After a month, you’re back to managing leads in your inbox or a spreadsheet.
The fix isn’t more discipline — it’s a pipeline built around how you actually work. Before touching a single HubSpot setting, map your real lead lifecycle on paper. Mine typically runs: first contact → proposal sent → follow-up needed → closed (won or lost). Four stages. That’s it. You can always add more later, but four stages you’ll actually use beats eight you won’t.
For a deeper look at the initial setup process, this walkthrough on building your HubSpot sales pipeline covers the configuration side. This tutorial picks up where that one leaves off — at the operational level, once your pipeline exists.
Step 1: Rebuild Your Pipeline Stages Around Your Real Process
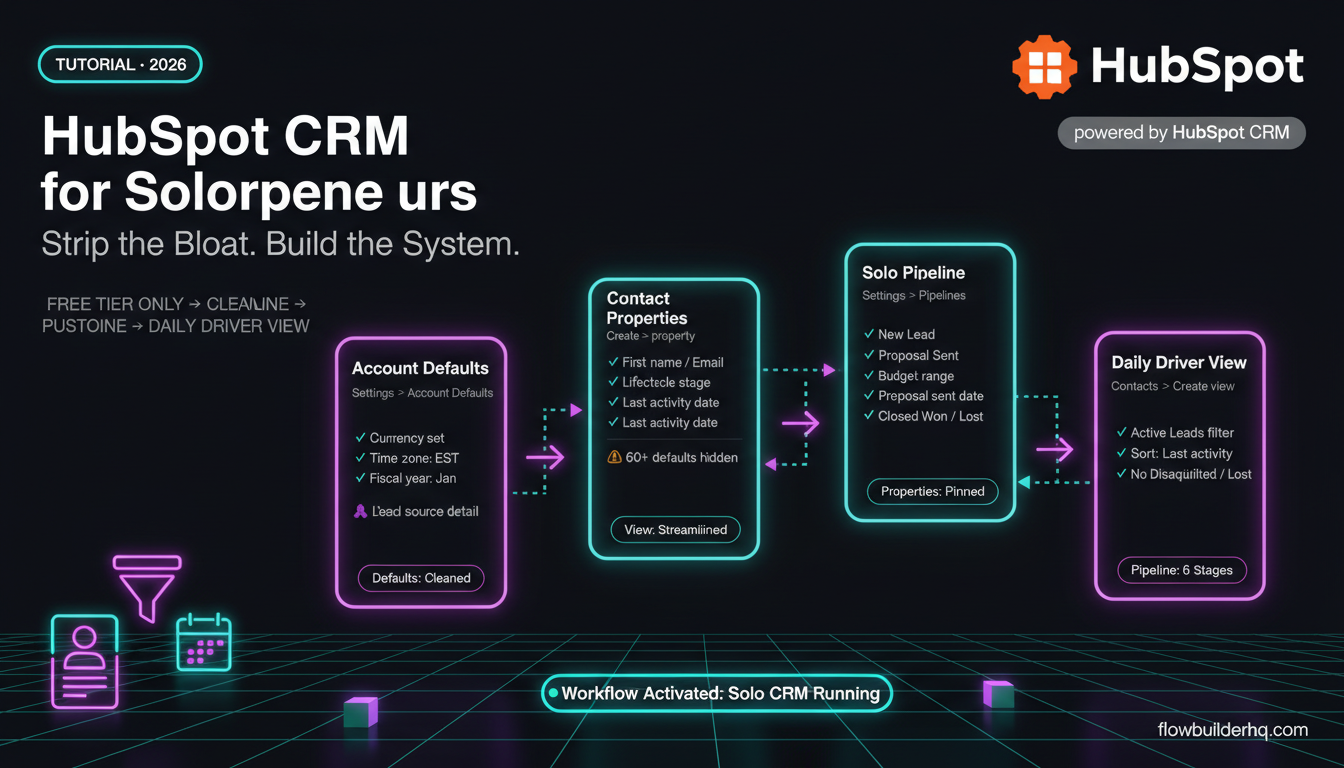
Go to Settings → Objects → Deals → Pipelines in HubSpot. Delete every default stage that doesn’t match your workflow. Add your own.
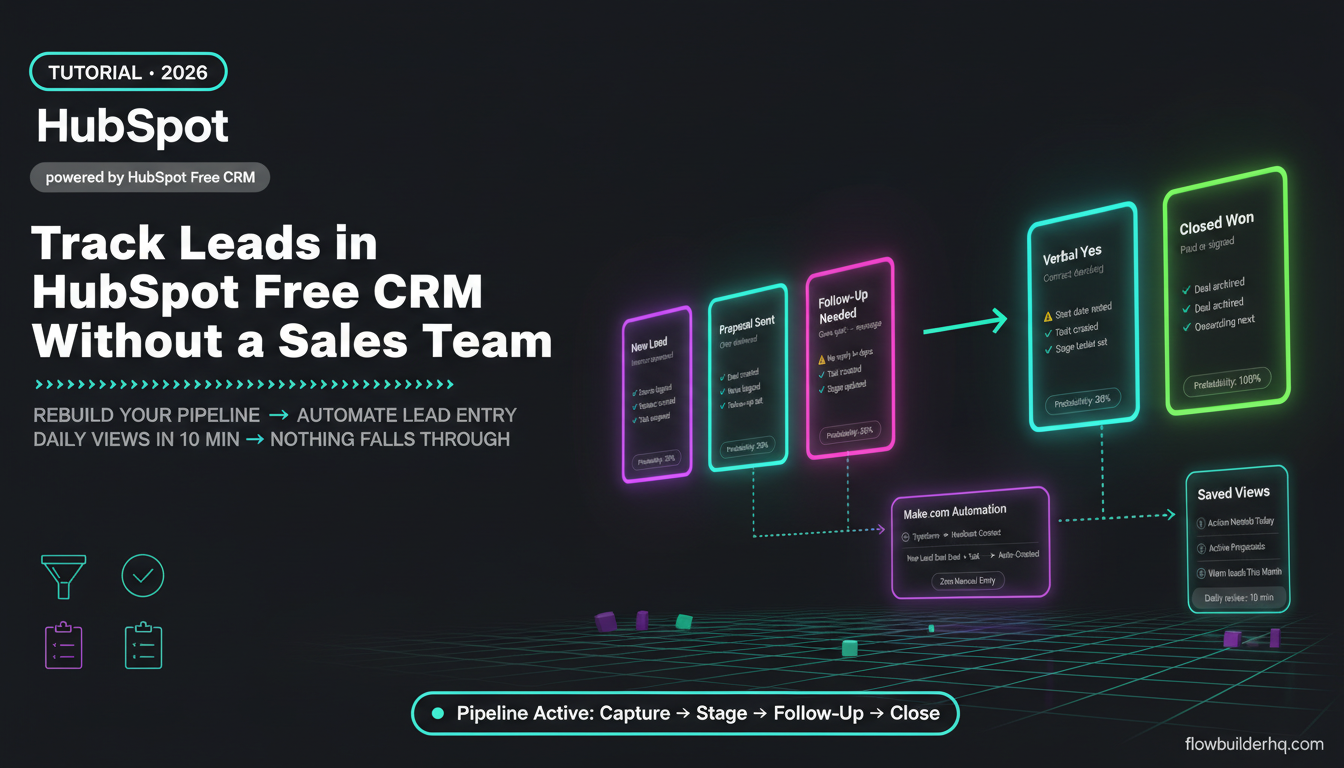
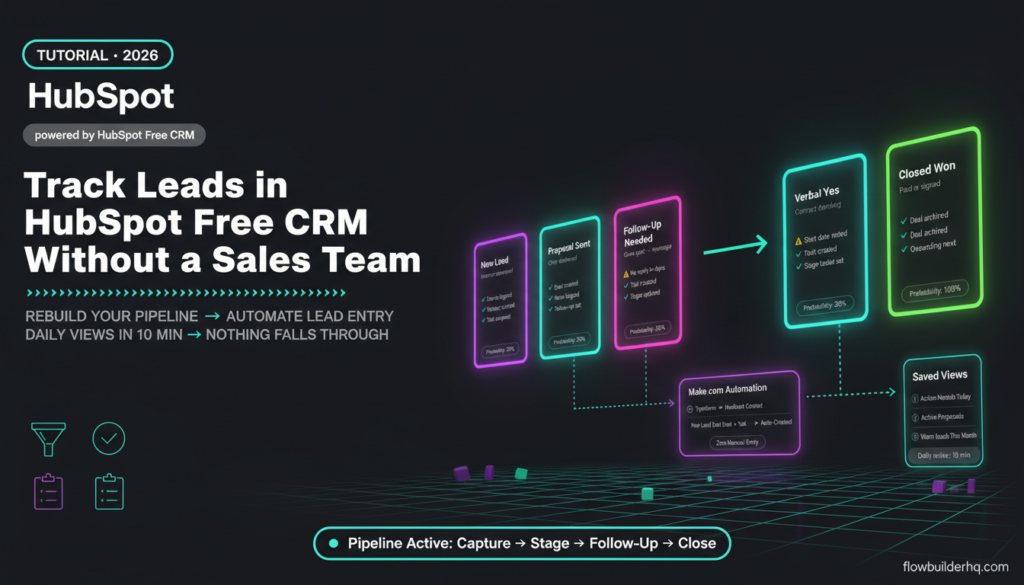
Here’s a solo-operator stage structure that actually works:
- New Lead — someone has expressed interest, nothing sent yet
- Proposal Sent — you’ve sent an offer, waiting on response
- Follow-Up Needed — they went quiet, you need to re-engage
- Verbal Yes — they said yes, contract/invoice not sent yet
- Closed Won — paid or signed
- Closed Lost — not moving forward
Set a close probability for each stage. HubSpot uses these to calculate your weighted pipeline value in the deals dashboard — genuinely useful when you’re forecasting whether you can take on new projects next month. New Lead at 10%, Proposal Sent at 30%, Follow-Up Needed at 20%, Verbal Yes at 80% is a reasonable starting point. Adjust after your first month of real data.
The Follow-Up Needed stage is the one most solo operators skip, and it’s the most important one. When someone goes silent, they don’t get a “Lost” stage — they get a holding pen with a task attached. This single habit change will recover deals that previously died in your inbox.
Step 2: Set Up Contact and Deal Properties That Actually Matter to You
HubSpot has hundreds of default contact properties. You need about ten. Go to Settings → Properties and pin the ones you’ll actually use to the record sidebar. For a solo service business, that’s usually:
- Lead source (where did they come from?)
- Service interested in
- Budget range (if applicable)
- Next follow-up date
- Internal notes
The Next Follow-Up Date property is critical. HubSpot free includes task creation, but tasks are easy to lose in the activity feed. A custom date property on the contact record gives you a filterable field — meaning you can build a saved view of “everyone whose follow-up date is today or earlier.” That’s your daily lead list, built automatically.
To create a custom property: Settings → Properties → Create Property. Choose “Contact” as the object, “Date picker” as the field type, label it “Next Follow-Up Date.” Done.
Step 3: Build Three Saved Views That Replace Your Morning CRM Review
This is where HubSpot free actually earns its keep. Saved views in the Contacts and Deals sections are filterable, shareable (with yourself), and persistent. You build them once and use them every day.
Go to Contacts → All Contacts → Add filter. Build and save these three views:
View 1: “Action Needed Today”
Filter: Next Follow-Up Date is on or before [today]. This shows everyone you need to touch today. Sort by follow-up date ascending. This replaces the mental overhead of remembering who needs what.
View 2: “Active Proposals”
Filter: Associated Deal Stage = “Proposal Sent” AND Deal Create Date is more than 3 days ago. This shows proposals that haven’t moved. If something has been sitting in Proposal Sent for a week with no activity, it needs attention — either a follow-up or a move to Follow-Up Needed.
View 3: “Warm Leads This Month”
Filter: Lead status is not “Unqualified” AND Create Date is in the last 30 days AND Deal Stage is not “Closed Won” AND not “Closed Lost.” This is your active pipeline view — everyone who could still convert this month.
Once you have these three views, your daily CRM work takes about 10 minutes. Open View 1, work through it, check View 2 for anything stale, glance at View 3 for the big picture. That’s it.
Step 4: Use Tasks and Notes Properly (Not as an Afterthought)
HubSpot’s task and notes system is genuinely good in the free tier — most solo operators just never use it correctly. Here’s the rule: every deal movement triggers either a note or a task. No exceptions.
When you move a deal from New Lead to Proposal Sent: log a note with what you sent and any specific details from the conversation. When you move to Follow-Up Needed: create a task with a due date and a specific action (“Email re: proposal, reference their Q4 budget concern”). When you get a verbal yes: note the expected start date and create a task to send the contract.
This habit costs about 60 seconds per deal movement. The payback is that six months from now, when a lost lead comes back, you open the record and immediately see the entire history — what you sent, what they said, why they didn’t close. That context is worth more than any reporting feature.
If you want to understand HubSpot’s broader capabilities before deciding how deep to go, the HubSpot free vs paid breakdown is worth reading — it’s clear about what the free tier actually limits.
Step 5: Automate Lead Entry With Make.com So You Never Enter a Contact Manually
Manual data entry into a CRM is how solo operators fall off the system. You get busy, forget to log a lead, and then the pipeline is incomplete and untrustworthy. The fix is automating every lead entry point.
If your leads come through a contact form, a Typeform, a Calendly booking, or an email newsletter signup, there’s no reason to manually add them to HubSpot. Make.com’s free tier handles all of these with a simple HubSpot integration.
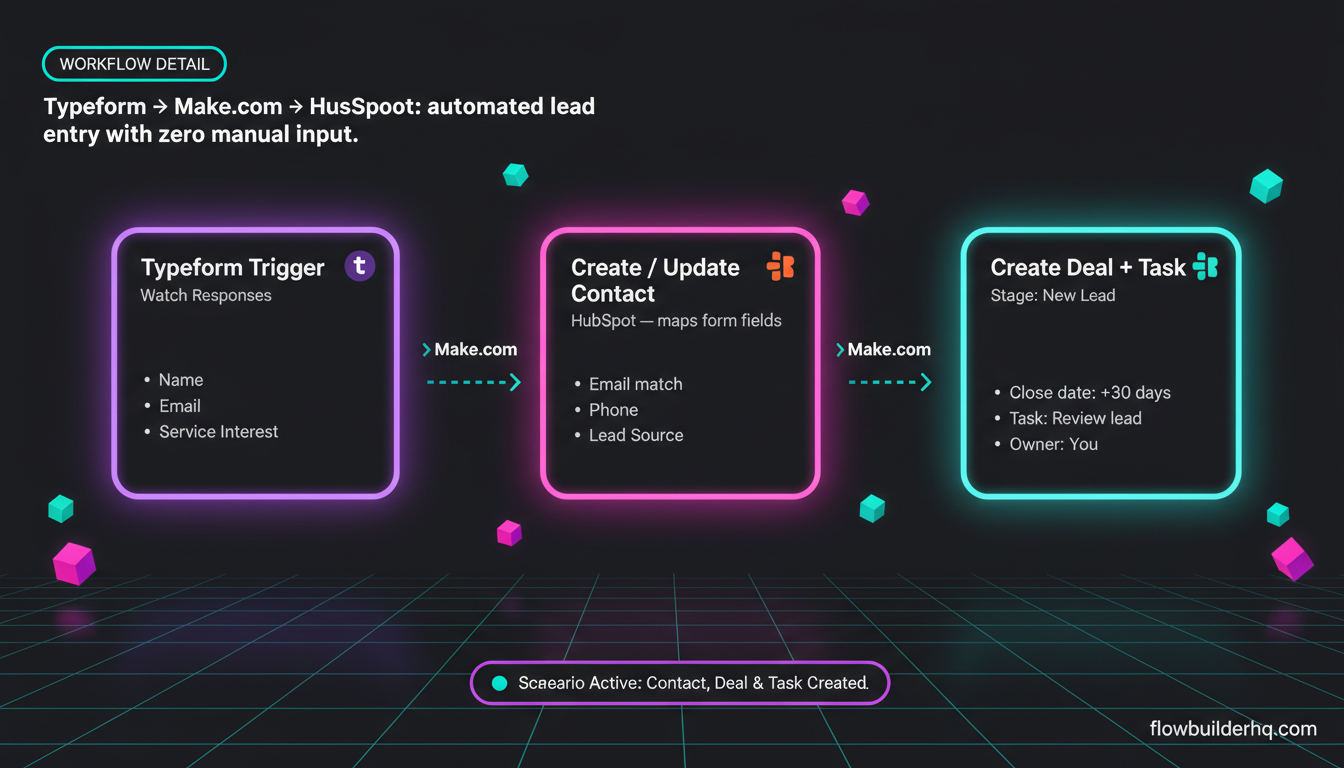
Here’s a concrete workflow: Typeform submission → Make.com → HubSpot contact created + deal created in “New Lead” stage + task created for initial review.
To build it:
- In Make.com, create a new scenario. Set the trigger to Typeform → Watch Responses.
- Add a HubSpot → Create/Update Contact module. Map the Typeform fields (name, email, phone, service interest) to HubSpot contact properties.
- Add a HubSpot → Create Deal module. Set the pipeline to your custom pipeline, the stage to “New Lead,” the deal name to the contact’s name + ” — [service type].” Set the close date to 30 days out as a default.
- Add a HubSpot → Create Task module. Set owner to yourself, due date to today or tomorrow, subject to “Review new lead: [contact name].”
Every time a form submits, HubSpot has a complete, accurate record — contact, deal, and task — without you touching anything. This is the kind of setup detailed in the Make.com to HubSpot integration tutorial if you need the step-by-step connection walkthrough.
Make.com’s free plan gives you 1,000 operations per month. For a solo lead volume, that’s more than enough. If you’re running multiple lead sources, the Core plan is $9/mo. See the full Make.com pricing breakdown for what counts as an operation.
For Typeform-specific automation, this Typeform + Make.com tutorial has the exact setup for intake form workflows.
Step 6: Handle the “Gone Quiet” Problem Without Chasing Your Tail
The hardest part of solo lead tracking isn’t capturing leads — it’s managing the ones who go silent after a proposal. You don’t have an SDR to delegate follow-ups to. You have to do it yourself, which means building a system that makes it impossible to forget.
Here’s the workflow that works: when a deal hits the Proposal Sent stage and you haven’t logged any activity in 5 days, you need a nudge. You can approximate this in HubSpot free using a saved view filtered by “Last Activity Date is more than 5 days ago AND Deal Stage = Proposal Sent.” Check that view every morning — if anything appears, move it to Follow-Up Needed and create a task.
Want this automated? Make.com can handle it. Build a scenario that runs on a schedule (every morning at 8am): HubSpot → Search Deals with filters for stage = Proposal Sent and last modified date older than 5 days. For each result, HubSpot → Update Deal to move to Follow-Up Needed, and HubSpot → Create Task with a follow-up prompt.
This is the same pattern used in automated email follow-up workflows — the trigger is a time condition rather than a form submission, but the Make.com build is similar.
For more ideas on which repetitive tasks are worth automating in your solo business, this automation prioritization framework is a useful reference — it helps you decide what to build next.
Step 7: Create a Weekly Review Ritual That Takes 15 Minutes
A CRM only works if you actually use the data it generates. Build a 15-minute Friday ritual around these four questions:
- What moved this week? — Look at deals that changed stage. Did any close? Did any stall?
- What’s in Follow-Up Needed that’s been there more than 7 days? — These need a decision: re-engage or close lost.
- What’s my weighted pipeline value? — HubSpot’s deal dashboard shows this automatically based on your close probabilities. Is it enough to cover your next month?
- What new leads came in this week and were properly entered? — If you have automation running, this should be automatic. Spot-check that nothing fell through.
This 15-minute review is worth more than any enterprise CRM feature. It forces a weekly reckoning with your actual pipeline rather than a vague feeling about how busy you are.
Common Errors and How to Fix Them
Error: Duplicate contacts cluttering your pipeline
HubSpot free creates duplicates when someone submits two forms or reaches you through multiple channels. Fix: use HubSpot’s native Merge Contacts tool (Contacts → select both → Actions → Merge). Prevention: in your Make.com workflow, use the “Create/Update Contact” module (not “Create Contact”) — this module searches by email first and updates the existing record rather than creating a new one.
Error: Deals with no associated contacts
If you create deals manually without properly associating a contact, your pipeline becomes orphaned records with no history. Fix: always create deals from the contact record, not from the Deals section directly. In Make.com, always run the Create Contact module before the Create Deal module, then use the returned contact ID to associate the deal.
Error: Views not updating in real time
Saved views in HubSpot free can have a short delay — sometimes a few minutes before a new contact appears. This is normal. If a record you just created isn’t showing in a view, wait 2-3 minutes and refresh. If it never appears, check that the properties you’re filtering on were actually set (common issue: a Make.com mapping that left a field blank).
For general Make.com troubleshooting when integrations misbehave, the Make.com error handling tutorial covers how to diagnose broken scenarios systematically.
How to Track Leads in HubSpot Free CRM: The Complete System at a Glance
Here’s everything assembled into one reference:
| Component | What It Does | Time to Set Up |
|---|---|---|
| Custom pipeline (4-6 stages) | Matches your real process | 15 min |
| Custom “Next Follow-Up Date” property | Powers your daily action view | 5 min |
| 3 saved views | Replaces morning CRM review | 20 min |
| Notes + task habit | Full history on every deal | Ongoing, 60 sec/deal |
| Make.com lead entry automation | Zero manual data entry | 30-45 min to build |
| Stale proposal automation | Nothing falls through cracks | 20-30 min to build |
| 15-min weekly review | Keeps pipeline honest | 15 min/week |
Total setup time: roughly 2 hours. Ongoing time: 10 minutes a day plus 15 minutes a week. That’s a functioning CRM practice for a solo operator — without any of the enterprise overhead HubSpot was designed around.
If you’re looking at what else to automate once your lead tracking is solid, this client onboarding automation workflow is the natural next step — once you close the deal, the process continues.
HubSpot’s free CRM is genuinely capable at the solo level. The problem was never the tool — it was the configuration. Fix the configuration, automate the entry points, and you have a lead tracking system that runs without you babysitting it.
For the Make.com side of this setup, start with Make.com’s free plan — 1,000 operations a month is enough to automate every lead source a solo operator realistically runs.
And if you want to see how HubSpot free compares against other CRM options before locking in, the best CRM roundup for solopreneurs ranks the realistic alternatives without assuming you have a team.