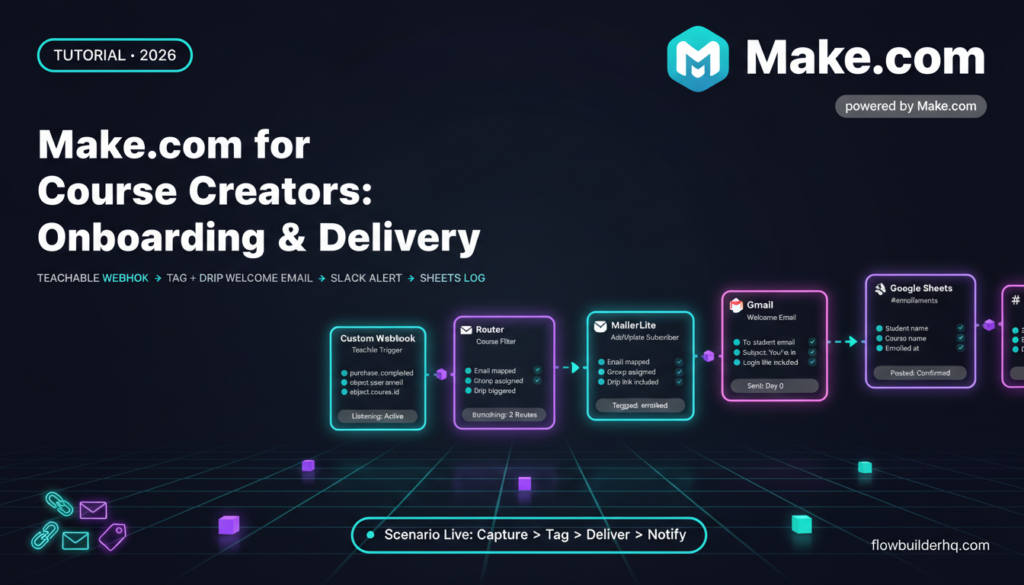
Make.com for Course Creators: Automate Student Onboarding and Delivery
Most course platforms handle payment. None of them handle what happens next. A student buys your course, and suddenly you’re the one manually sending welcome emails, adding tags in your email tool, dropping login links into Slack, and hoping you didn’t miss anyone. That’s not a delivery system — that’s a checklist you’re running by hand.
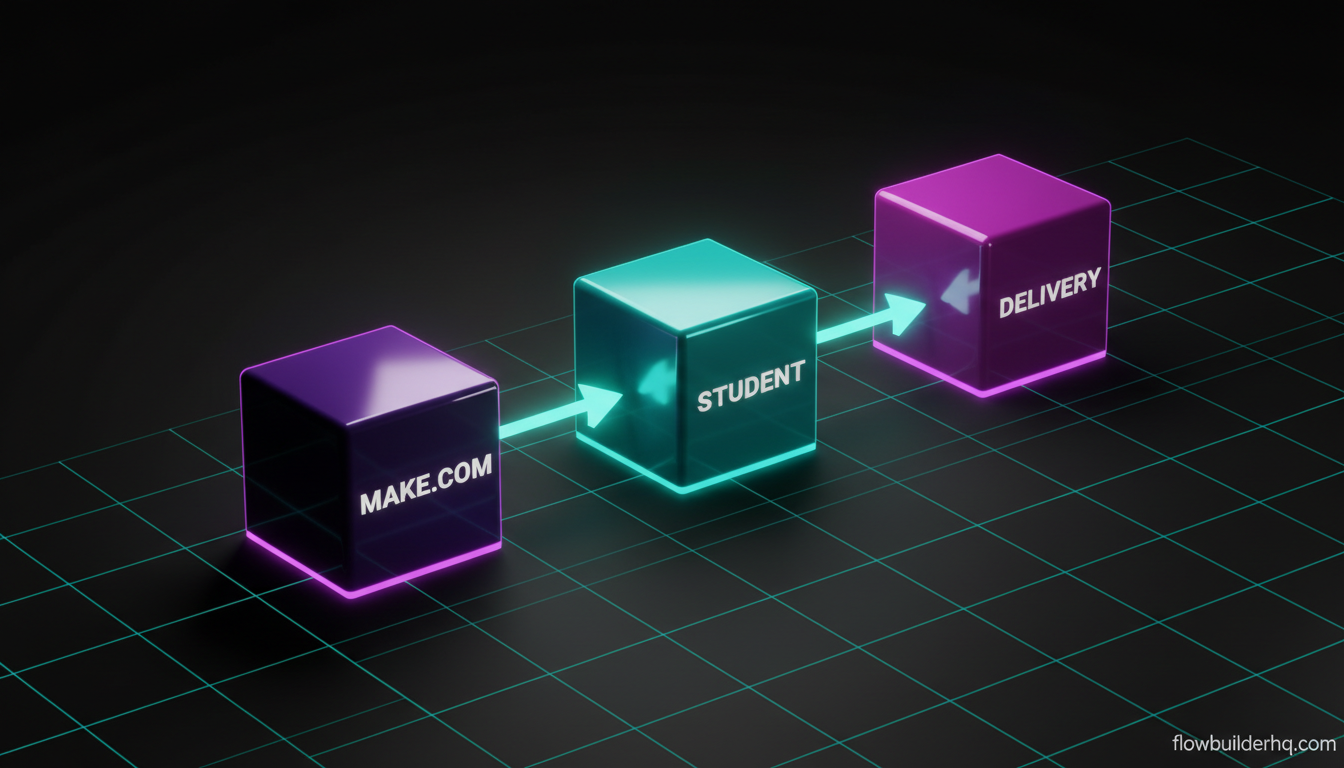
This tutorial walks through a complete Make.com for course creators workflow: new purchase triggers a Teachable webhook, Make.com picks it up, tags the student in your email tool, queues their drip sequence, sends course materials, and fires a Slack notification to your workspace. The whole thing runs without you touching it.
If you’ve never built a scenario before, start with this beginner walkthrough first. Otherwise, let’s get into the build.
What You’ll Need Before You Start
- Make.com account — Free tier works for testing. Core ($9/mo) or higher for production runs.
- Teachable account with at least one published course
- Email tool with API/webhook support — MailerLite, ActiveCampaign, or similar
- Slack workspace — for internal notifications
- A Google Drive or Notion folder with your course materials (PDFs, links, access info)
This workflow assumes Teachable as the course platform, but the same pattern works with Thinkific, Podia, or any platform that fires purchase webhooks. The Make.com logic stays identical — only the trigger module changes.
The Full Workflow at a Glance
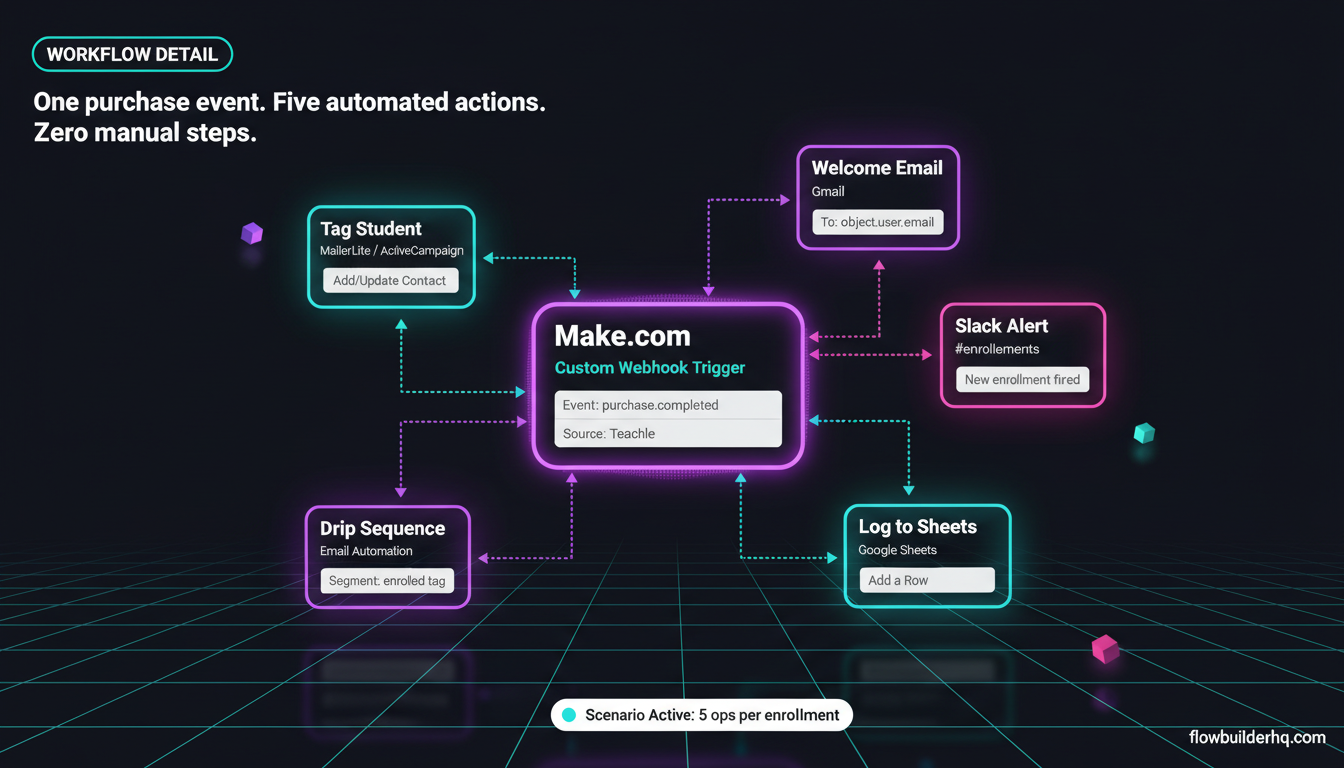
Here’s the sequence you’re building:
- Teachable fires a
purchase.completedwebhook on new enrollment - Make.com catches it via a custom webhook trigger
- Make.com adds the student to your email tool and applies the correct tag
- The tagged segment triggers a drip sequence in your email tool
- Make.com sends a direct welcome email with access details (optional — use if your email tool can’t handle immediate sends reliably)
- Make.com posts a formatted Slack message to your #enrollments channel
- Optionally: Make.com logs the enrollment to a Google Sheet for your records
Seven steps. One scenario. Zero manual work per student. The ops count on Make.com’s free tier is 1,000/month — each run of this scenario uses roughly 4-6 operations depending on how many modules you include. At 100 students a month, you’re at 400-600 ops, well within the free tier.
Step 1: Set Up the Teachable Webhook
In Make.com, create a new scenario. Add a Webhooks > Custom Webhook trigger as your first module. Make.com will generate a unique webhook URL — copy it.
In Teachable, go to Settings > Integrations > Webhooks. Add a new webhook, paste your Make.com URL, and select the purchase.completed event. Save it.
Back in Make.com, click Run once on your scenario to put it in listening mode. Then in Teachable, trigger a test purchase (use a $0 coupon on a test enrollment or their built-in test purchase feature). Make.com will catch the payload and show you the data structure.
The Teachable webhook payload includes:
object.user.email— student emailobject.user.name— student full nameobject.course.name— the course purchasedobject.course.id— useful for filtering if you have multiple coursesobject.enrollment.enrolled_at— timestamp
Map these fields now. You’ll reference them in every downstream module. If you’re unfamiliar with how Make.com handles webhook data mapping, the Make.com webhooks tutorial covers the mechanics in detail.
Step 2: Add a Router for Multi-Course Logic
If you have more than one course, add a Router module immediately after the webhook trigger. Create one route per course, filtering on object.course.id. This lets you send different materials, different tags, and different Slack messages depending on which course was purchased — without duplicating your entire scenario.
If you only have one course right now, skip the router and connect directly to Step 3. You can add it later without rebuilding the scenario.
Step 3: Tag the Student in Your Email Tool
This is the make-or-break step for student onboarding. Tagging correctly here determines which drip sequence fires, which segments the student lands in, and whether your email tool treats them as a lead or a customer.
For MailerLite: Add the MailerLite > Add a Subscriber module. Map object.user.email to the Email field and object.user.name to the Name field. Under Groups, add the group that corresponds to your course (e.g., “Course: Productivity Blueprint”). MailerLite’s automation will fire any sequence attached to that group the moment the subscriber is added.
For ActiveCampaign: Use ActiveCampaign > Add/Update Contact, then add a second module: ActiveCampaign > Add Tag to Contact. Set the tag to match your course name exactly (e.g., enrolled-productivity-blueprint). Your ActiveCampaign automation listens for that tag and kicks off the drip.
Common error here: the subscriber already exists in your email tool as a lead, and the “add subscriber” call fails because the email is already present. Fix this by using “Add/Update” instead of “Add” — most email tool modules in Make.com have this variant. It upserts the contact and still applies the new tag without throwing an error.
For a broader look at how email tool integrations fit into a solopreneur stack, see the comparison of MailerLite vs ActiveCampaign vs HubSpot — it covers the tag/automation logic differences worth knowing before you commit to one.
Step 4: Send the Welcome Email with Access Details
Your email tool’s drip sequence handles day 2, day 5, and day 14 messages. But day 0 — the immediate “here’s how to access your course” email — often has a lag if it relies on automation triggers to process. Sending it directly from Make.com eliminates that gap.
Add a Gmail > Send an Email module (or your preferred email provider). Map the fields:
- To:
object.user.email - Subject:
You're in — here's how to access [Course Name] - Body: A plain-text or HTML template with your course login URL, any PDF downloads, and a single clear next step
Keep this email short. One link, one action. Students who just purchased don’t need three paragraphs of context — they need to know where to go.
If you prefer Notion to store your course materials and link students there, the Make.com and Notion integration guide shows how to pull dynamic content from a Notion database into your email body — useful if your materials change between cohorts.
Step 5: Post to Slack
Add a Slack > Create a Message module. Set the channel to #enrollments (or whatever you name it). Format the message so it’s actually readable:
:tada: New enrollment!
*Student:* {{object.user.name}} ({{object.user.email}})
*Course:* {{object.course.name}}
*Enrolled at:* {{object.enrollment.enrolled_at}}
This Slack ping matters more than it sounds. When you’re running a course solo, you’re often heads-down creating content or doing support. The Slack message closes the loop — you know the automation ran, you know who enrolled, and you have a record in a place you already check. If Make.com ever fails silently on the email step, you still have the Slack notification to catch it manually.
For more on formatting Slack messages properly through Make.com — including error-state alerts — the Slack notifications tutorial covers filters and formatting in depth.
Step 6: Log the Enrollment to Google Sheets
This step is optional but highly recommended. Add a Google Sheets > Add a Row module. Create a sheet with columns: Timestamp, Name, Email, Course, Source. Map the webhook data to each column.
Why bother when Teachable already tracks enrollments? Because you now have a single spreadsheet that shows every student across every course, every platform, with consistent formatting. You can filter, sort, export for accountants, or feed it into a dashboard — none of which is easy inside Teachable’s built-in reports.
If you want to go further and turn that sheet into a lightweight CRM for students, the Make.com and Airtable integration is worth reading — Airtable gives you views and filtering that Google Sheets can’t match once your student list grows past a few hundred rows.
Step 7: Add Error Handling
Right-click any module in your scenario and select Add error handler. Use the Resume handler for non-critical steps like the Google Sheets log (if the sheet write fails, you don’t want to block the welcome email). Use the Rollback handler or a separate error-notification route for critical steps like the email module.
The most useful error pattern: add a parallel route that fires only when a module fails, sending you a Slack DM with the error details and the student’s email. That way you can re-trigger the welcome email manually for that one student instead of discovering the failure three days later when they email asking for access.
Make.com’s error handling has a few quirks worth understanding before you hit them in production. The error handling tutorial walks through the Resume, Rollback, and Ignore options with real examples.
Extending the Workflow: What Else You Can Automate
Once the core onboarding scenario is stable, here’s what course creators typically add next:
Completion certificates: Teachable fires a lesson.completed or course.completed webhook. Catch it in a separate Make.com scenario, generate a PDF certificate (using a tool like Carbone or a Google Slides template via API), and email it automatically.
Upsell triggers: When a student completes your first course, Make.com tags them in your email tool as “Course 1 Complete” and triggers an upsell sequence for your second course. No manual segmentation.
Refund handling: Teachable fires a purchase.refunded event. Catch it, remove the tag in your email tool, revoke access if needed, and log it to your sheet. This one saves a lot of awkward manual cleanup.
Community access: If you run a Discord or Circle community for students, Make.com can hit their API to send an invite link automatically as part of the onboarding flow — no more manually DMing invite links.
The automation patterns here aren’t fundamentally different from other solopreneur service workflows. If you want to see how this kind of trigger-to-action logic applies more broadly, the workflow automation prioritization framework is useful for deciding what to build next.
Make.com for Course Creators: Pricing Reality Check
Make.com’s free tier gives you 1,000 operations per month. A single run of this scenario (webhook catch → tag → email → Slack → Sheets) uses 5-6 operations. At 1,000 ops, you can process roughly 165-200 enrollments per month for free.
Once you cross that, Core at $9/month gives you 10,000 ops — enough for 1,500+ enrollments per month. Most course creators running under a few hundred students monthly will never need to leave the free tier. For a full breakdown of what those numbers actually cost at scale, see the Make.com pricing breakdown.
The scenario described here is a clean, documented workflow that pays for itself the first time it runs unsupervised through 50 enrollments you didn’t have to touch.
Ready to build it? Start with Make.com here — the free tier is enough to get this entire scenario running before you spend a dollar.
Common Mistakes to Avoid
Not testing with a real purchase event. Teachable’s test webhook payload sometimes differs from a real purchase payload — field names can vary. Always do a real $0 test enrollment before going live.
Using “Add Subscriber” instead of “Add/Update.” Covered above, but it’s the most common cause of silent failures. Returning students who previously opted in will cause the add call to fail.
Forgetting to activate the scenario. Make.com scenarios are off by default. After testing, toggle the scenario to Active — otherwise nothing runs in production.
Building everything in one scenario with no router. Fine for one course. The moment you add a second course, you’ll wish you’d added the router from day one. Build it in from the start.
If you’ve hit other automation mistakes running workflows like this, the 7 workflow automation mistakes solopreneurs make covers the patterns that break scenarios most often — and the fixes that actually hold.
Build It Once, Run It Forever
Course delivery is one of the best places to automate as a solopreneur. Unlike client work where each engagement is custom, course enrollment is a repeatable event with a predictable data structure. The webhook payload looks the same whether it’s student 1 or student 500.
That predictability is exactly what Make.com for course creators is built for. One scenario, mapped once, handles onboarding at any volume. You spend your time creating the next course — not processing the last enrollment.
Get started with Make.com and build this scenario today. The free tier handles everything described here.
Building this yourself? Get the workflow pack.
5 ready-to-import n8n workflows — lead capture, invoicing, content repurposing, onboarding, social posting. Free.