Make.com Error Handling Tutorial: What to Do When Your Scenarios Break
Your Make.com scenario just failed at 2am. You wake up to an email about a missed webhook, a contact that never got added to your CRM, or a client who didn’t receive their onboarding email. The scenario ran — but something broke mid-way through.
This Make.com error handling tutorial covers exactly what to do: how to read what failed, how to recover lost data, how to set up error routes that catch failures before they become problems, and how to get alerts so you’re not finding out about breakages two days later.
This is the post that separates people who use Make.com from people who rely on Make.com. If you already have scenarios running in production, this is the skill set that keeps them running.
Why Make.com Scenarios Break (The Four Usual Suspects)
Before fixing errors, you need to know what caused them. Make.com failures fall into four categories almost every time:
- API errors from third-party apps — the service Make.com is calling returns a 4xx or 5xx response. Rate limits, auth token expiration, and service outages all land here.
- Data errors — a field Make.com expects is empty, null, or in the wrong format. A contact form that skips the phone number field when your scenario requires it is a classic example.
- Connection errors — Make.com can’t reach the service at all. Usually temporary, usually retry-able.
- Scenario configuration errors — something you set up is now invalid. A module pointing to a deleted Google Sheet tab, or a filter with logic that blocks all data, falls here.
Knowing which category you’re in tells you whether to retry immediately, fix your data, re-authenticate, or rebuild a module. Check the Make.com error types documentation for the full taxonomy — it’s more useful than it looks at first glance.
Step 1: Read the Execution History Properly
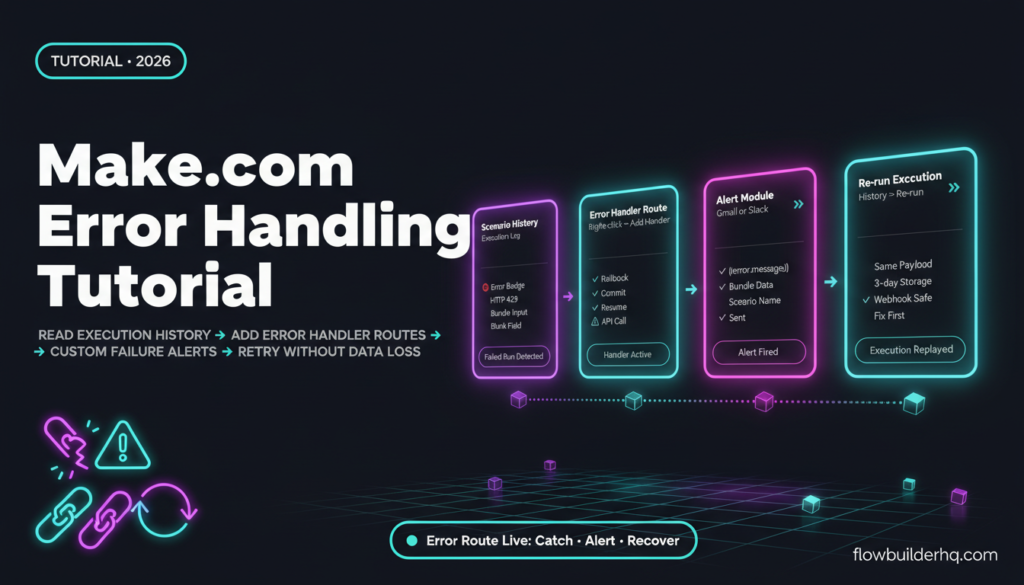
When a scenario fails, the first place to go is Scenario > History in your Make.com dashboard. Most people glance at this and give up. Here’s how to actually read it.
Each execution log shows:
- A status icon — green (success), orange (warning/partial), red (error), blue (incomplete data)
- The timestamp of the run
- The number of operations consumed
- Which bundle triggered the run
Click any failed execution. You’ll see the scenario map with each module highlighted. The module that broke shows a red badge with an error code. Click that module. Make.com gives you the exact error message, the HTTP status code (if it’s an API call), and the input/output data for that specific bundle at the moment it failed.
That input/output data is the most useful thing here. You can see exactly what value Make.com was working with when it hit the error. Nine times out of ten, the problem is visible right there — a blank field, a malformed URL, an expired token.
If you’re newer to building scenarios, the beginner scenario-building guide covers how modules pass data to each other, which is the foundation for understanding why data errors happen.
Step 2: Use the Error Handler Route (The Right Way)
Most Make.com users have never set up an error handler route. This is the single biggest gap between casual users and production-grade operators.
An error handler route is a separate branch in your scenario that only activates when a specific module fails. Instead of your scenario stopping dead, it continues down the error path — where you can log the failure, send yourself an alert, store the failed data, or attempt a fallback.
How to add one:
- Right-click the module you want to protect (usually an API call or a module that relies on external data).
- Select Add error handler.
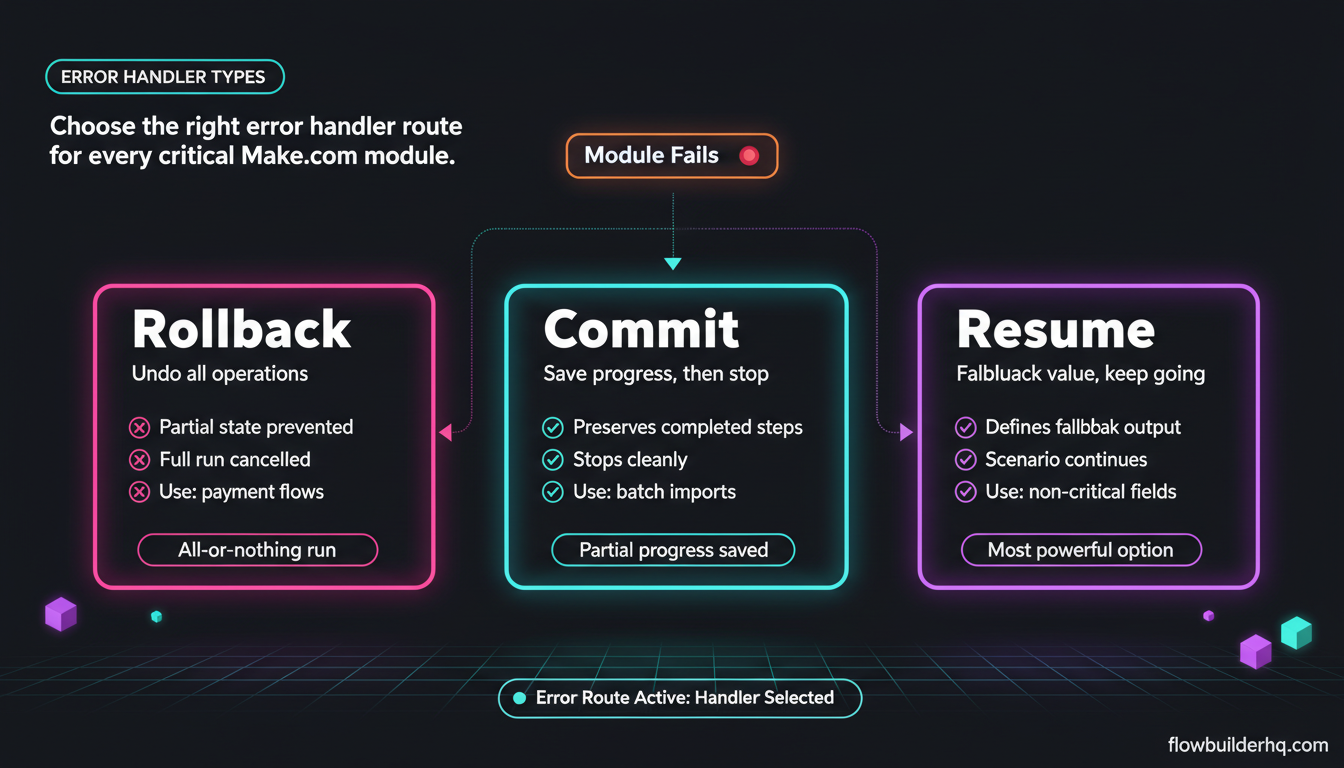
- Choose your error handler type. Make.com gives you three options: Rollback, Commit, and Resume.
Here’s what each one actually does:
- Rollback — undoes all operations from that scenario run. Use this when partial execution is worse than no execution (e.g., you’ve charged a card but haven’t sent a confirmation yet — rollback prevents the half-finished state).
- Commit — saves everything that succeeded before the error, then stops. Use this when you want to preserve partial progress.
- Resume — lets you define a fallback value and continue the scenario as if the module succeeded with that value. This is the most powerful option for keeping workflows alive through predictable failures.
After selecting the handler type, you chain additional modules onto the error handler route. The most common setup: add a Send an Email or Slack: Send a Message module that fires immediately when the error route activates, giving you real-time notification of the failure.
This pairs well with the approach in the client onboarding automation workflow — where a failure mid-sequence means a new client doesn’t get their welcome email. An error handler route there can fall back to a manual trigger or alert you to send it yourself.
Step 3: Set Up Email Alerts on Scenario Failures
Make.com has a built-in notification system that most users never configure. Go to Organization > Notifications and turn on email alerts for scenario errors. This sends you an email every time a scenario hits an unhandled error — no extra module setup required.
The problem with the built-in alert: it’s generic. It tells you a scenario failed, but doesn’t tell you which bundle was being processed, what data was involved, or what the error was.
For anything in production, you want a custom alert module inside an error handler route instead. Set it up like this:
- Add an error handler route (as above) to your most critical modules.
- Add a Gmail or SMTP module to the error route.
- In the email body, map in the error message variable (
{{error.message}}), the bundle data that failed, and the scenario name. - Send it to yourself.
Now when the error fires, you get an email with the actual data that caused the problem — not just “something broke.” You can fix the root cause instead of hunting through execution logs.
If you’re using Slack for operations, the Slack: Send a Message module works identically here. Many operators prefer Slack because the alert hits their phone immediately rather than sitting in an inbox.
Step 4: Retry Failed Executions Without Losing Data
Make.com stores failed execution data temporarily — this is one of its most underused features. When a scenario fails due to a temporary issue (API rate limit, momentary outage), you don’t have to re-trigger the whole workflow from scratch.
Go to Scenario > History, find the failed execution, and click the Re-run button (the circular arrow icon). Make.com replays the exact same bundle data through the scenario — same input, same trigger payload.
This matters most for webhook-triggered scenarios. If your Make.com webhook receives a payload from a form submission or payment event, that data only arrives once. If the scenario fails after receiving it, the webhook payload is gone unless Make.com stored it in the execution history. As long as the failed execution is in history (Make.com keeps them for 30 days on most plans), you can re-run it.
One caveat: if the root cause of the failure hasn’t been fixed, re-running will fail again in exactly the same place. Fix the error first, then re-run.
Step 5: Use Filters to Prevent Predictable Errors
Some errors aren’t really errors — they’re your scenario attempting to process data it was never designed to handle. Filters are the prevention layer.
Add a filter between the trigger module and the first action module. Common patterns:
- Check that a required field is not empty — use the “Exists” or “Is not empty” condition. If the field is empty, the scenario stops cleanly rather than failing mid-run.
- Validate email format — use a regex filter before passing an email address to your CRM or email tool.
- Check that a numeric value is within expected range — prevents downstream calculation errors.
The difference between a filter stopping a scenario and an error stopping it: a filter stop is intentional and doesn’t count as a failure in your execution history. An error stop does — and it can affect how Make.com counts your operations. See the Make.com pricing breakdown for how operations are counted and where failures affect your quota.
Filters are also where you handle multi-path logic. If a field can be one of several values and each needs different handling, a router combined with filters on each branch is cleaner than a single scenario trying to handle all cases and potentially erroring on unexpected inputs.
Step 6: Handle API Rate Limits Specifically
Rate limit errors are the most common production failure for scenarios that process volume. The HTTP error code is usually 429. Make.com surfaces this as a connection error on the failing module.
The fix depends on the service:
- For services with a retry-after header — Make.com will sometimes respect this automatically. Check the service’s API documentation to confirm.
- For services without automatic retry — add a Sleep module (found under Tools) before the rate-limited module. A 1-2 second sleep between iterations is often enough for APIs with per-second limits.
- For bulk processing scenarios — use the Iterator and limit the bundle count per run. Process in smaller batches rather than all at once.
If you’re processing Google Sheets data in a loop and hitting rate limits, the Make.com Google Sheets integration tutorial covers batching patterns that prevent this problem before it starts.
Step 7: Test Your Error Handling Before You Need It
Error handling that’s never been tested is error handling that fails when it matters. Before pushing any production scenario live, deliberately trigger the error path.
The easiest way: temporarily replace the module that might fail with a Tools: Set Variable module that outputs a known-bad value, or use the HTTP module pointed at a URL that returns a 500 error. Run the scenario in test mode. Confirm that your error route activates, your alert fires, and the error message in the alert contains the data you need.
Then remove the test trigger and reconnect the real module.
This takes five minutes and has saved countless production scenarios from silent failures. Check the Make.com scenario templates for examples of pre-built flows with error handling already included — they’re a good reference for how to structure the error route alongside the main flow.
The Error Handling Stack for Production Scenarios
To summarize the recommended setup for any scenario you’re running in production:
- Filters at the top — catch bad input data before it enters your workflow
- Error handler routes on critical modules — API calls, data writes, and external service calls
- Custom alert modules on error routes — email or Slack with full error context, not just scenario name
- Resume handler where appropriate — for non-critical failures where you can continue with a fallback value
- Execution history monitoring — check it weekly even if you’re not getting alerts
- Re-run capability for webhook triggers — know which scenarios rely on one-time payloads and ensure they’re recoverable
This setup means a 2am failure doesn’t become a 9am crisis. The scenario either recovers itself, alerts you with enough information to fix it in two minutes, or fails cleanly without corrupting your data downstream.
If you’re building multi-step scenarios that touch your CRM, invoice system, or client communication, the proposal sending workflow and the email follow-up automation are both good candidates for applying this error handling stack immediately.
Make.com Error Handling vs Other Platforms
Make.com’s error handling is meaningfully better than Zapier’s at this price point. Zapier gives you basic error notifications and task history replay on paid plans, but doesn’t give you the equivalent of Make.com’s error handler routes or the Resume/Rollback/Commit distinction. For production automation at scale, that matters. See the full Make.com vs Zapier comparison if you’re deciding between platforms.
n8n (self-hosted free, cloud from $8/month) has comparable error handling with try/catch nodes and extensive logging, but requires more configuration upfront. The n8n vs Make.com breakdown covers when each platform’s error model is the better fit.
Make.com’s visual error handler routes are the right default for most solopreneurs — they’re fast to set up and visible in the scenario map. You can see exactly what happens when something breaks without reading logs.
Get Make.com Running Reliably
The scenarios that cause the most stress are the ones running without error handling. They work fine — until they don’t, and you have no idea what happened or how to recover.
Adding proper Make.com error handling to your existing scenarios takes an afternoon. The error handler route, a custom alert module, and filters on key data fields cover 90% of real-world failures. The other 10% you handle from execution history with a re-run.
If you’re not already on Make.com, the free plan gives you 1,000 operations/month to build and test everything covered here. Start your Make.com free account and build your first error-handled scenario before you need it.
For a full assessment of the platform’s strengths and limits, the Make.com 2026 review covers what it does well and where it falls short for solo operators.
Building this yourself? Get the workflow pack.
5 ready-to-import n8n workflows — lead capture, invoicing, content repurposing, onboarding, social posting. Free.