How to Automate Your Solopreneur Morning Routine with No-Code Tools
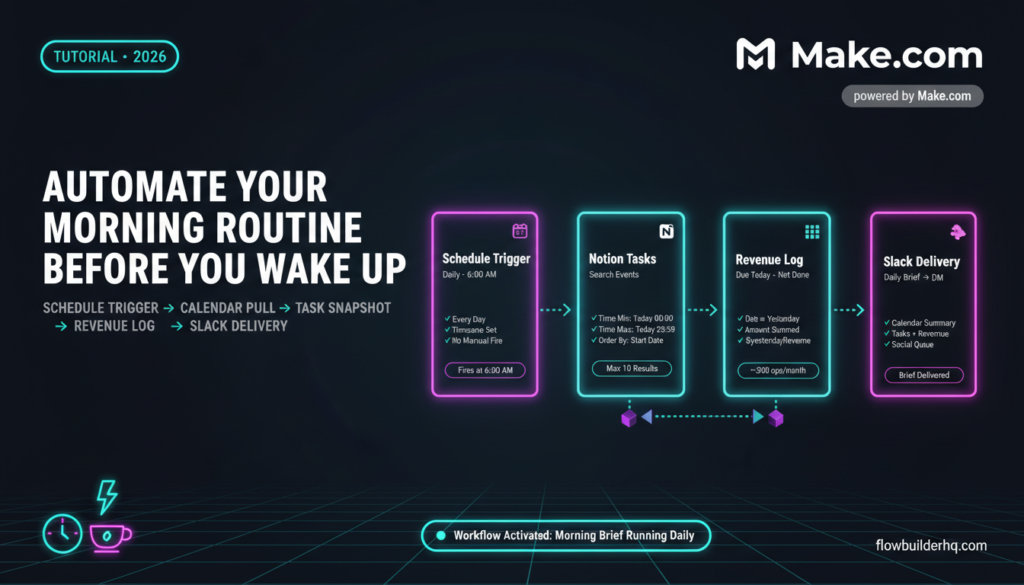
What if your first 30 minutes of admin happened before you woke up? No scrolling through emails looking for yesterday’s revenue. No manually checking which tasks are due today. No digging through three apps to remember what’s on your calendar. By the time you pour coffee, your daily digest is already waiting — news, calendar, task list, revenue snapshot, and social queue check, compiled and delivered automatically.
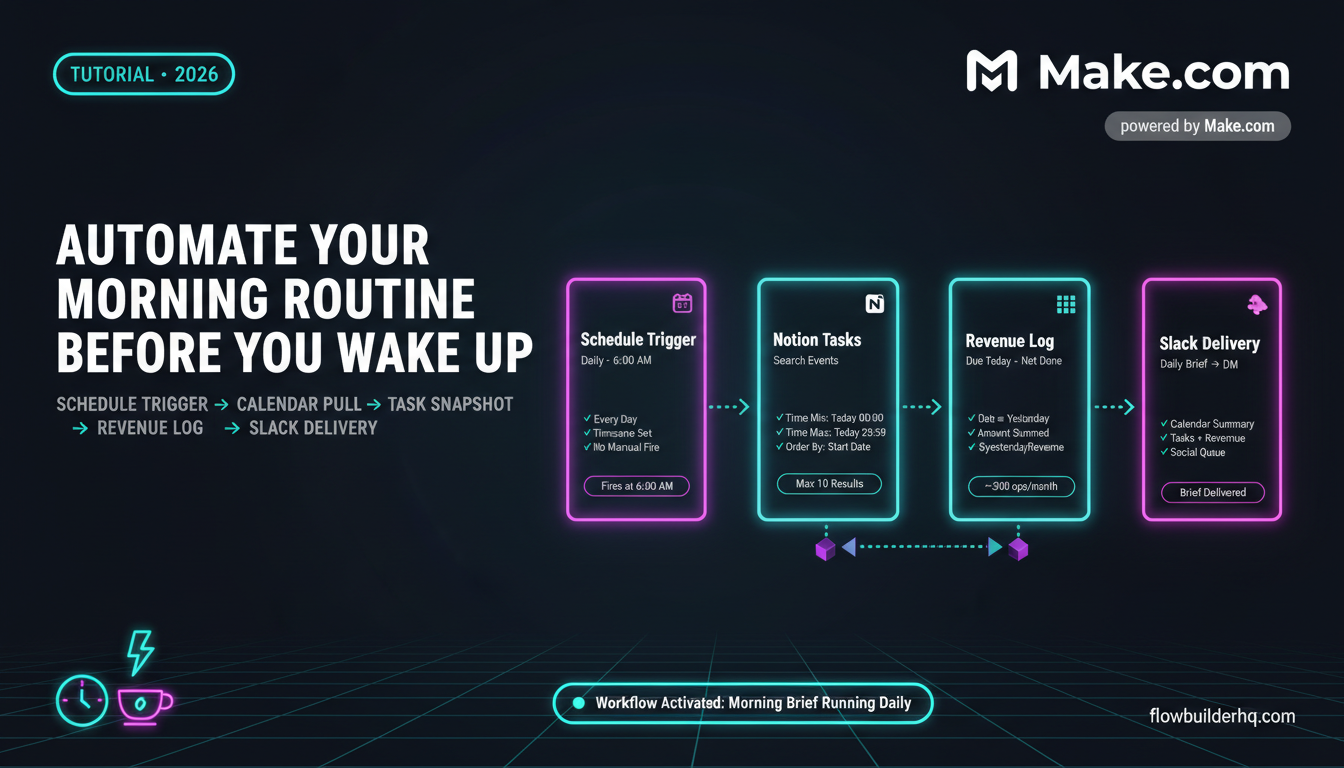
This tutorial walks through exactly how to automate your solopreneur morning routine using no-code tools, with Make.com as the connective tissue. No custom code. No expensive stack. Just a scheduled scenario that runs at 6 AM (or whenever you want) and drops a clean briefing into Slack or your inbox.
What This Automation Does
Before building anything, here’s what the finished morning routine automation covers:
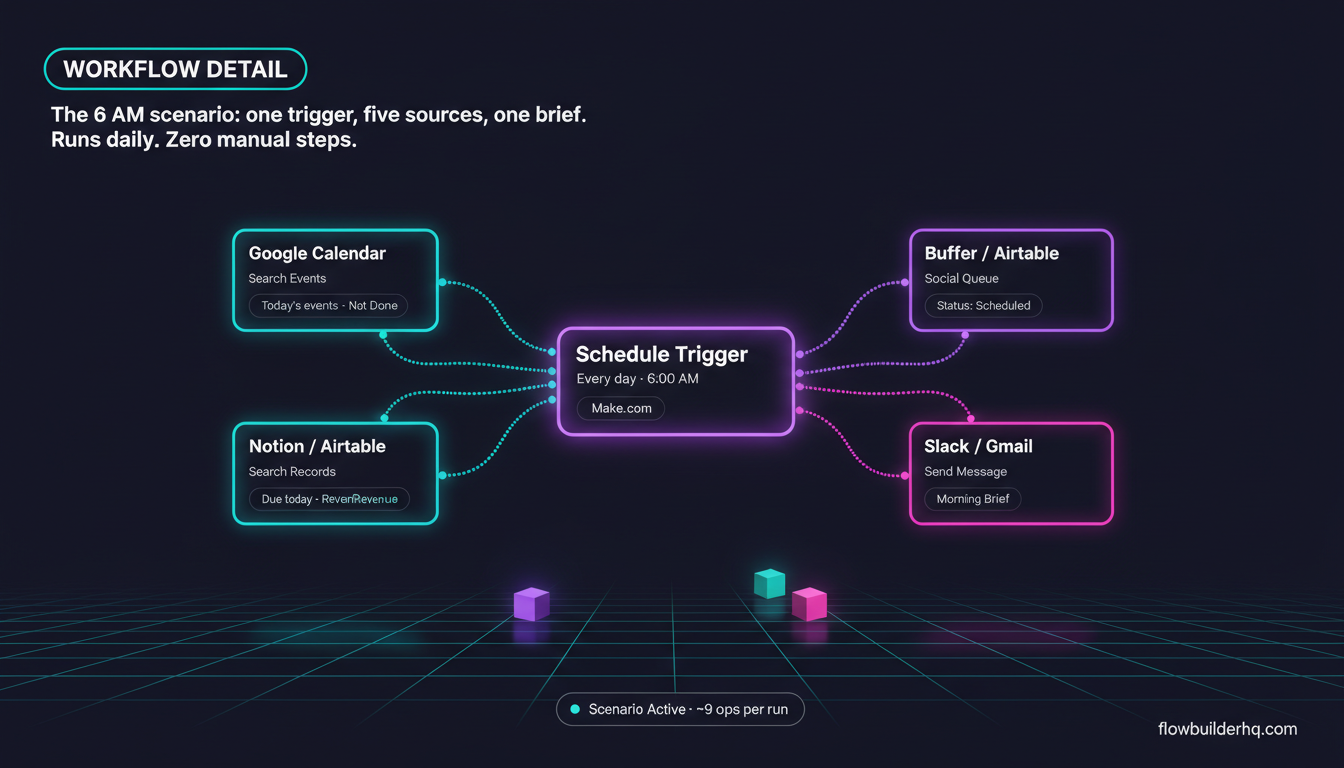
- Daily digest — Pulls your Google Calendar events for the day and formats them into a readable summary
- Task snapshot — Grabs open tasks from Notion or Airtable (your choice) filtered by today’s due date
- Revenue snapshot — Pulls the previous day’s revenue from a Google Sheet connected to your payment processor
- Social queue check — Reads a Buffer or Airtable content queue and tells you what’s scheduled to post today
- Delivery — Sends everything to Slack DM or email as a formatted daily brief
The scenario runs on a schedule. You don’t trigger it. It just runs. If you want a broader look at what else you can automate before this tutorial, the task automation ideas for solopreneurs post is a good reference for prioritizing what to tackle first.
What You Need Before You Start
- A Make.com account (free tier works for testing; Core at $9/mo handles production)
- Google Calendar connected to Make
- Notion or Airtable for tasks (this tutorial covers both paths)
- A Google Sheet with a revenue log (one row per transaction, date column required)
- Slack workspace OR a Gmail/email account for delivery
- Optional: Buffer account for social queue data
If you’ve never built a Make.com scenario before, spend 20 minutes with this beginner scenario tutorial first. The steps below assume you know how to add modules, map fields, and connect accounts.
How to Automate Your Solopreneur Morning Routine: The Build
Step 1: Set Up the Schedule Trigger
Create a new scenario in Make.com. Add a Schedule trigger as your first module. Set it to run daily at your preferred time — 5:30 AM or 6:00 AM works well so the brief is ready when you wake up.
Set the interval to “Every day” and pick your timezone. Make sure “Advanced scheduling” is off unless you want to exclude weekends (which is a valid choice — enable it and uncheck Saturday and Sunday).
This trigger produces no data itself. It just fires the rest of the scenario on time.
Step 2: Pull Today’s Calendar Events from Google Calendar
Add a Google Calendar → Search Events module. Connect your Google account. Configure it:
- Calendar ID: Select your primary calendar
- Time Min: Use
{{formatDate(now; "YYYY-MM-DD")}}T00:00:00Z - Time Max: Use
{{formatDate(now; "YYYY-MM-DD")}}T23:59:59Z - Max Results: 10 (adjust if you’re that person with 15 meetings a day)
- Order By: Start time
This returns an array of events. You’ll format them in a later step — for now, just confirm the module returns data by running a test with a day that has calendar events on it.
Step 3: Pull Due Tasks from Notion or Airtable
Notion path: Add a Notion → Search Objects module. Select your task database. Add a filter: Due Date → equals → {{formatDate(now; "YYYY-MM-DD")}}. Also filter by Status → does not equal → Done so completed tasks don’t clutter the brief.
Airtable path: Add an Airtable → Search Records module. Point it to your tasks base and table. Set the filter formula to: AND(IS_SAME({Due Date}, TODAY(), 'day'), {Status} != 'Done'). The Make.com Google Sheets integration tutorial has a good breakdown of how Make handles array data from flat-record tools like Airtable, which applies here too.
Run a test. If you get zero results, double-check your date field format in Notion/Airtable — Make expects ISO 8601 dates. If your Notion database stores dates without times, remove the time portion from the filter.
Common error here: Notion returns paginated results and Make’s Search Objects module only returns the first page (default 100 items). If you have more than 100 tasks due today, you have a different problem. For everyone else, 100 is fine.
Step 4: Pull Yesterday’s Revenue from Google Sheets
Your revenue log needs a consistent structure: one sheet, with at least a Date column (YYYY-MM-DD format) and an Amount column (numeric, no currency symbols).
Add a Google Sheets → Search Rows module. Select your spreadsheet and sheet. Set the filter to match the Date column against {{formatDate(addDays(now; -1); "YYYY-MM-DD")}} — that’s yesterday’s date.
Then add a Math → Aggregator or use Make’s built-in Array Aggregator followed by a Tools → Set Variable module to sum the Amount values. Map the Amount field from each matched row and use {{sum(map(arrayOfRows; "Amount"))}} in a Set Variable module. Name the variable yesterdayRevenue.
If you have zero rows (no revenue yesterday), the aggregator returns 0. That’s correct behavior — don’t add error handling for this unless you want a different message on zero-revenue days.
Step 5: Check Your Social Queue
There are two practical options here depending on your stack.
Option A — Airtable content calendar: Add another Airtable → Search Records module pointed at your content calendar table. Filter for records where Schedule Date equals today and Status equals Scheduled. This returns the posts queued for today. If you want to see how a content automation workflow fits alongside this, the content repurposing automation guide shows a complementary setup.
Option B — Buffer via HTTP module: Buffer doesn’t have a native Make module. Use an HTTP → Make a Request module. Set the URL to https://api.bufferapp.com/1/updates/pending.json with your Buffer access token as a query parameter. Parse the response with a JSON → Parse JSON module and filter updates where scheduled_at falls within today’s date range.
Option A is simpler and more reliable. Use it unless Buffer is already your source of truth.
Step 6: Format the Daily Brief
This is where the scenario earns its keep. Add a Tools → Set Multiple Variables module and build your message string. Here’s the structure to use:
📅 *Good morning. Here's your day.*

🗓 *Today's Calendar ({{formatDate(now; "ddd MMM D")}})*
{{join(map(calendarEvents; "summary"); "\n• ")}}

✅ *Tasks Due Today*
{{join(map(todayTasks; "title"); "\n• ")}}

💰 *Yesterday's Revenue*
${{yesterdayRevenue}}

📣 *Social Posts Scheduled Today*
{{join(map(socialQueue; "postTitle"); "\n• ")}}
Replace the map references with your actual field names from each module. If any section returns empty data, use Make’s ifempty() function to display a fallback — for example: {{ifempty(join(map(todayTasks; "title"); "\n• "); "No tasks due today.")}}
The Slack formatting uses standard Slack markdown (*bold*, line breaks). If you’re delivering to email instead, swap the asterisks for <strong> tags and use <br> for line breaks.
Step 7: Deliver to Slack or Email
Slack delivery: Add a Slack → Create a Message module. Connect your Slack workspace. Set Channel to your own Slack DM (find your member ID in Slack profile settings and paste it — format is U0XXXXXXXX). Paste your formatted message variable into the Text field. Enable “As User” to send it as yourself, not a bot.
Email delivery: Add a Gmail → Send an Email module (or any SMTP module). Set To as your own email. Subject: ☀️ Morning Brief — {{formatDate(now; "ddd MMM D")}}. Set the email body to your formatted message. Switch the content type to HTML if you’re using HTML formatting.
Run the full scenario end-to-end. Check Slack or your inbox. You’ll almost certainly need to tweak the message formatting on first run — the data comes back and the line breaks don’t behave the way you expect. That’s normal. Fix the join() delimiters and run again.
Step 8: Activate and Test for a Full Week
Turn the scenario on. Watch it run for 3-5 days before trusting it fully. Common issues that only show up in production:
- Weekends with no calendar events — the Calendar module returns an empty array and downstream
map()calls fail. Fix: add anifempty()wrapper or a Router module that handles the empty-array case. - Timezone mismatch — your Make account timezone differs from your Google Calendar timezone. Fix this in Make.com account settings under Profile → Time Zone. It must match the timezone your calendar events are created in.
- Notion filter returning nothing — Notion date filters are case-sensitive about property names. Check the exact name in your database (capital letters matter). The Make.com review has a good breakdown of how Make handles Notion pagination limits if you hit those.
Operations Cost on Make.com
This scenario runs once per day. Here’s the operation count per run:
- Schedule trigger: 1 op
- Google Calendar Search: 1 op
- Notion/Airtable Search: 1 op
- Google Sheets Search: 1 op
- Social queue pull: 1 op
- Aggregator + Variables: 2-3 ops
- Slack/Gmail send: 1 op
Total: ~9-10 ops per day. That’s roughly 300 ops per month. Make.com’s free tier gives you 1,000 ops/month, so this runs free. The Core plan at $9/mo gives you 10,000 ops if you’re building additional scenarios alongside this. See the full Make.com pricing breakdown if you’re calculating your total scenario budget.
Extending the Automation
Once the base brief is working, there are a few natural extensions worth considering:
Add an AI summary layer: Before the Slack/Gmail module, pipe your raw data through an OpenAI → Create Completion module and ask it to write a one-paragraph natural-language summary of your day. The prompt: “You are a business assistant. Here is today’s calendar, tasks, and revenue data. Write a 3-sentence morning briefing in a calm, clear tone.” This pairs well with the Claude AI business automation guide if you prefer Anthropic’s models for this step.
Add a metrics comparison: Pull revenue from the same day last week (use addDays(now; -8)) and show week-over-week in the brief. One extra Google Sheets module and a subtraction formula.
Add client follow-up reminders: If you use HubSpot CRM, add a HubSpot → Search Contacts module filtered by “Last contacted more than 7 days ago” and append those names to the brief. The Make.com to HubSpot integration guide covers the connection setup.
Automate the social queue itself: If you’re only checking the queue in your morning brief, you might as well automate the posting too. The social media posting automation tutorial walks through how to close that loop.
The Bigger Picture
The goal here isn’t to build a complicated workflow. It’s to eliminate the 20-30 minutes you spend every morning assembling a mental picture of your day from five different apps. That time adds up — and more importantly, the context-switching cost before your first real work session is higher than the time itself.
This is one of the most underrated categories of automation for solopreneurs — not client-facing automations, not revenue-critical workflows, just the quiet infrastructure that means you start every day already oriented. For a full walkthrough of building your first Make.com workflow if you haven’t done it yet, the beginner scenario guide is the right starting point before returning here.
Ready to build it? Start your Make.com free account here — the free tier is enough to run this scenario indefinitely. Check the Make.com scheduling documentation if you want to configure more complex run schedules like skipping weekends or running at different times per day.