How to Set Up a Sales Pipeline in HubSpot Free (Step-by-Step for Solopreneurs)
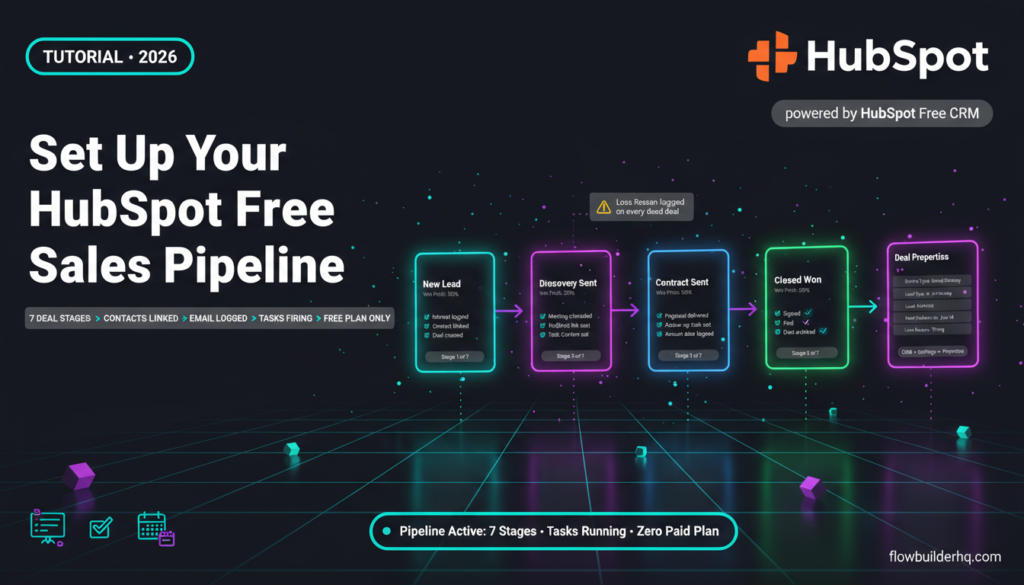
If you want to know how to set up a sales pipeline in HubSpot free, you’re in the right place. HubSpot’s free CRM gives you a fully functional pipeline with deal stages, contact records, and task management — no credit card required, no paid tier needed. The catch is knowing which settings actually matter and which ones to ignore when you’re running a one-person shop.
This tutorial walks through the complete setup: creating your pipeline, configuring deal stages that match how you actually sell, connecting contacts, and building a lightweight follow-up system — all inside the free plan. If you’re evaluating whether the free tier is enough before committing, check out HubSpot Free vs Paid for solopreneurs first, then come back here to build.
What HubSpot Free Actually Gives You
Before touching any settings, know what you’re working with. HubSpot’s free CRM includes:
- 1 sales pipeline with up to 7 deal stages
- Unlimited contacts, companies, and deals
- Deal board (Kanban view) and list view
- Contact timeline with activity logging
- Tasks and reminders
- 1 meeting scheduler link
- Basic email logging (via BCC or Gmail/Outlook integration)
- 1 shared inbox
What you don’t get on free: multiple pipelines, sequences (automated follow-up emails), sales analytics dashboards, or custom reporting. For most solopreneurs closing 5–20 deals per month, the free tier is more than workable. The limitation that bites hardest is the single pipeline — if you sell two totally different services, you’ll have to be creative with stage naming or upgrade.
For a broader look at how HubSpot stacks up against other options, the best CRM comparison for solopreneurs is worth reading before you commit to this tool long-term.
Step 1: Create Your HubSpot Account and Access the CRM
Go to HubSpot’s homepage and sign up for a free account. Use your business email — this matters later when you connect Gmail or Outlook for email logging.
Once inside, skip the onboarding wizard for now. Navigate directly to CRM → Deals in the left sidebar. This is where your pipeline lives. If you don’t see the CRM menu, click the grid icon (top left) and select CRM from the app switcher.
You’ll land on the deals board, which shows HubSpot’s default pipeline with generic stages: Appointment Scheduled, Qualified to Buy, Presentation Scheduled, Decision Maker Bought-In, Contract Sent, Closed Won, Closed Lost. These are built for a B2B enterprise sales motion. You’ll want to replace most of them.
Step 2: Edit Your Pipeline Stages
Click the gear icon (top right of the deals board) → Edit Pipeline. This takes you to the pipeline editor under Settings.
You’ll see the default stages listed with win probability percentages next to each. These percentages feed into HubSpot’s deal forecasting — not critical on the free plan, but it’s good practice to set them accurately.
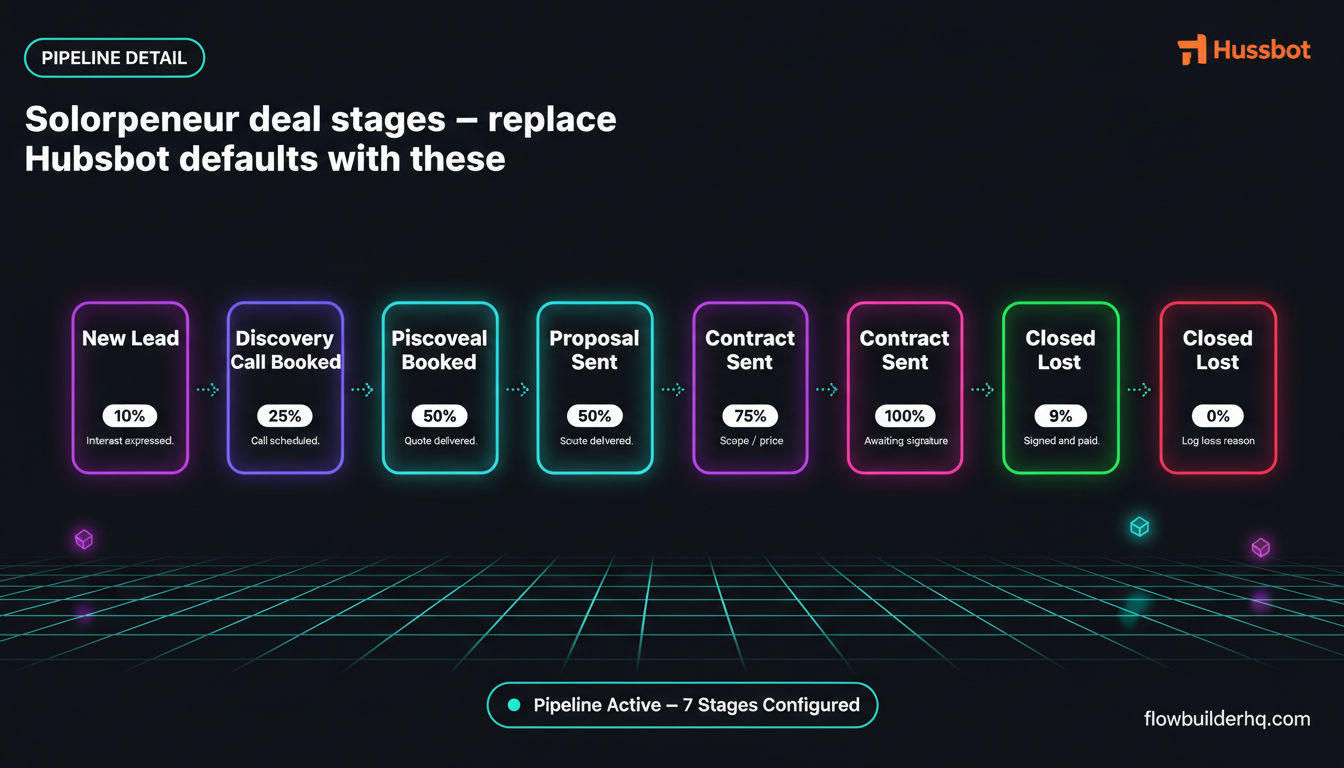
Here’s a practical pipeline structure for a service-based solopreneur:
| Stage Name | Suggested Win Probability | What Happens Here |
|---|---|---|
| New Lead | 10% | Contact expressed interest, nothing confirmed |
| Discovery Call Booked | 25% | Call scheduled, not yet completed |
| Proposal Sent | 50% | Proposal or quote delivered |
| Negotiation | 75% | Active back-and-forth on scope/price |
| Contract Sent | 90% | Agreement delivered, awaiting signature |
| Closed Won | 100% | Signed and paid |
| Closed Lost | 0% | Dead deal — always log a loss reason |
To edit: hover over a stage name and click the pencil icon. To delete a stage: click the X. To reorder: drag. Save when done.
One error to expect here: HubSpot won’t let you delete a stage if it currently has deals assigned to it. If you inherited a default pipeline with existing test deals, move them to another stage first, then delete. The error message just says “Cannot delete stage with associated records” — move the records first, then come back to delete.
Step 3: Set Up Deal Properties That Matter
By default, a deal record shows: Deal Name, Amount, Close Date, Pipeline, Deal Stage, and Owner. For a solopreneur, you want a few more fields without drowning in data entry.
Go to Settings → Properties → Deal Properties. Click Create property. Useful additions:
- Service Type (Dropdown) — lists the services you sell. Helps filter deals later.
- Lead Source (Dropdown) — Referral, Website, LinkedIn, Cold Outreach, etc.
- Next Follow-Up Date (Date) — since free doesn’t have sequences, this is your manual trigger.
- Loss Reason (Dropdown) — Price, Timing, Went with Competitor, No Decision. Fill this on every lost deal. Even a month of this data is useful.
Don’t add more than 5–6 custom properties. If you’re manually updating deals every time, complexity kills consistency.
If you want to see how HubSpot CRM compares to a simpler tool before committing to this structure, HubSpot vs Notion for contact management breaks down the tradeoffs clearly.
Step 4: Create Your First Deal and Link It to a Contact
Back on the deals board, click Create deal (top right). Fill in:
- Deal Name: Use a consistent naming convention. “First Last — Service Type” works well. E.g., “Sarah Chen — Brand Strategy.” Avoid vague names like “New Opportunity.”
- Deal Stage: Set to wherever this deal actually is right now.
- Amount: Your best estimate. Doesn’t have to be exact.
- Close Date: When you expect to close — even a rough month. This affects pipeline value calculations.
- Associated Contact: Search for an existing contact or create new. Always link a deal to a contact. Unlinked deals become orphaned records that pollute your view.
Once the deal is saved, open the deal record. You’ll see the activity timeline on the left and the deal properties panel on the right. This is where you log calls, add notes, and set tasks.
Step 5: Import Your Existing Contacts
If you have existing leads in a spreadsheet, email list, or another tool, import them now before you’re weeks in and the pipeline is already messy.
Go to Contacts → Import → Start an import → File from computer. HubSpot accepts CSV files. Required columns: First Name, Last Name, Email. Optional but useful: Company, Phone, Lead Source.
Download HubSpot’s import template first — it shows the exact column headers to use. If your CSV has a column called “Email Address” instead of “Email,” HubSpot will ask you to manually map it. That mapping step is one place where imports slow down.
Common error: Duplicate records. If you import the same email twice, HubSpot merges them automatically — but it won’t warn you mid-import. Run a deduplication check on your spreadsheet before uploading. Sort by email column and look for duplicates manually, or use a spreadsheet formula to flag them.
After import, create deals for your active prospects manually. Don’t create deals for cold contacts just to bulk up the pipeline — it creates noise.
Step 6: Connect Your Email for Activity Logging
HubSpot’s free email integration logs sent emails automatically to the relevant contact timeline. This is one of the most valuable free features — your deal records stay current without manual note entry.
Go to Settings → Integrations → Email Integrations. Connect Gmail or Outlook. Once connected, install the HubSpot Sales Chrome extension if you use Gmail in a browser. This adds a HubSpot panel inside Gmail so you can log emails, see contact records, and set follow-up tasks without leaving your inbox.
Alternatively, use the BCC logging address (found in Settings → General → Email) to log individual emails manually by copying HubSpot’s BCC address when you send.
The Chrome extension route is cleaner. Once set up, every email you send from Gmail to a contact in your CRM logs automatically. No extra steps.
Step 7: Build a Simple Follow-Up System Without Sequences
HubSpot’s email sequences (automated multi-step follow-up) are locked behind paid plans. On free, you do this manually — but you can build a consistent system using tasks.
Every time you move a deal forward in the pipeline, create a follow-up task on that deal record. Click Create task inside the deal. Set:
- Task Type: Email, Call, or To-Do
- Due Date: Specific date, not “sometime next week”
- Reminder: Turn on email notification
- Notes: What exactly you’re following up about
Then, check your task queue daily: CRM → Tasks. This view shows everything due today across all deals. Work through it before opening email. This is the free-plan substitute for sequences — it requires discipline but it works.
If you want to automate the follow-up piece without upgrading HubSpot, connecting HubSpot to an automation tool is possible on the free plan. See how to connect Make.com to HubSpot for the full integration setup.
Step 8: Use the Deals Board for Your Weekly Pipeline Review
Set a weekly recurring calendar block — 20 minutes, same time every week — to review your deals board. During this review:
- Check every deal in Proposal Sent or later — if it’s been sitting there more than 7 days with no activity, it needs a task.
- Move any deals that progressed forward since last week.
- Close out any dead deals to Closed Lost with a loss reason. Don’t leave stale deals in active stages — they distort your view of real pipeline value.
- Create deals for any new leads that came in this week.
The board view shows deal value in each stage column. As you do this weekly, you’ll develop a gut feel for what a healthy pipeline looks like for your business specifically.
For solopreneurs using HubSpot as part of a broader client workflow, client onboarding automation can pick up right after a deal hits Closed Won — handling the intake and kickoff steps automatically.
Step 9: Log Your Meeting Link and Book Discovery Calls Directly
HubSpot free includes one meeting scheduler. Set it up under Sales → Meetings. Connect your Google or Outlook calendar, set your availability, and you get a public booking link you can share in emails or put on your website.
When a prospect books through that link, HubSpot automatically creates a contact record (if one doesn’t exist) and logs the meeting on their timeline. If you’ve already created a deal for that prospect, go to the contact record and manually associate the meeting to the deal.
This is a small but useful piece of the free plan that many solopreneurs miss. You’re not paying for Calendly if HubSpot’s scheduler covers your basic booking needs.
When to Upgrade (and When Not To)
The free plan starts showing real cracks when:
- You need more than one pipeline (e.g., separate pipelines for consulting retainers vs. one-time projects)
- You want sequences — automated follow-up emails based on deal stage or inactivity
- You need reporting beyond what you can see on the board (conversion rates by stage, average deal length, etc.)
- Your team grows past 1–2 people and you need permission controls
HubSpot Starter is $15/month and unlocks two pipelines, calling features, and removes HubSpot branding from your meeting links. Professional is $890/month and is genuinely not for solopreneurs. The gap between Starter and Professional is steep — read the full HubSpot Free vs Paid breakdown before making that call.
If you decide HubSpot isn’t the right fit, ActiveCampaign vs MailerLite covers two strong alternatives with better email automation at lower price points. ActiveCampaign starts at $15/month and includes deal pipeline features alongside its email automation — a different tradeoff worth knowing about. See the ActiveCampaign review for a full breakdown of whether that fits your workflow.
For a detailed comparison of how all three options stack up together, the MailerLite vs ActiveCampaign vs HubSpot comparison lays out the real differences for solo operators.
How to Set Up a Sales Pipeline in HubSpot Free: Quick Reference
Here’s the full setup condensed:
- Sign up at hubspot.com with your business email
- Go to CRM → Deals → Edit Pipeline and replace default stages
- Add 4–6 custom deal properties (Service Type, Lead Source, Loss Reason at minimum)
- Import existing contacts via CSV
- Create deals manually for active prospects and link them to contacts
- Connect Gmail or Outlook for automatic email logging
- Use tasks for follow-ups — check the task queue daily
- Do a 20-minute weekly pipeline review on the deals board
- Set up your meeting scheduler link and use it
The setup takes about 90 minutes end to end. The discipline of using it consistently is the harder part — but that’s true of any CRM, not just HubSpot.
If your business is at the stage where managing contacts and deals manually still works, this free setup handles it cleanly. When volume increases and manual follow-up becomes the bottleneck, that’s the right time to look at automation layers or a paid upgrade — not before. For the full picture on HubSpot’s capabilities as a CRM for solo operators, the HubSpot CRM tutorial for solopreneurs goes deeper on contact management and customization beyond pipeline setup.
Ready to get your pipeline running? Create your free HubSpot account and follow the steps above. It’s free to start and stays free as long as you need it.
Building this yourself? Get the workflow pack.
5 ready-to-import n8n workflows — lead capture, invoicing, content repurposing, onboarding, social posting. Free.